MX/MZX
17A-04-S
17 10/09
PAGE 34 of 40
3.14.3 DELETE POINT
Remove the device(s) to be deleted from the addressable
loop, when a fault has been generated, ‘Accept’ the fault(s).
Press 3 from the Configuration menu. The following
screen will be displayed:
Select the Loop and Point to be deleted, then press
‘F5’. The following screen will be displayed:
Select ‘No’ to return to the previous screen.
Press ‘Yes’ to delete the configuration, the message ‘Please
wait...’ will be displayed then:
Press ‘9’ to complete the configuration or ‘3’ to delete
another point.
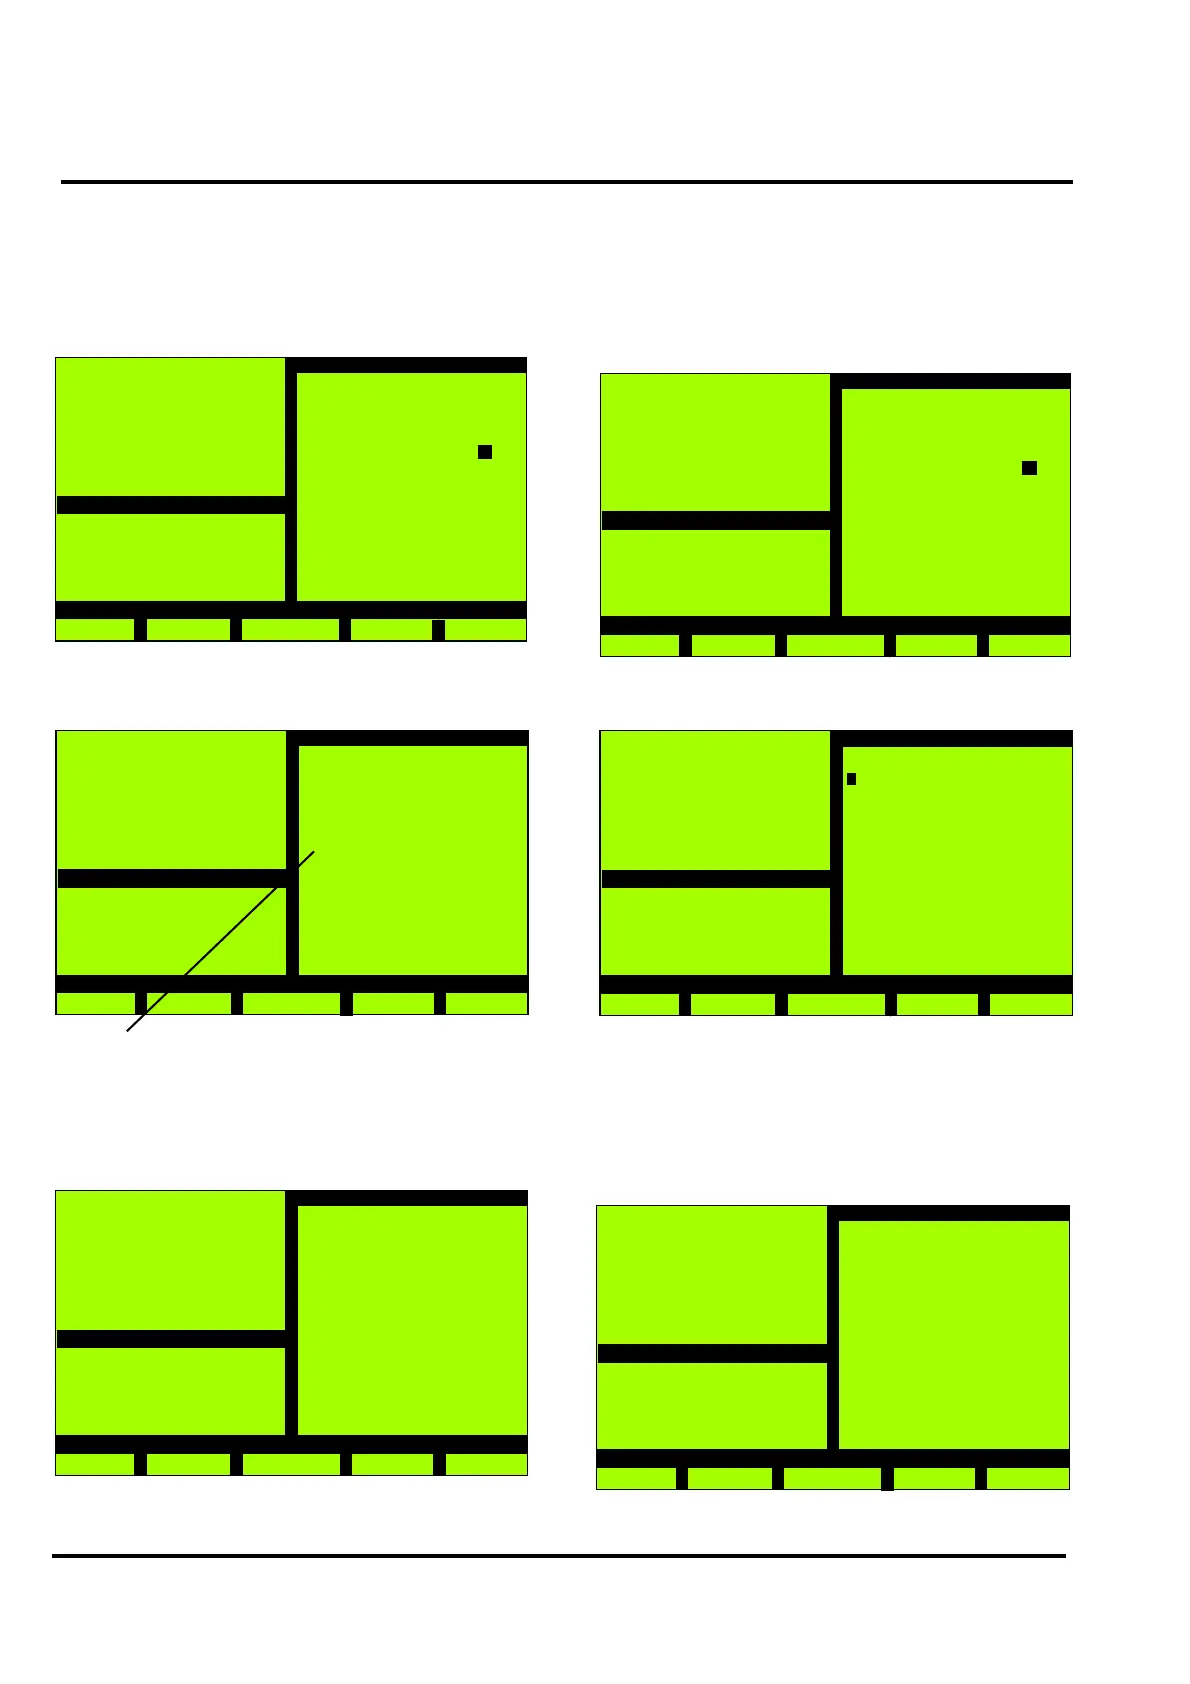
MX Panel
Wed, 01-Mar-00
14:15
Company Name
General
Back
Point delete
>>
-
+
Enter
Loop A
Point 001
Zone 001 -001 B
Photo Sensor Device
Device Type / Use:
811 PH
--
Loop : B
Phys. Address: 001
Zone : 01
Delete from Config?
MX Panel
Wed, 01-Mar-00
14:15
Company Name
General
Back
Point delete
Yes
No
THE ‘--’ INDICATES THE END OF THE LIST HAS BEEN REACHED
PRESSING ‘+’ WILL MOVE TO THE BEGINNING OF THE LIST
MX Panel
Wed, 01-Mar-00
14:15
Company Name
General
Back
Configuration
2 - Insert Point
3 - Delete Point
4 - Modify Point
7 - Autoconfig.
9 - Restart
3.14.4 MODIFY POINT
Remove the device(s) to be modified and replace with the
new device(s). When faults have been generated, ‘Accept’
the fault(s)
Press 4 from the Configuration menu. The following
screen will be displayed:
Select the Loop and Point to be inserted, then press
‘F5’. The following type of screen will be displayed:
Use the ‘>>’ key to move between the options, when the
cursor is moved to the next option, key 3 changes to ‘-’ and
key 4 changes to ‘+’. Use the ‘+’ and ‘-’ keys to select the
type of point, loop, physical address and zone number.
When finished, press ‘Enter’, the message ‘Please wait...’
will be displayed then:
Press ‘9’ to complete the configuration or ‘4’ to modify
another point.
MX Panel
Wed, 01-Mar-00
14:15
Company Name
General
Back
Point modify
>>
-
+
Enter
Loop A
Point 001
Zone 001 -001 B
Device Type / Use:
811 H
811H - Heat
Loop : B
Phys. Address: 001
Zone : 01
MX Panel
Wed, 01-Mar-00
14:15
Company Name
General
Back
Point modify
Enter
>>
<- ->
MX Panel
Wed, 01-Mar-00
14:15
Company Name
General
Back
Configuration
2 - Insert Point
3 - Delete Point
4 - Modify Point
7 - Autoconfig.
9 - Restart