MX/MZX
17A-04-S
17 10/09
PAGE 36 of 40
Pressing F3 (Scan from step c) will display the following
type of screen:
e)
The ‘stars’ denote devices that will be configured.
Pressing F2 (>>) will display further point screens.
Pressing F5 (Enter from step b) will display the following
type of screen:
f)
When the ‘Loop Scan’ has been completed, the following
type of screen will be displayed:
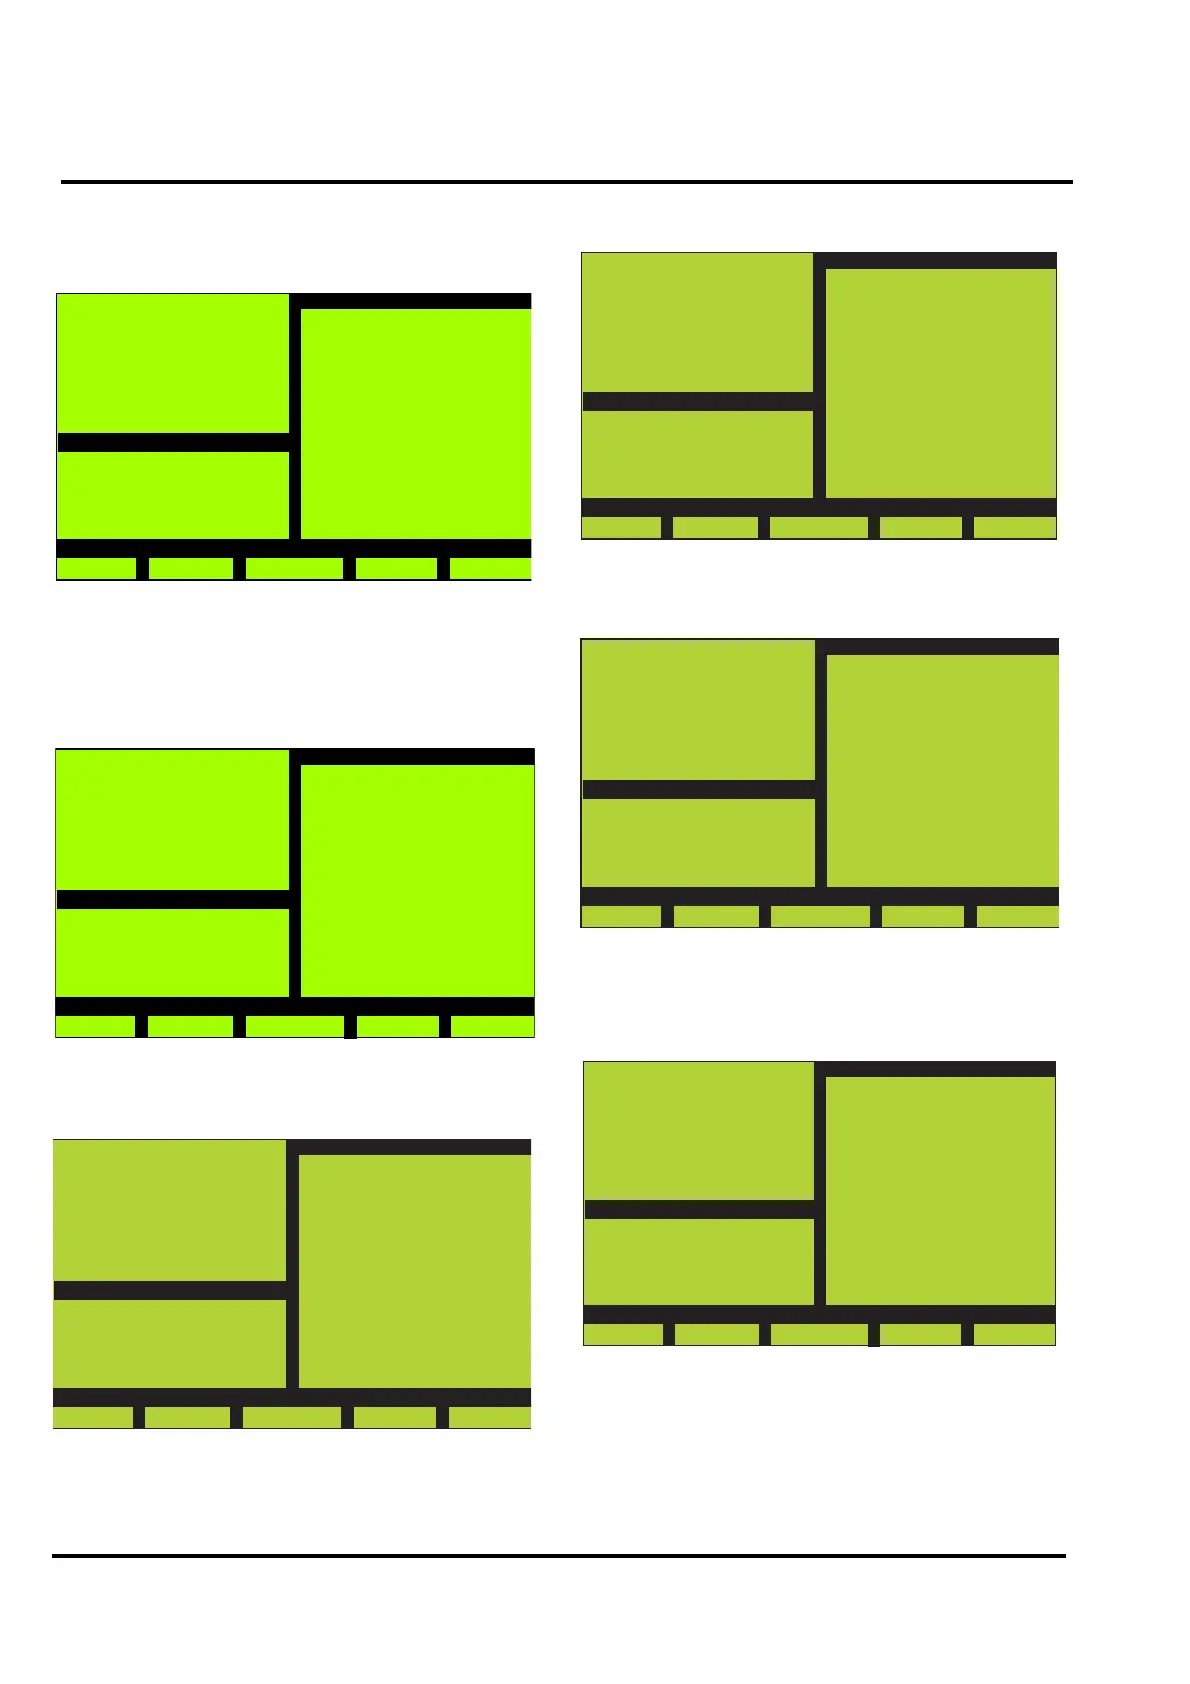
MX Panel
Wed, 01-Jan-00
14:15
Company Name
General
Back
Loop Point Counters
>>
Left / Right Scan
Loop : A
Point 0123456789
0 : ......*...
10 : ..........
20 : .*........
30 : ...*......
40 : ..........
50 : ..........
60 : ..........
70 : ..........
80 : ..*.......
90 : .*....*...
Please wait...
MX Panel
Wed, 01-Jan-00
14:15
Company Name
General
Abort
LoopScan
MX Panel
Wed, 01-Mar-00
14:15
Company Name
General
Result
no errors
015 points added
000 points unchanged
000 pnt. with error
Abort
Details
Save
Pressing F2 (Details) will display the following screen:
g)
Pressing ‘1’ from the alpha numeric keypad will display the
following type of screen:
h)
‘<<‘, ‘>>’ and ‘>>|’ navigate through the points.
Pressing F5 (Save) from step f) will display the following type
of screen:
i)
Pressing F4 (Yes) will save the configuration. When the save
is complete, the controller will re-initialise.
If errors are detected, the following type of screen will be
displayed:
MX Panel
Wed, 01-Mar-00
14:15
Company Name
General
Result
View details of
1 - Added point
Flt P 015
Back
MX Panel
Wed, 01-Mar-00
14:15
Company Name
General
Result
Added Points
Panel : 01
Loop : A
Zone : 001
Point : 006
Mode : 2
Device Type
RIM800
001/015
Back
<< >>
>>|
MX Panel
Wed, 01-Mar-00
14:15
Company Name
General
Result
no errors
015 points added
000 points unchanged
000 pnt. with error
Save data?
No
Yes