166
3. Screw bolt 3 until it touches piston tail 17 (see Fig. 9.24) of
the valve.
4. Tighten bolt 3 (see Fig. 9.25) for 2/3 turns (14 edges of the
bolt head).
5. Tighten the locknut.
6. Check the stroke of the valve piston (see above).
7. Check adjustment correctness in motion of the motor vehicle.
While going on a straight level road with dry surface, brake the
motor vehicle until wheels block. If the valve is in order and drive
adjustment is done correctly, the front wheels should be blocked
slightly earlier than the rear ones. If the rear wheels are blocked
earlier, unscrew bolt 3 for 1-2 edges of the bolt head and check
the brakes in motion again.
Change the uid regularly for proper work of the brakes: drain
old uid via the bypass valves of wheel cylinders and proportion-
ing valve, and then replace it with a new one.
Fill the brake system as follows:
WARNING! Filling the brake system of ABS-equipped motor
vehicles is necessarily carried out at a service station as it requires
additional diagnostic equipment.
1. Check all couplings of the brakes hydraulic drive for leak-
ages and the exible rubber pipes and hoses.
2. Clean the bypass valves and the safety caps of wheel cylin-
ders, crankcases and proportioning valve from dust and dirt.
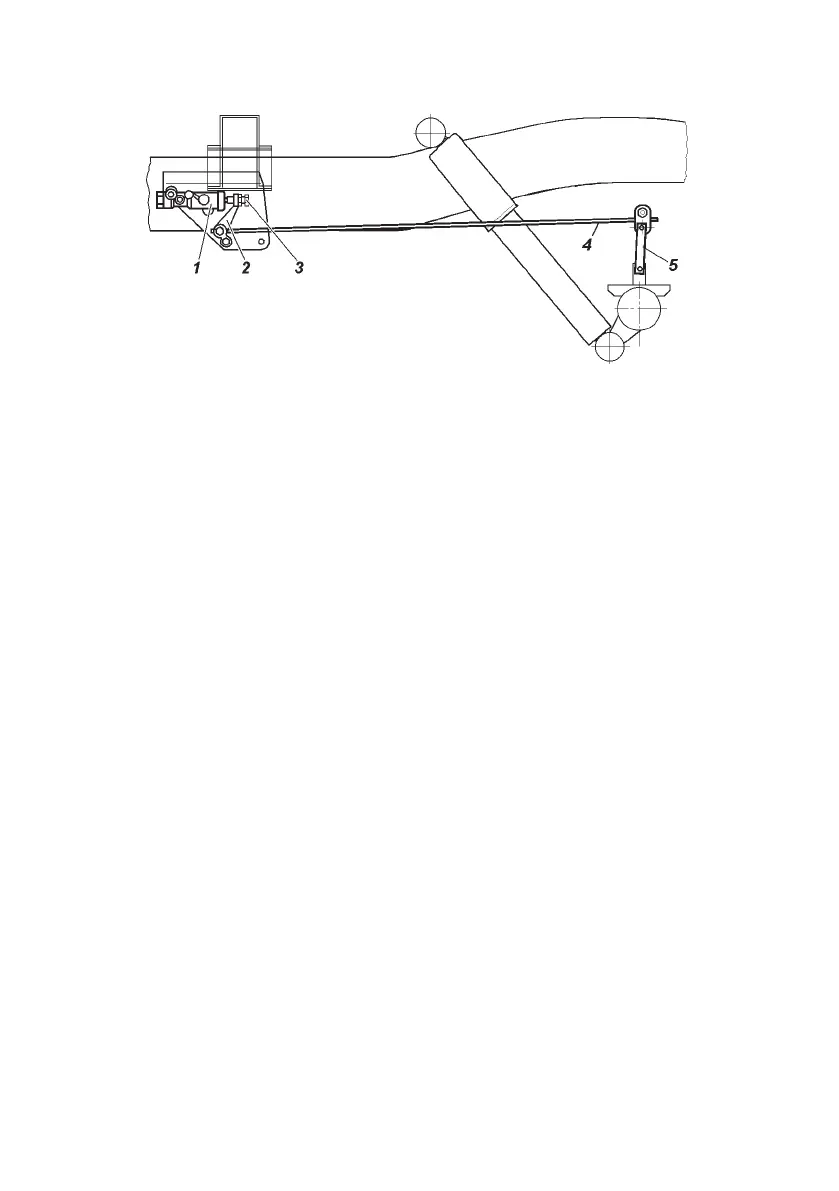
Fig. 9.25. Proportioning valve drive:
1 — proportioning valve; 2 — drive lever; 3 — adjusting bolt;
4 — exible arm; 5 — arm pillar.