13
UltiMaker S8 Installation and user manual
3.3 Included components
The UltiMaker S8 is shipped with several accessories, tools, and consumables:
Accessories
1. Print core CC+0.4
*1
2. Print core AA+0.4
*1
3. Flexible build plate
*2
4. Spool holder
with material guide
*3
5. Anti-slip rubber feet (4x)
*3
6. Power cable
7. Ethernet cable
8. USB stick
9. Air Manager filter
Tools & maintenance
10. Nozzle cover (3x)
11. Oil
12. Grease
13. Hex screwdriver 2 mm
14. XY calibration sheet
Materials
15. Spool PET-CF 750g
16. Spool TPU 95A 700g
Documentation
17. Quick start guide
18. Safety and warranty information
19. Flexible build plate
maintenance instructions
20. Digital Factory
leaflet with free trial
21. Composite materials leaflet
*1
The print cores are already installed in the print head.
*2
The flexible build plate is already installed on the build platform.
*3
The spool holder and anti-slip feet are not required in combination with the Material Station.
3.4 Installation
After unboxing, complete the hardware setup by installing several of the hardware accessories before powering on
the printer for the first time. The installation steps are different if the printer will be used in combination with the
Material Station. Select your configuration and follow the steps below.
Tip: The print cores and flexible build plate are already installed on the printer.
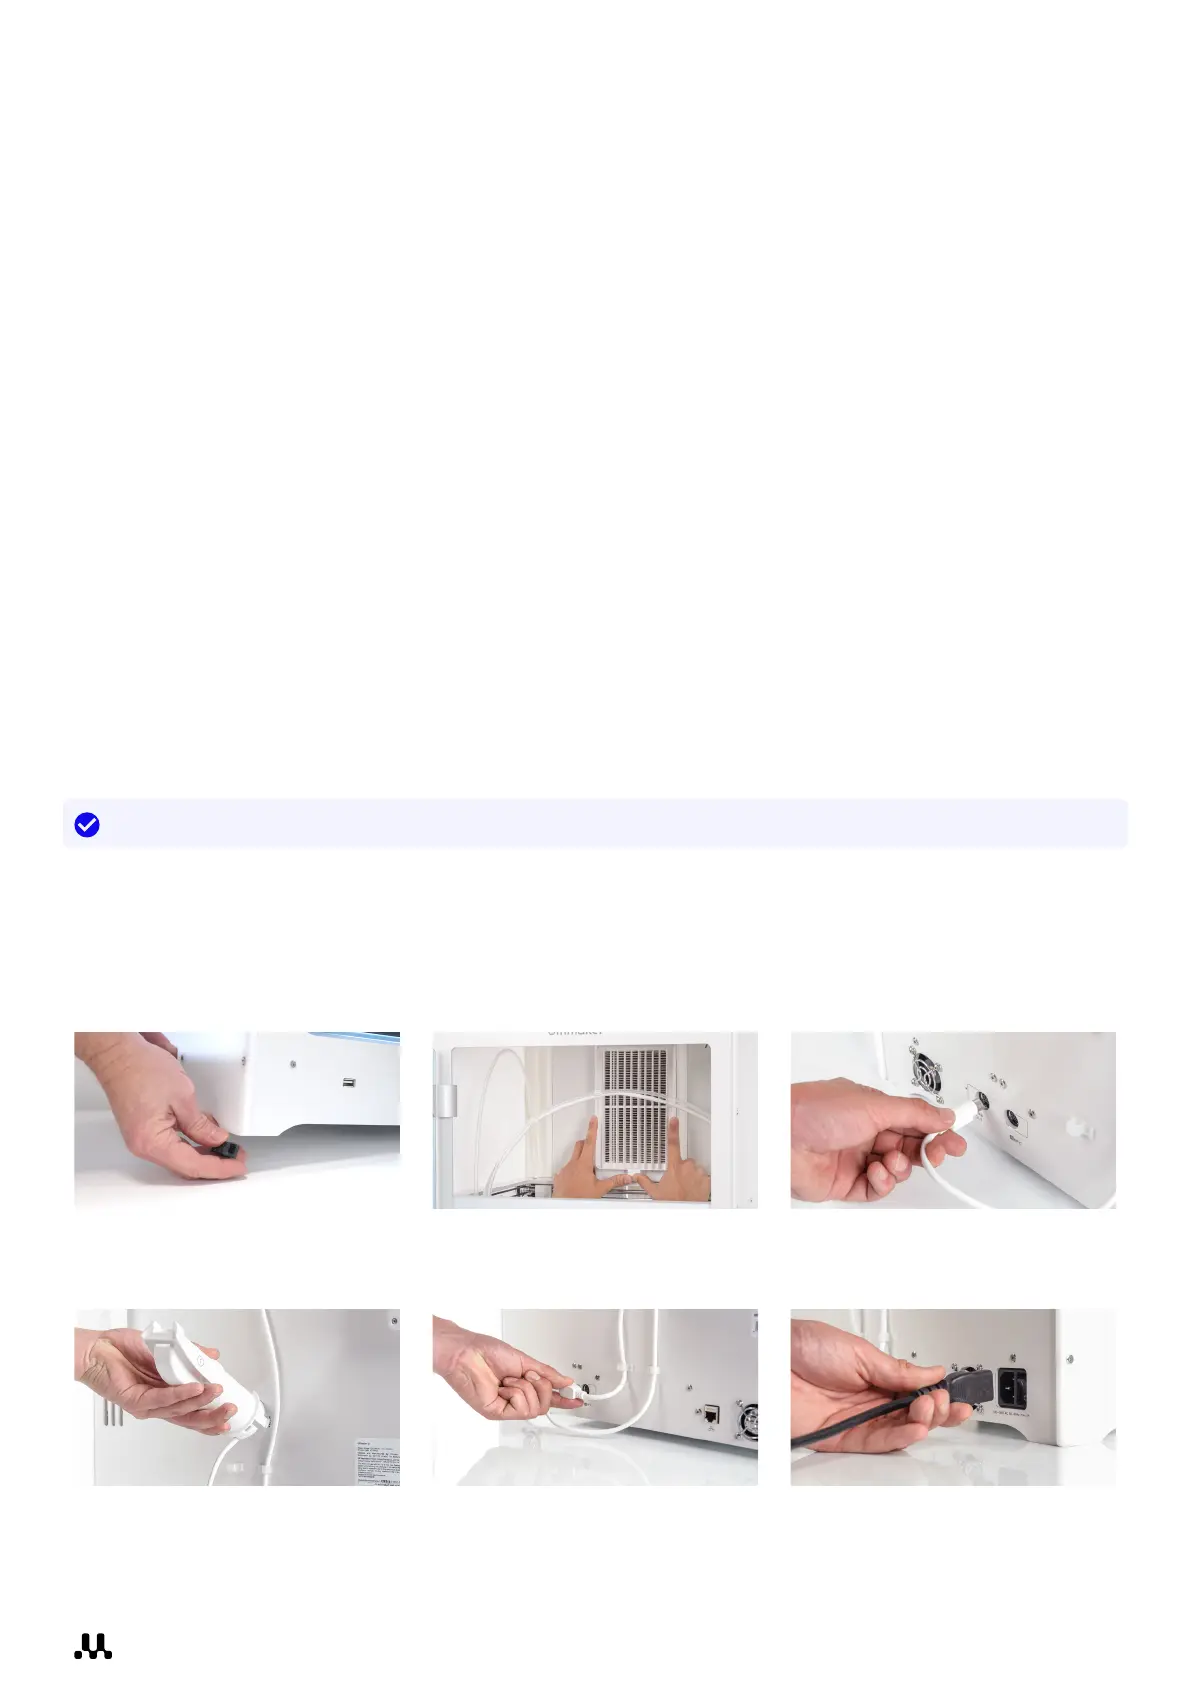
Setup without Material Station
Take the following steps to install the UltiMaker S8 without the Material Station. You will need the anti-slip feet, Air
Manager filter, spool holder, and power cable. If necessary, move the printer to its final installation surface. Always
lift and move the UltiMaker S8 with at least two people.
1. Carefully tilt the printer and
place the anti-slip feet around
the bottom of the frame panels.
2. Open the door, align the Air
Manager filter with the housing,
and gently push it into place.
3. At the back of the printer,
connect the Air Manager cable
to the UMB OUT port.
4. Insert the spool holder into
the back panel and push until
it snaps into place.
5. Connect the spool holder cable
to the NFC socket and secure it
behind the cable clips.
6. Connect the power cable
to the printer and the other
end to a power outlet.