17
UltiMaker S8 Installation and user manual
4.4 Preparing a print
Use UltiMaker Cura, UltiMaker’s powerful and user-friendly desktop slicing application, to prepare your print jobs.
UltiMaker Cura is free to download and use. Prepare your 3D model for print in minutes with recommended settings;
simply choose speed and quality settings, and you can start printing.
Add your printer
After installing the software, complete the first-run experience. If you sign in to your UltiMaker Account, you can add
any printers already connected to your Digital Factory workspace. If your UltiMaker S8 is not connected yet, set it up
via the Digital Factory option on the printer.
Tip: Create a new UltiMaker Account if you don’t have an UltiMaker Digital Factory workspace yet.
When your printer is not connected to a network, you can also add it manually from the list of
non-networked printers.
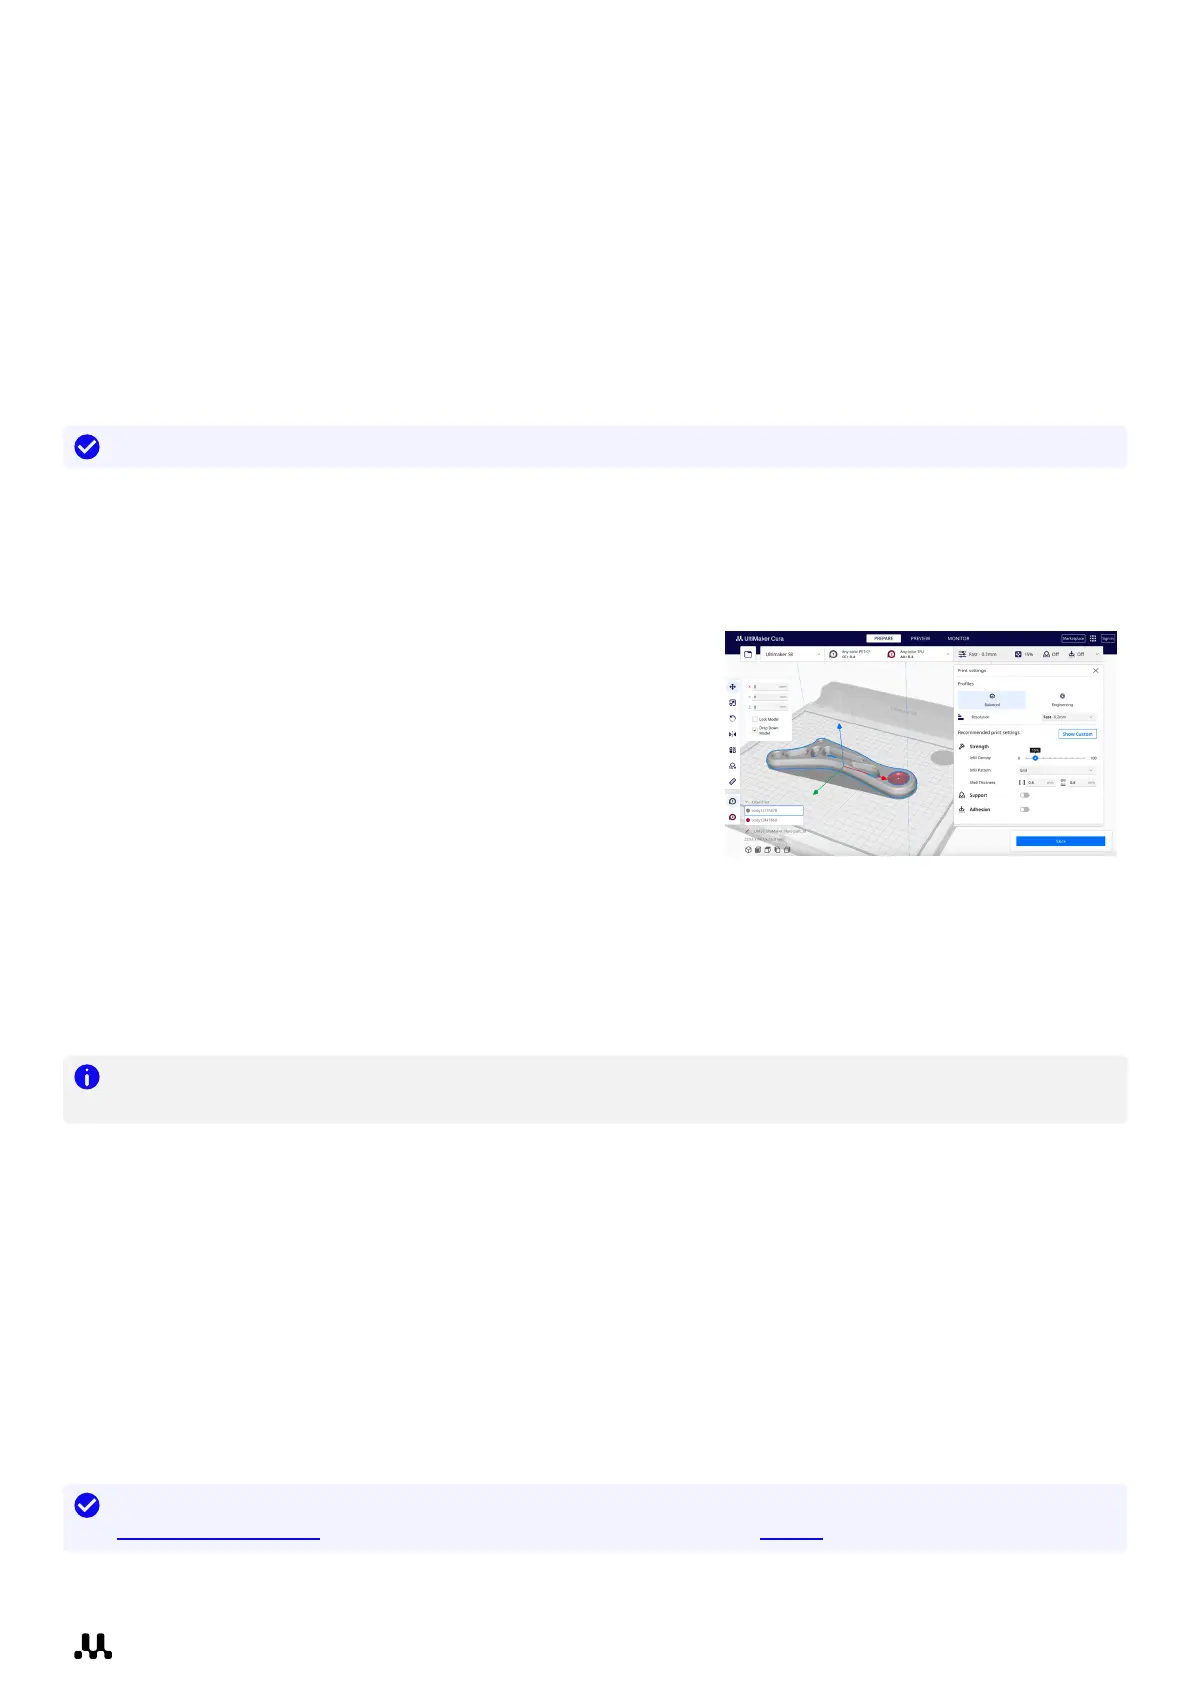
Prepare
Take the following steps to prepare your model(s) for 3D printing:
1. Load the 3D model(s) by clicking the ‘open file’ folder icon.
2. In the configuration panel, select your print cores and materials.
3. Use the adjustment tools on the left side to position, scale, and
rotate the model as desired.
4. Select your intent profile, resolution, and desired settings in the
print settings panel on the right side.
5. Press the “Slice” button in the action panel.
Preview
The preview stage allows you to see exactly how your model will be printed. Use the different color schemes to get
various information about your model. You can view the different line types, differentiate infill from skin, or use the
X-Ray view to detect gaps within your model.
Note: Previewing the model can be skipped, but is highly recommended to validate your print strategy and
prevent problems before starting the print.
Start the print
When slicing is complete, you can start the print via the action panel. There are several ways to start or save your
print file. Press the arrow icon next to the ‘Print’ button to see all options:
• Print via cloud: Send your print job via cloud directly to the printer or the printer’s queue if the printer is
connected to the Digital Factory.
• Print over network: Send the print job to the printer via local network if the printer is connected via LAN.
• Save to Library: If the printer is connected to Digital Factory, but you want to save it for later or share it with
team members, save the print file to a Digital Library project.
• Save to USB: For offline workflows, you can save the file to a USB drive for printing with offline printers.
• Save to Disk: Store the print file on your computer if you want to save it for later.
Tip: Learn more about UltiMaker Cura, including the interface options and all available settings, at
support.ultimaker.com. Release notes for new versions can be found on GitHub.