6.Hardware installation
This section describes how to install the IMMImodule hardware. For information on configuring the
IMMImodule software, see 7.Software installationon page15.
6.1. Required items
You need the following items to install the IMMI module:
•
One M6 nut
•
One M6 washer
•
A TX20 Torx screwdriver
•
A box cutter with a 2.5cm (max) blade
•
Cutting nippers
6.2. Installing the IMMI module
To install the IMMI module
1. Power down the control box and disconnect the mains cable from the power source.
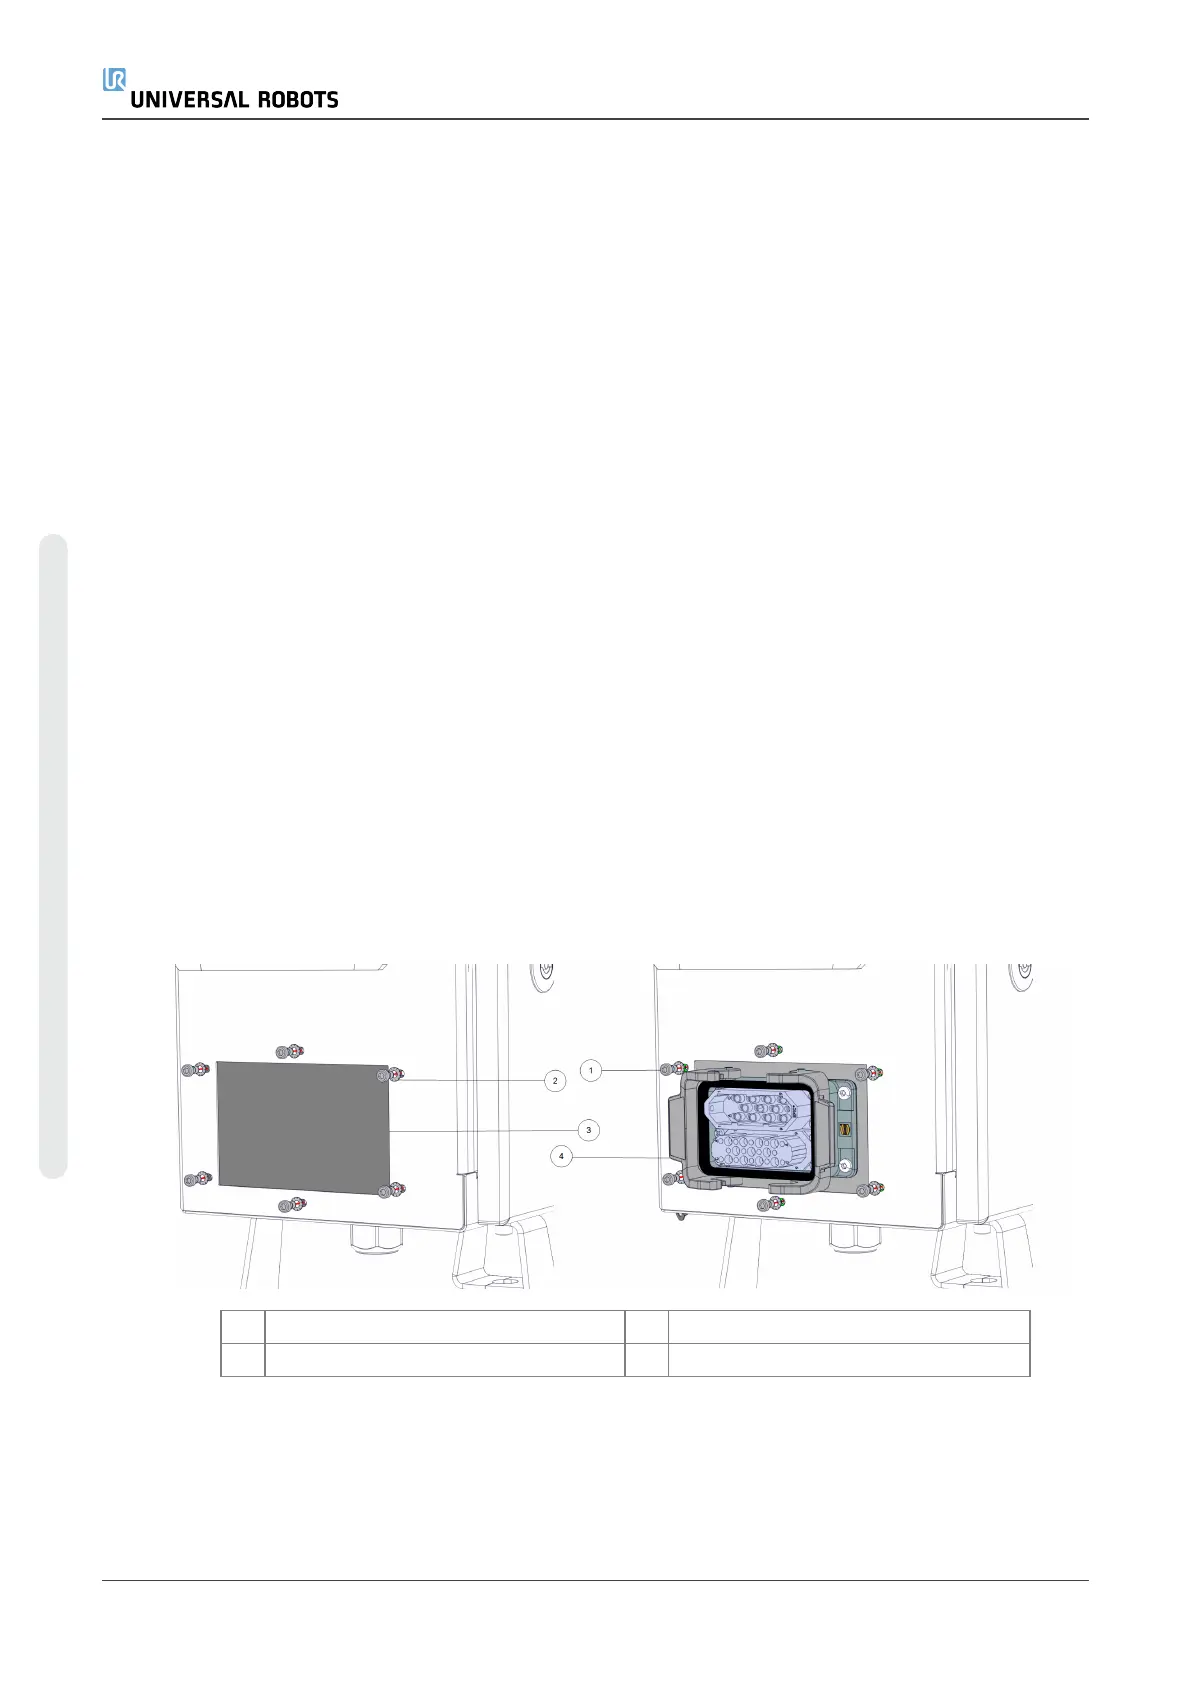
2. Remove the plate cover on the side of the control box.
Keep the screws and the tooth lock washers to continue installing the hardware.
1 screw 2 tooth lock washer
3 removed plate 4 IMMI module
e-Series Injection Molding Machine
Interface (IMMI)
12 Installation Guide
6.Hardware installation
Copyright © 2019–2021 by UniversalRobotsA/S. All rights reserved.
 Loading...