OTDR Series e-Manual, D07-00-076P-RevC00 Page 60 of 107
To access and set up the internal OPM:
1. Check the test ports to ensure that the Optical Power Meter option is installed on the test
unit.
2. Power on the unit. Test App 1 – Test Mode Selection is loaded by default. Select Fiber
testing, and then press OK.
3. Press Optical Power Meter on the main menu. The OPM screen appears with the Caution
warning.
See 6.11.2 Using the built-in OPM for information on using the built-in OPM.
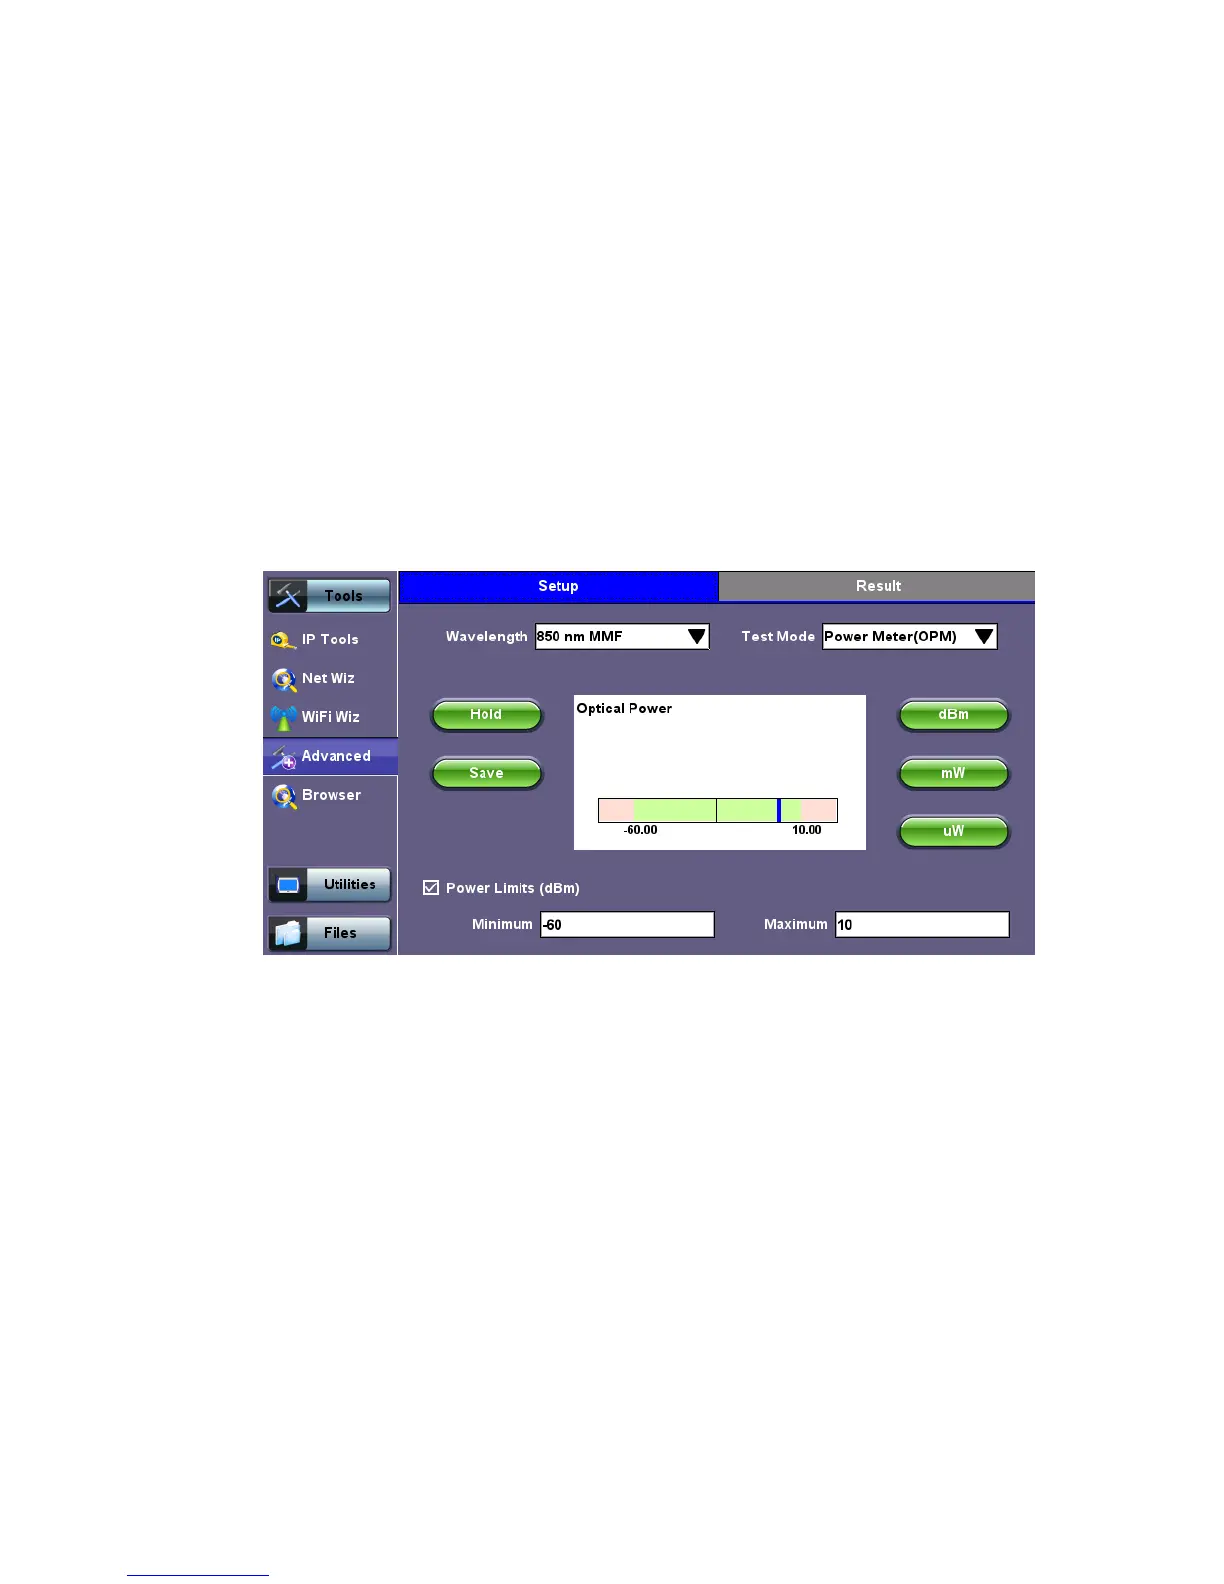
6.11.1.1 USB OPM Setup Options
Use the following options to configure the OPM:
• Wavelength: Provides a list of calibrated wavelengths to match the signal being
measured.
• Test Mode: Select between Power or Loss measurements.
• Power Meter (OPM): In Power Meter mode, the test set presents the direct power
readings, which are displayed in dBm, mW or uW units. You can perform unit
conversions by using the dBm, mW or uW buttons.
• Loss Meter: In Loss Meter mode, the test set reports the difference in power
readings between the Laser Source (LS) output being used and what is currently
present at the connector after being attenuated by the fiber. The results are
presented in dB.
Loss meter must be referenced (calibrated) to the Laser Source output.