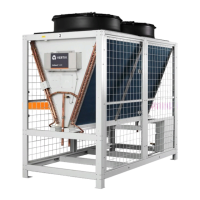
High Velocity Water or Compressed Air
High velocity water from a pressure washer or compressed air should only be used at a very low pressure, (< 100 psi), to
prevent fin and/or coil damages. The force of the water or air jet may bend the fin edges and increase air side pressure drop.
Reduced unit performance or nuisance unit shutdowns may occur.
11.3.2 Detailed Instructions
Scope
The Warranty Protection plan consists of a two-step process. Step 1 is to clean the coils and step 2 is to remove the
salts/chlorides.
The coils are to be thoroughly cleaned using an approved coil cleaner as listed above in Table 11.1 on the previous page.
Once cleaned, they will then need to have the chlorides/salts removed by using preferred chloride remover as listed in Table
11.2 on the previous page.
Warranty Protection Step 1 of 2
Complete the coil cleaning following these steps.
1. Ensure that the power to the unit is off and locked out.
2. Clean the area around the unit, if needed, to ensure leaves, grass or loose debris will not be blown into the coil.
3. Remove panels or tops as required to gain access to the coil(s) to be cleaned.
4. Using a pump up sprayer, fill to the appropriate level with potable water and add the correct amount of approved
cleaner as per manufacture instructions leaving room for the pump plunger to be reinserted.
NOTE: Coils should always be cleaned/back flushed, opposite of airflow to prevent impacting the dirt into the coil.
5. If the coils have heavy dirt, fibers, grass, leaves, etc. on the interior or exterior face areas, a vacuum and brush
should be used to remove those surface contaminants prior to applying cleaner. The interior floor, drain tray or
pan areas should also be vacuumed.
6. Apply the mixed cleaner to coil surfaces using a pressurized pump up sprayer maintaining a good rate of
pressure and at a medium size nozzle spray, (not a solid stream and not a wide fan but somewhere in the middle).
Work in sections/panels ensuring that all areas are covered and kept wetted.
7. Apply the cleaner to unit interior air exiting side coil surfaces first. Work in sections/panels moving side to side
and from top to bottom.
8. Generously soak coils by spraying cleaner directly on and into the fin pack section to be cleaned and allow the
cleaning solution to soak for 5 to 10 minutes.
9. Using pressurized potable water, (< 100 psi), rinse the coils and continue to always work in sections/panels. Start
at the top of the coil and slowly move vertically downward to the bottom. Then, staying in the same vertical area,
slowly move back up to the top where you started. Now move over slightly overlapping the area just completed
and repeat above. Continue until all coil areas on the inside of the unit have been rinsed.
10. Complete steps 5 - 9 for the exterior air entering side of the coils.
11. Final rinse – Now complete a quick rinse of both sides of the coil including the headers, piping, u-bends and
hairpins.
12. If the coil has a drain pan or unit floor that is holding rinse water or cleaner, extra time and attention will need to
be taken in those areas to ensure a proper rinse has been completed.
11 Maintenance Proprietary and Confidential ©2024 Vertiv Group Corp. 55
Vertiv™ Liebert® MCV Installer/User Guide