20
How to install the junction box
A single junction box is used to receive information from each sensor in a suspension system.
1. Select a position to install the junction box where:
• The junction box cannot be damaged by any moving parts on the vehicle
• The cables from each sensor can reach the junction box. Ensure the cables can be routed
from the transducer without risk of damage from any moving parts on the vehicle
• The external domain cable can reach from the cab of the vehicle to the junction box.
Ensure the cable can be routed to the cab without risk of damage from any moving parts
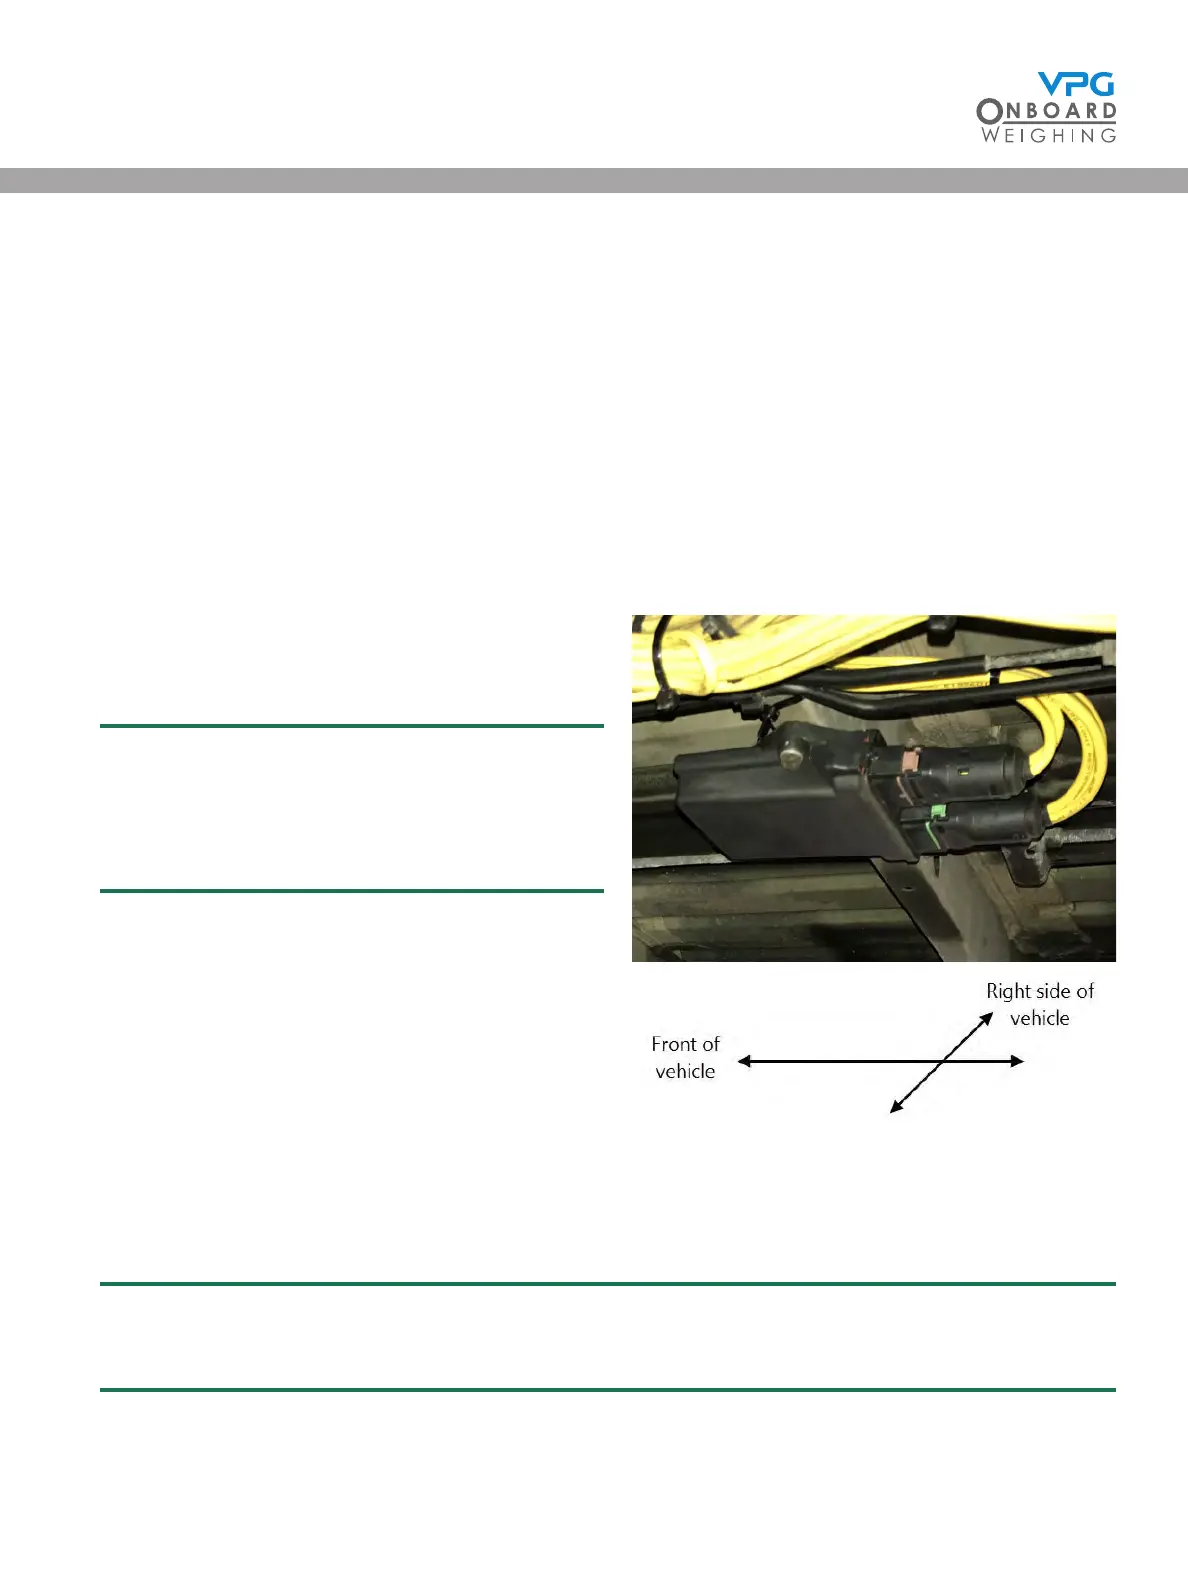
2. Mount the junction box to the vehicle:
• The cable sockets must point to the rear of
the vehicle
The VanWeigh® system will not provide the
correct measurements if the junction box is
not mounted with the cable sockets pointing
to the rear of the vehicle
• Use existing holes on the chassis to mount
the junction box, if possible. Drill holes
appropriate to the size and length of the
mounting screws if existing holes are not
suitable
• Use 2 X 1/4” or M6 screws with Nyloc nuts
to mount the junction box. The length of the
screws may vary depending on where you
mount it
3. Make a note of the orientation of the top face of the junction box, e.g. facing up, down, left or
right side of the vehicle. In the example shown above, the junction box is facing down
It is recommended that you use the system conguration table to record this information.
See “System conguration table” on page 68
VanWeigh
®