Reassembly Procedures WM 130/170/270 Repair
wc_tx000379gb.fm 56
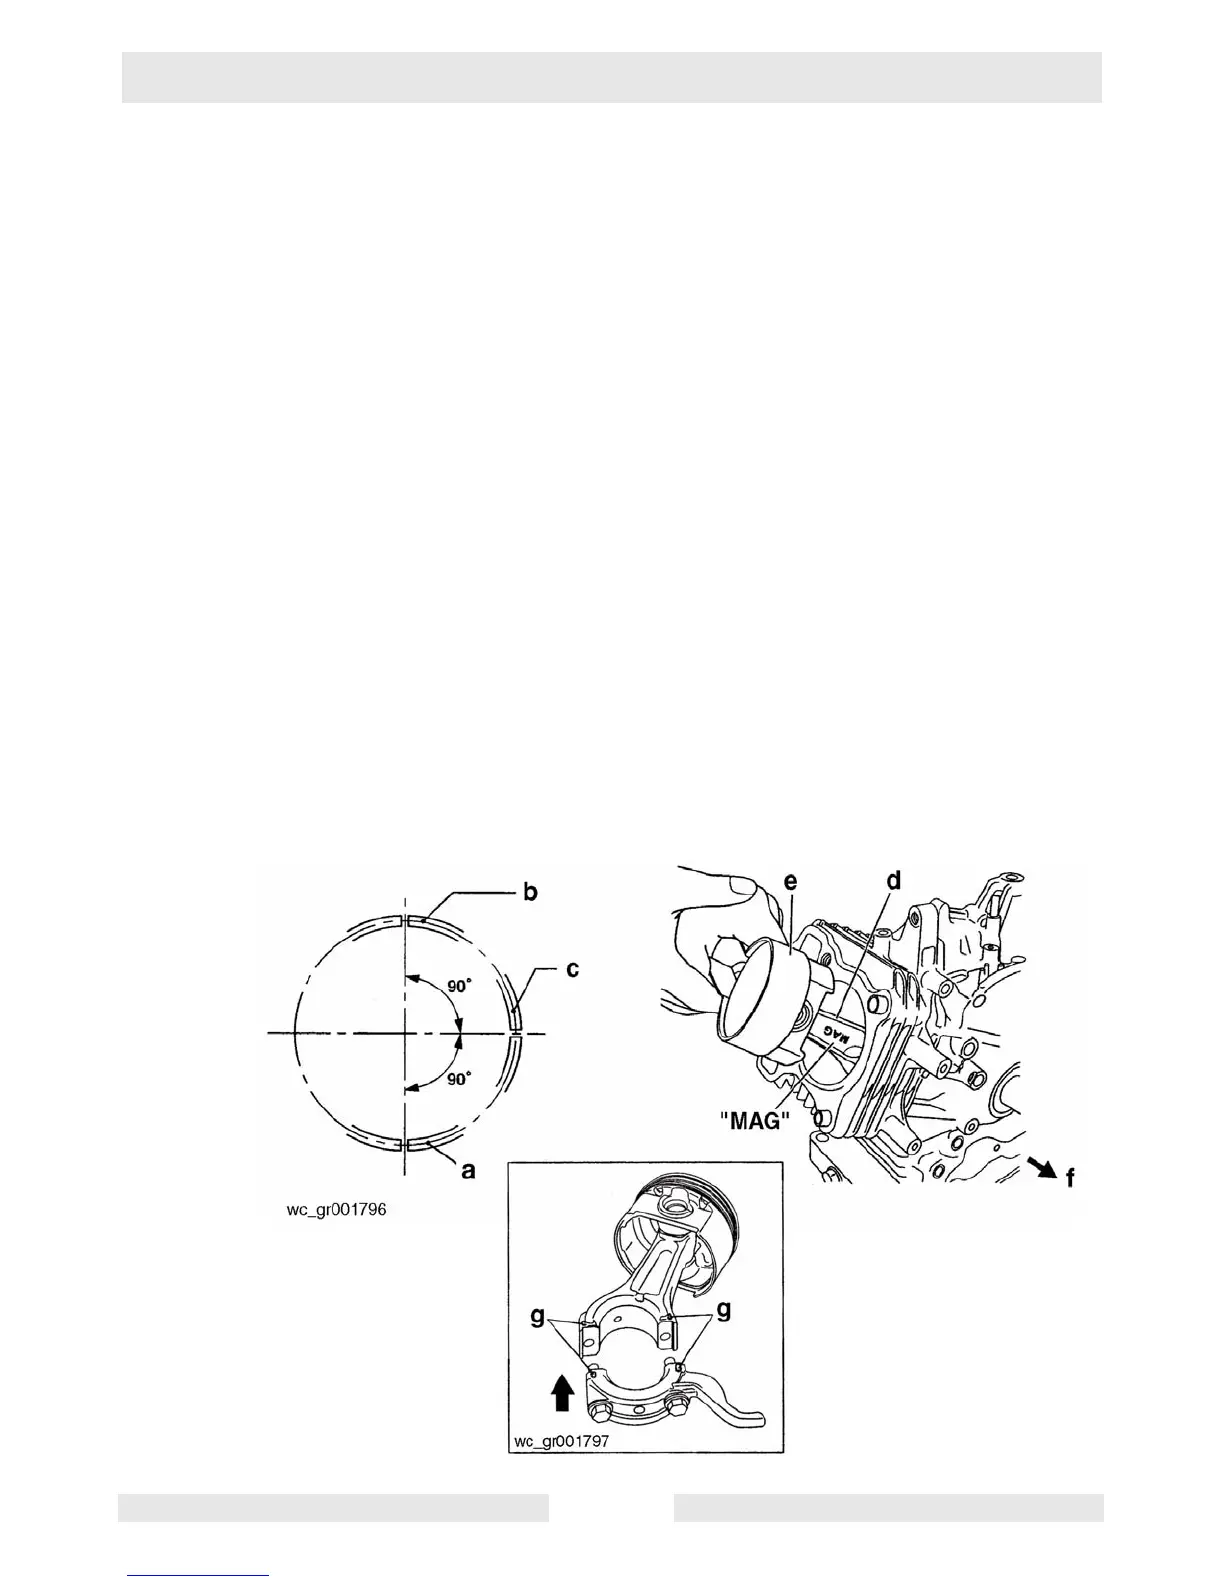
9.6 Connecting Rod
See Graphic: wc_gr001796 and wc_gr001797
9.6.1 Position the piston rings so that the gaps in the rings are at 90°
intervals from each other (a = top ring, b = second ring, c = oil ring).
9.6.2 Apply oil to the piston rings, the cylinder bore, and the large end of the
connecting rod.
9.6.3 Position the “MAG” mark on the connecting rod (d) towards the
flywheel side (f) of the engine. Then, using a ring guide (e), hold the
piston rings in and lower the piston into the cylinder.
Note: If you do not have a ring guide, hold the piston rings in with your
fingers while tapping lightly on the piston head with a block of wood or
rubber mallet.
9.6.4 Rotate the crankshaft down to the bottom dead center and lightly tap
the piston head until the large end of the connecting rod touches the
crank pin.
9.6.5 To mount the connecting rod, line up the matching marks (g) and fit the
clinch portions firmly together. Using two M8 bolts, secure the two
halves together. Torque bolts to: WM 130/170 13–15 Nm (9.4–10.8
ft.lbs); WM 270 17–20 Nm (12.3–14.5 ft.lbs).
9.6.6 Check for free movement of the connecting rod by turning the
crankshaft slowly.
 Loading...