34
GM 4700AC
B_02261
x
A
B
C
D
B_02384
OPERATING MANUAL
VERSION 06/2014 ORDER NUMBER DOC2311730
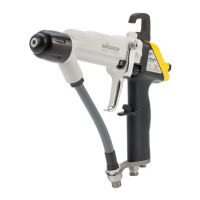
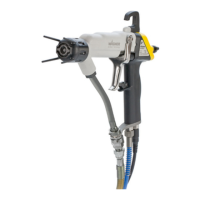
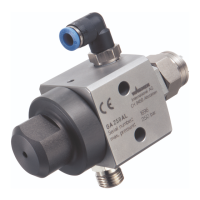
For disassembly and assembly of AirCoat nozzles, see section 7.3.4.
AirCoat nozzle (C) can be placed into a cleaning solvent which has been recommended by
the paint manufacturer.
1. Relieve the pressure of the spray gun and device.
2. Secure the spray gun with the locking device.
3. Unscrew the union nut with nozzle guard (A).
4. Remove air cap (B).
5. Push AirCoat nozzle (C) out of air cap (B) by hand and place on nozzle seal (D) the
other way round with the nozzle tip towards the rear.
6. Re t air cap (B) on nozzle (C). Note the attened parts (X) on the nozzle and in the
air cap.
7. Screw the union nut with nozzle guard (A) over the air cap (B) onto the spray gun
and tighten by hand.
8. Switch the product pressure back on.
9. Turn the locking device to the spraying position and brie y pull trigger.
10. When the blockage has been ushed out, secure the spray gun with the trigger
guard locking device.
11. Relieve the pressure of the spray gun and device.
12. Unscrew the union nut with nozzle guard (A).
13. Remove air cap (B) and push AirCoat nozzle (C) out by hand. Clean the nozzle and
put it back on nozzle seal (D) in the spray position.
14. Re t air cap (B) on nozzle (C).
Note the attened parts (X) on the nozzle and in the air cap.
15. Screw the union nut with nozzle guard (A) over the air cap (B) onto the spray gun
and tighten by hand.
16. Switch the product pressure and the air pressure back on.
Nozzle in spray position
Nozzle in cleaning position
7.3.5 CLEANING AIRCOAT NOZZLE
7.3.6 ELIMINATE NOZZLE CLOGGING

 Loading...