44
A
B
SURFOX 306
USER MANUAL
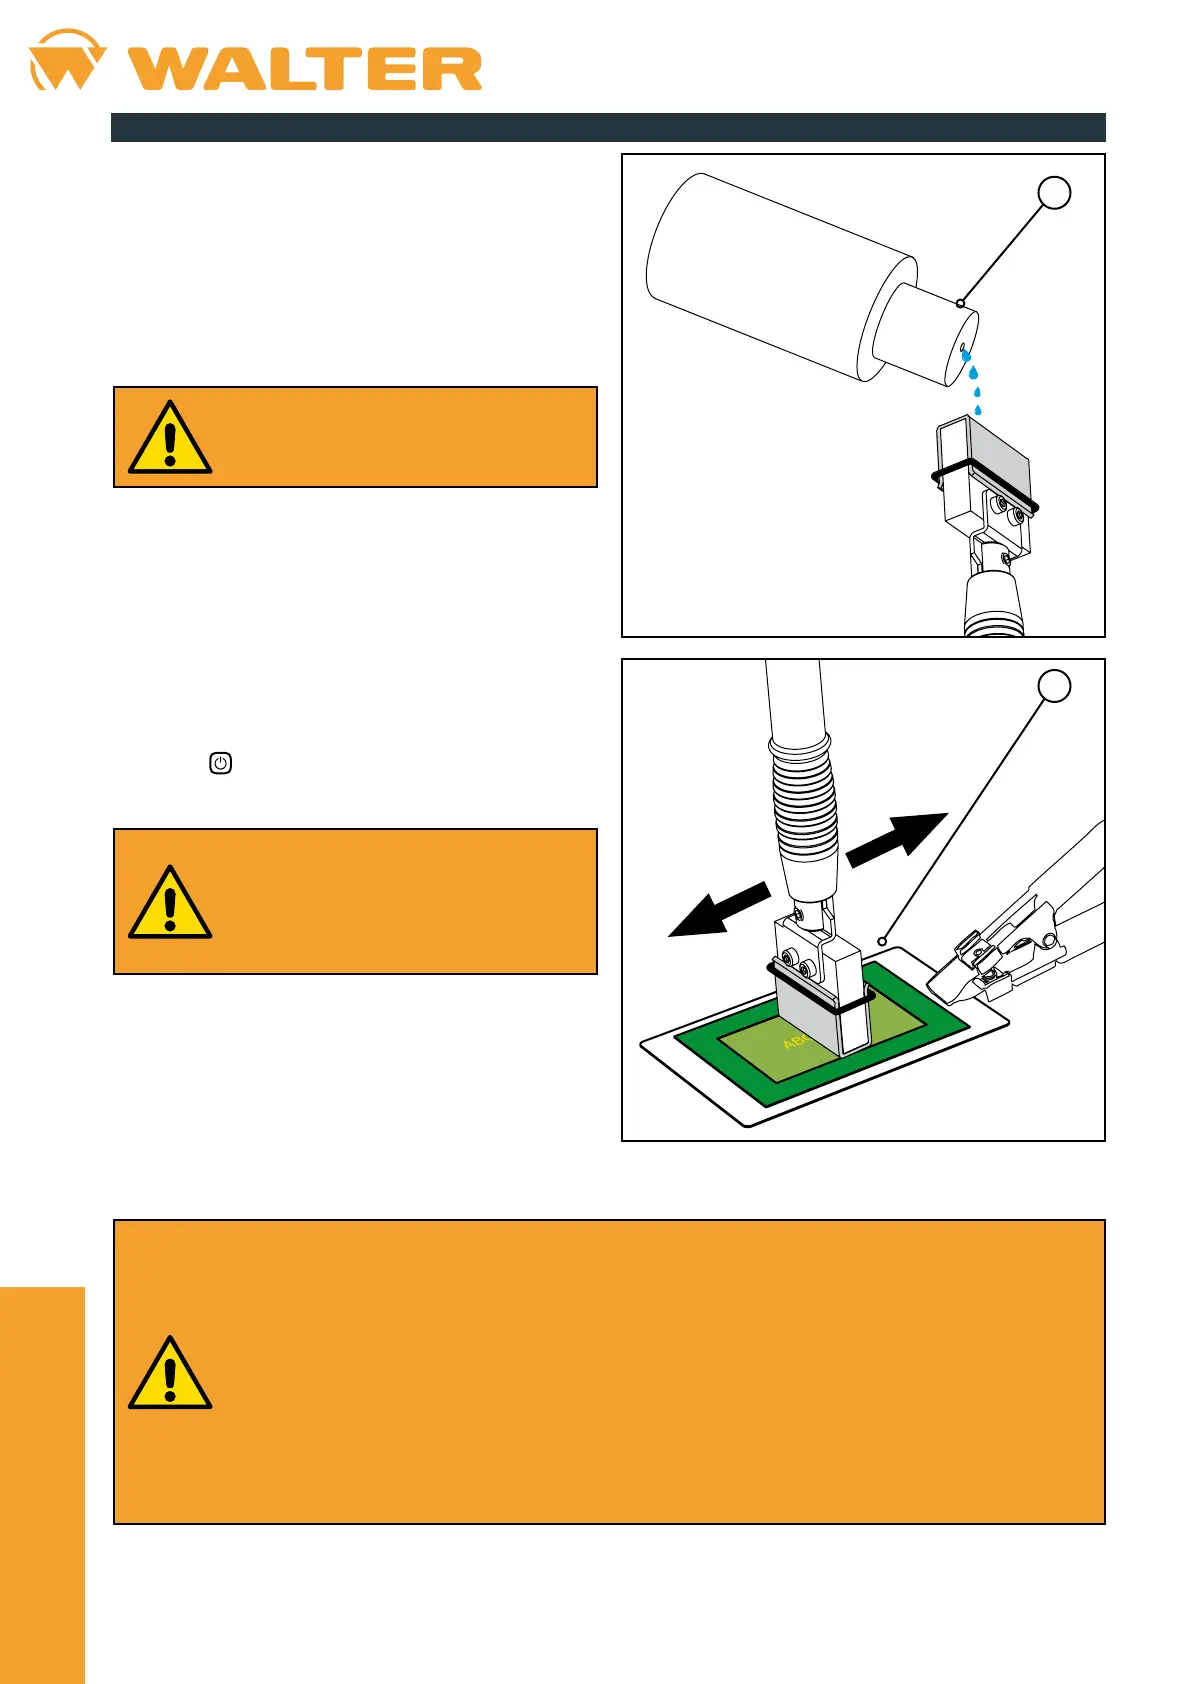
• Choose the most appropriate liquid according for the type
of marking to be carried out:
◊ SURFOX-M, for marking; the result will be a dark and
high-contrast mark on the workpiece.
◊ SURFOX-E, for etching; the result will be a clear, light
marking on due to the a spark erosion principle.
• Pour a few drops of electrolyte solution (A) onto the
marking pad.
The pad moistened with the electrolytic
solution allows about 15 consecutive
markings to be made, after which it must be
remoistened.
• Turn on the device by turning the main switch (located on
the front panel of the unit) to the "I" position.
• Select the desired operating mode by pressing the MODE
button on the control panel (see chapter 3.3 for more
information).
• Unlike cleaning and polishing, the marking/etching process
with the 35 mm insert requires a minimum amount of
current, so it is not necessary to select a particular working
power.
• Press the
button on the control panel to start the device.
Once started, the device switches o
automatically after approximately 30 seconds
of inactivity.
This is a precautionary measure to prevent
the wand from being accidentally powered at
the end of processing.
• Repeatedly apply the wet marking pad to the logo or on the
text that must be imprinted on the stainless steel surface
(B).
• Stay inside the edges of the stencil to avoid marking the steel outside the desired area.
• Always keep the pad well moistened with the electrolytic solution to avoid overheating and consequent
signicant reduction in its working life; if there are obvious signs of wear, replace the component immediately.
• Never use an insert without its matching pad; the insert must never be placed in direct contact with the
stencil.
• The device automatically supplies the appropriate voltage when the marking operating mode is selected.
Do not press the – and + buttons on the control panel to adjust the output power, otherwise a number of
problems may occur, such as:
◊ Weak and/or poorly dened markings.
◊ Burns on the marking pad.
◊ Burns on the screen-printing stencil.
◊ Unwanted halos on the workpiece.
8.5. Start of processing