E4. Preparing a 3D model
1. Most 3D printable les that you will nd on
YouMagine.com are in the STL format. Let’s start
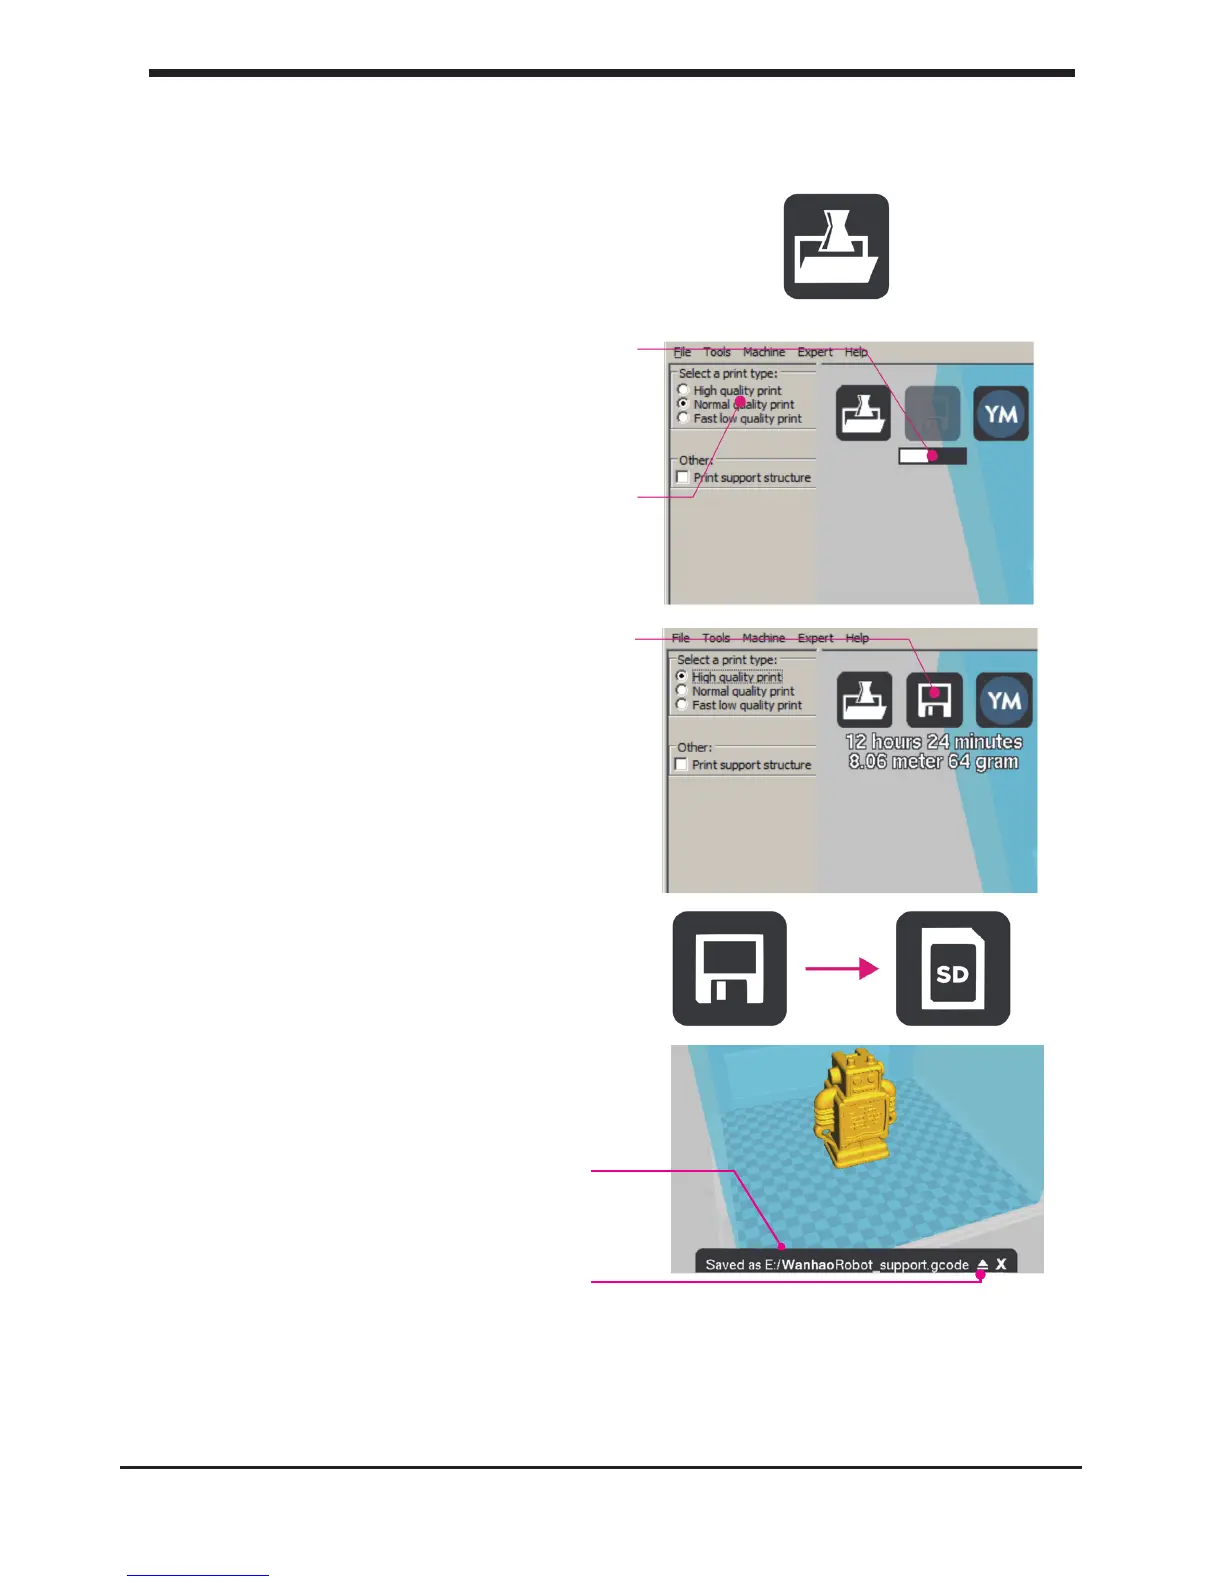
by clicking on the Load button in Cura.
2. When you have loaded a le into Cura you
might notice the progress bar.
Cura is automatically making the 3D model print
ready for you.
3. In the meantime you can adjust settings and
select a print type.
4. When the 3D model is prepared, the Save
toolpath button shows up and gives you the
option to save the prepared model in a
directory.
Underneath the button Cura gives you an
indication about your print on
- Estimated Print Time
- Amount of material required
- And the weight of your 3D print
5. After you inserted the included SD-card into
your computer, Cura changes the Save
toolpath Button into the Toolpath to SD
Button
6. Just after you choose for the Toolpath to SD
button you will see the same progress bar but
now it saves the le on the SD card.
7. When nished saving It will give you the
notication that your le has been saved.
8. Before taking out the SD-card make sure you
always choose the safely eject
button in Cura.
30
E4. Preparing a 3D model Make a printle with cura software
 Loading...