User Guide
4. Management
4.9 Daisy Chaining
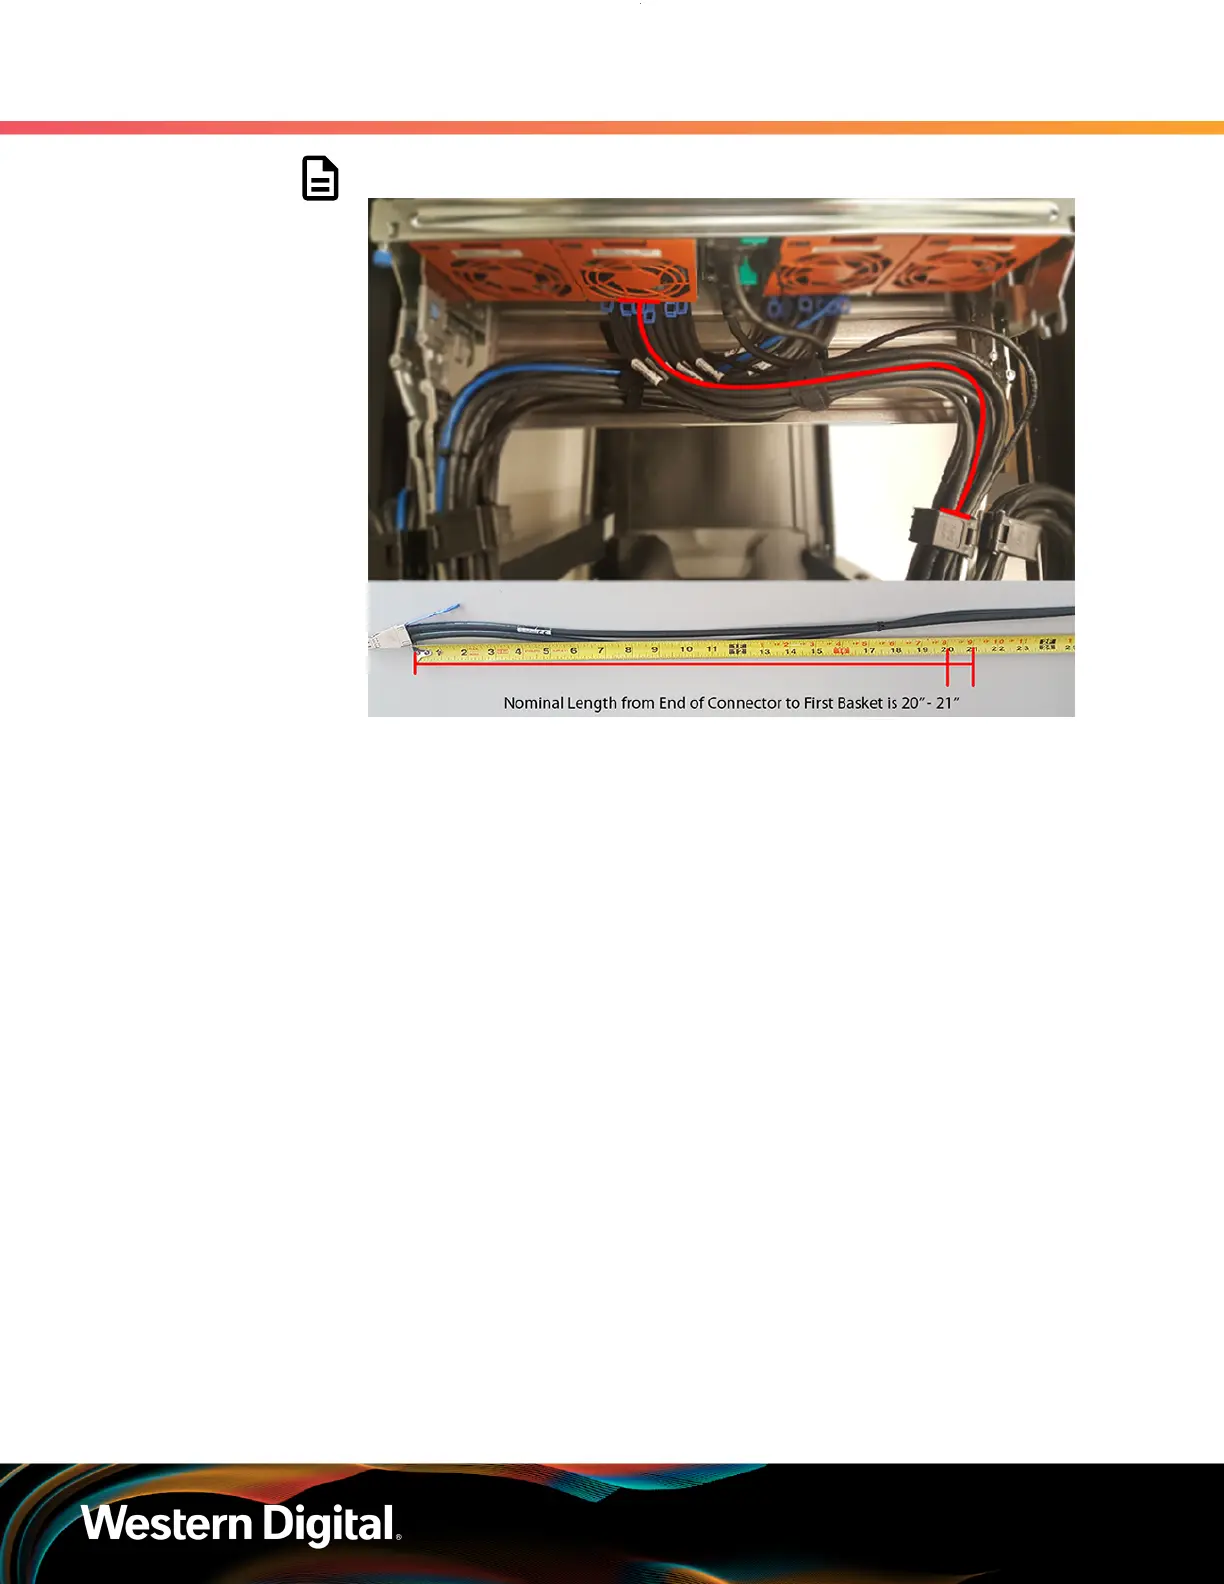
Figure 224: Nominal Cable Length at Connectors
f. Close all of the baskets.
g. Reconnect the CMA at the elbow to the connectors on the rail.
Step 3 : Cable the upper CMA.
a. Unlatch the elbow side of the CMA arm and swing it forward by pressing the blue button
that says “push” to unlatch it.
b. Gather the SAS cables, one power cable, and one Ethernet cable to install in the left hand
side.
c.
Open all of the baskets
235





 To Next Page