User Guide
3. Support
3.7 CMA Replacement
b. Grasp both handles at the front of the enclosure and pull with even pressure until the
enclosure will not extend further.
Warning: The handles on the front of the chassis are not intended to be used
to support the weight of the Ultrastar Data60 . Lifting the unit by the chassis
handles or trying to support the unit on the handles can cause them to fail.
This can cause serious damage to the unit or serious bodily harm to those
handling the unit. Always team lift the chassis by gripping the underside of the
unit, and never try to lift a chassis that is filled with drives.
c.
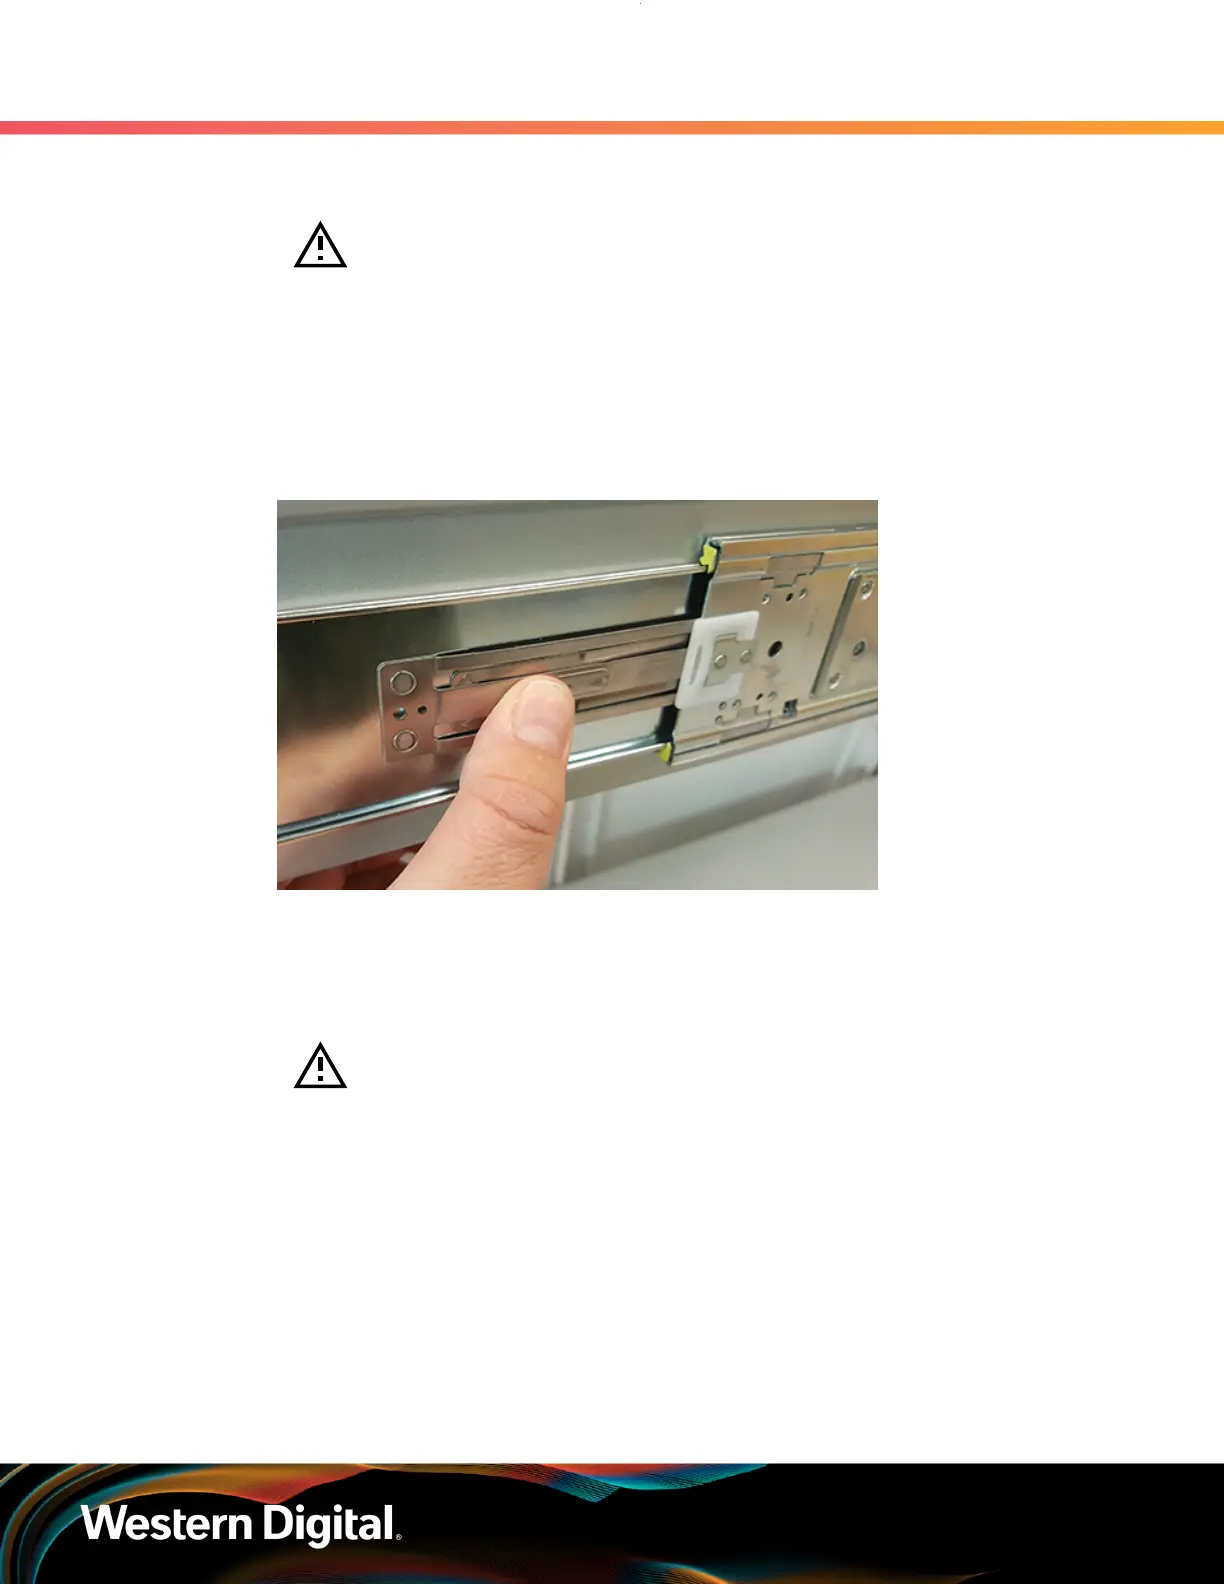
Locate the safety catches on the inner rails attached to the enclosure.
Figure 71: Safety Latch Release
d. Depress the latch release lever for the safety latches on the rail and push the chassis very
slightly forward. The chassis is now unsecured from the rack.
e.
Ensure that you have the proper support mechanism to hold the chassis in position, whether
that be a team lifting partner or an appropriate lift.
Warning: Do not lift the chassis by the Cable Tray while removing the chassis
from the rack OR while installing it into a rack. This can cause serious damage
to the unit or serious bodily harm to those handling the unit. Always team lift
the chassis by gripping the underside of the unit, and never try to lift a chassis
that is filled with drives.
f. Slide the chassis forward to free it from the rails. Place the chassis in a safe location to avoid
damage.
Step 11 : Install the chassis into the rails.
a. Extend the bearing plates on the inside of the mid-rails until they are fully forward (detent
has engaged). This prevents potential damage due to improper mating of the rails.
80



 To Next Page