User Guide
3. Support
3.7 CMA Replacement
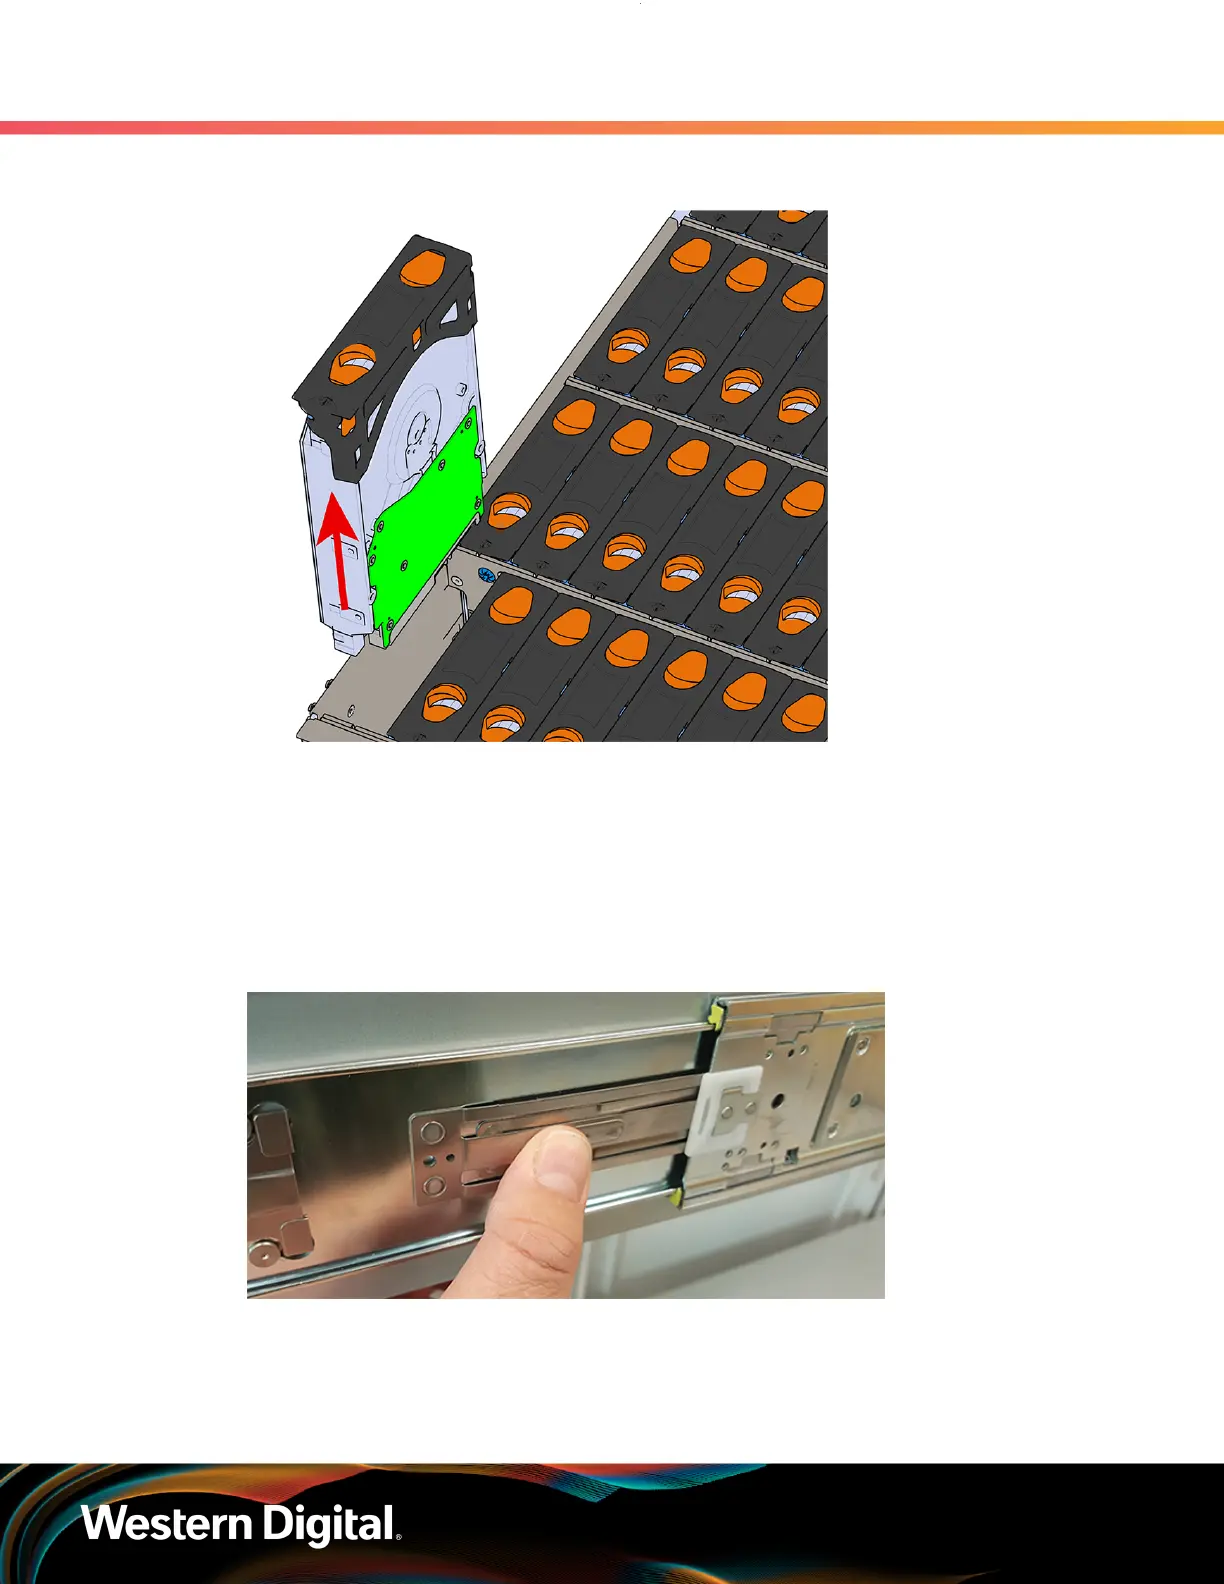
Figure 69: Removing 3.5in HDD Assembly
Step 8 :
Follow the previous step for each drive in the enclosure. Attach a label or mark the drives with
the drive slot they were removed from in order to add them to the same slot in the future. Store
the drives in an ESD safe location until the drives are ready to be installed back into an enclosure.
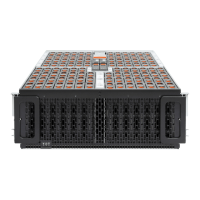
Step 9 : Release the safety latch on the inner rails on each side of the chassis as shown in the following
image.
Figure 70: Inner Rail Safety Latch Release
Step 10 : Remove the chassis from the rack.
a. Be prepared to support the enclosure once it is free of the rails by having a second person
or a lift to support the enclosure
79



 To Next Page