4-22
REMOVING THE TUB ASSEMBLY (continued)
9. Remove the bellows from the tub see
("REMOVING THE DOOR SWITCH ASSEMBLY
FRONT PANEL AND BELLOWS" for the
procedure).
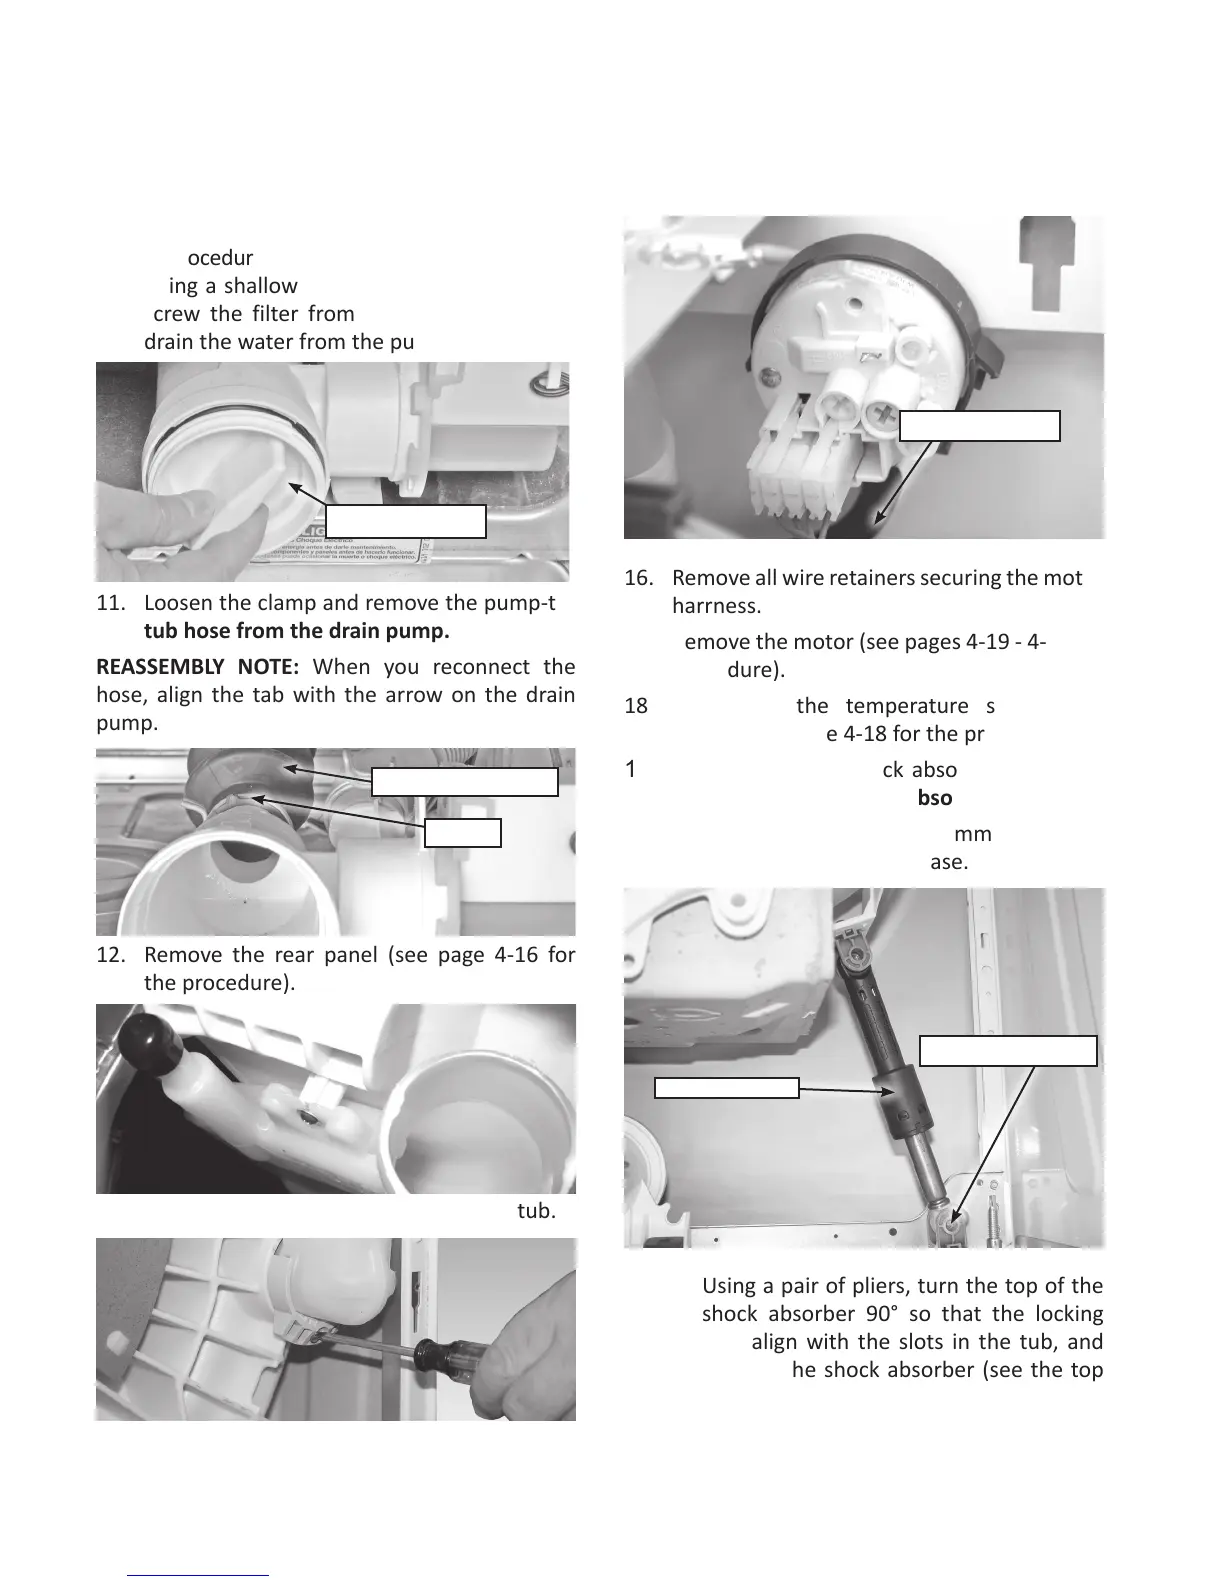
10. Using a shallow pan to catch the water, un-
screw the filter from the drain pump, and
drain the water from the pump.
11. Loosen the clamp and remove the pump-to-
tub hose from the drain pump.
REASSEMBLY NOTE: When you reconnect the
hose, align the tab with the arrow on the drain
pump.
12. Remove the rear panel (see page 4-16 for
the procedure).
13. Remove 1 screw at the top side of the tub.
14. Remove 1 screw at the bottom back of the tub
and remove the vent/fan tube-to-tub end
.
15. Disconnect the pressure hose from the pres-
sure switch.
16. Remove all wire retainers securing the motor
harrness.
17. Remove the motor (see pages 4-19 - 4-20 for
procedure).
18. Disconnect the temperature sensor and
heater. (see page 4-18 for the procedure).
19. Remove the four shock absorbers from the
tub. To remove a shock absorber:
a) Remove the 11/16˝ (17 mm) mounting
bolt and nut from the base.
Drain Pump Filter
Pump-To-Tub Hose
Clamp
Disconnect Hose
b) Using a pair of pliers, turn the top of the
shock absorber 90° so that the locking
tabs align with the slots in the tub, and
remove the shock absorber (see the top
right photo).
Base Mounng Bolt
Shock Absorber