27
2. For the Installer
2.4.26 Installing the exhaust pipe
a) Install the exhaust pipe upward to the flue (45° is the ideal angle). Maximum exhaust pipe length to flue 3 m.
Information!
Any section of this exhaust line that only rises slightly (up to 30°) or is horizontal is not allowed to be
more than 1 m in length.
b) Avoid 90° bends, 45° bends are better
c) Do not push the exhaust pipe too far into the flue.
d) Do not seal the exhaust pipe completely into the flue. Connection with flexible exhaust pipe inlet into the flue.
The vacuum fan can cause sound transmissions that create noise pollution.
e) The entire exhaust line should be sealed (incl. cleaning aperture) because there can be positive pressure in the
exhaust pipe for a short period during the starting phase.
f) Insulate the exhaust pipe with at least 30 mm insulation!
g) A draught limiter is needed if the maximum draught (see technical data in section 4.4.) is exceeded during
operation.
Note!
We would recommend fitting outside the flue around ½ m below where the exhaust pipe intersects
with the flue.
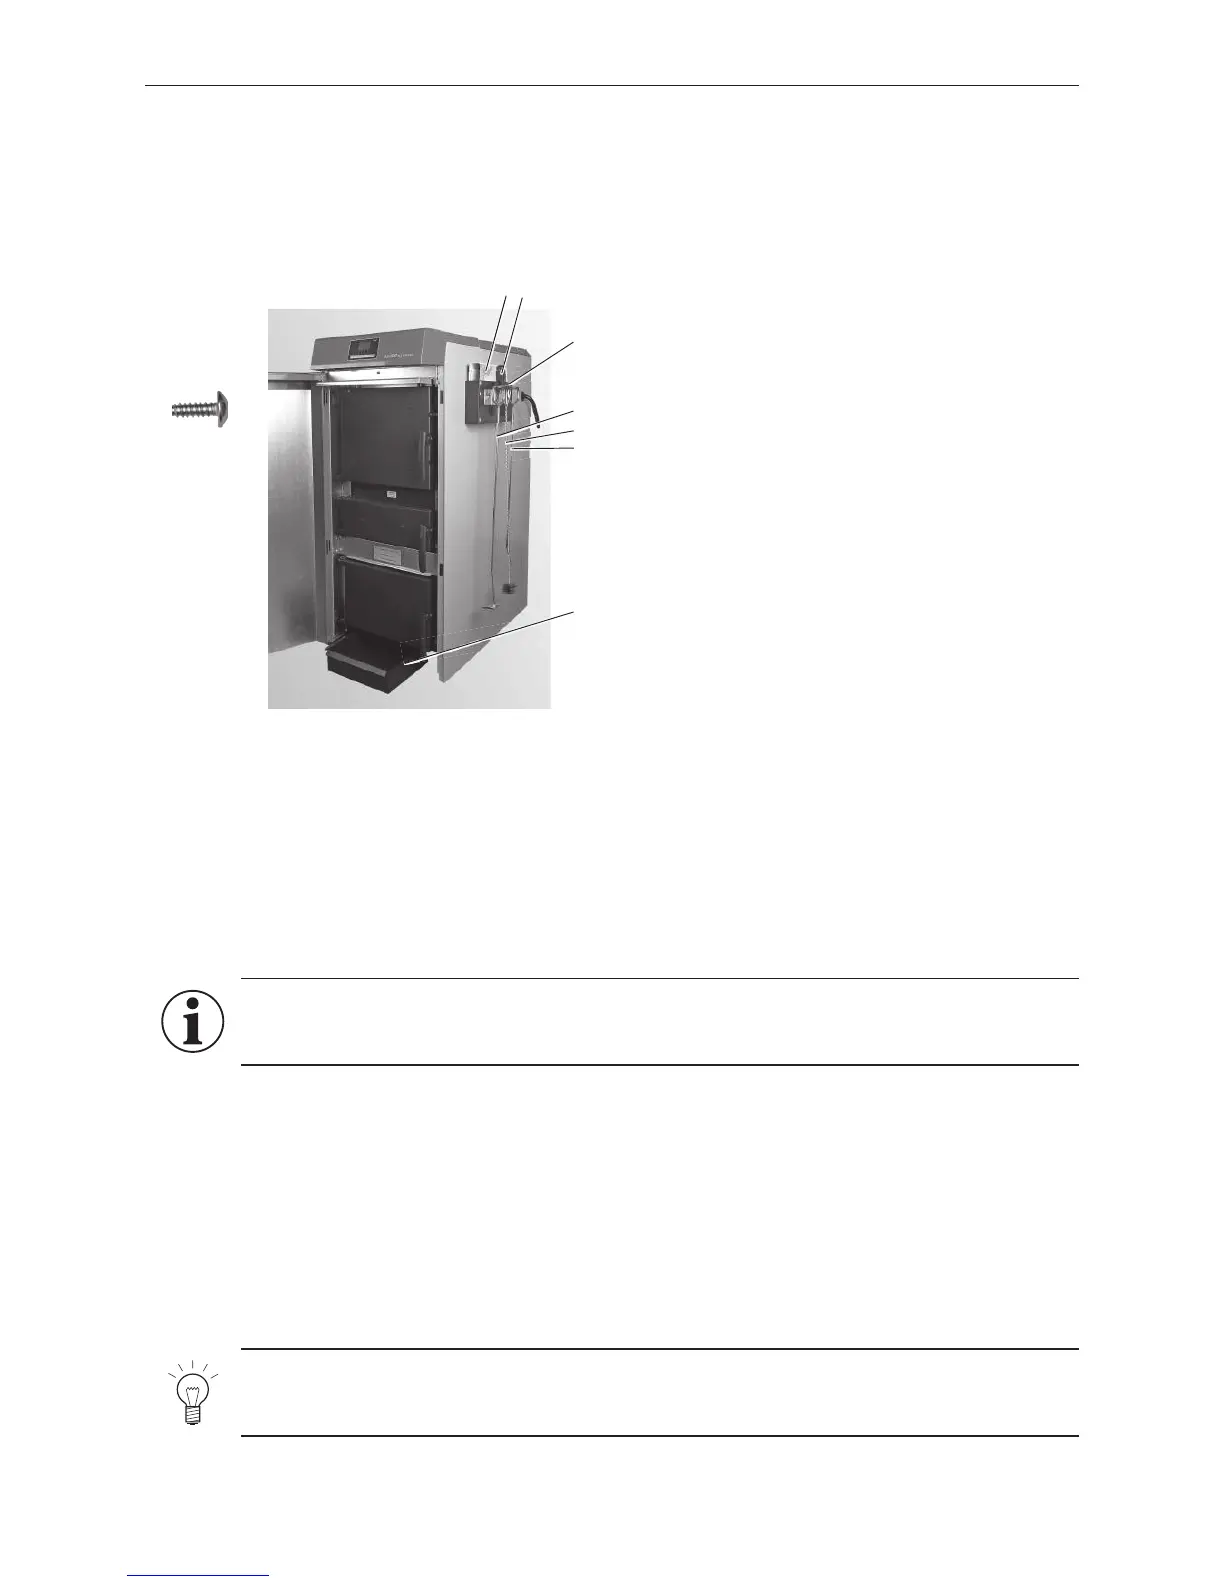
4 x
Supplied as standard:
1 ...........Instructions
4 ...........Scratcher
7 ...........Ash pan
Optional accessory: cleaning kit EWK 020:
3 ...........Hanger (for installation on the wall or boiler side
panel)
2 ...........Spatula
5 ...........Cleaning brush
6 ...........Poker
2.4.25 Instructions, cleaning and operating implements
– Install the hanger with the instructions folder, cleaning and operating implements on a side panel of the boiler
(Fig. 56) or on a wall in the boiler room/installation room.
– Keep ash pan under boiler.
Fig. 56 Fitting hanger, ash pan under boiler
3
4
5
6
7
1 2