70
WPS-365-DVR-9CH & 16CH Installation and Users Manual
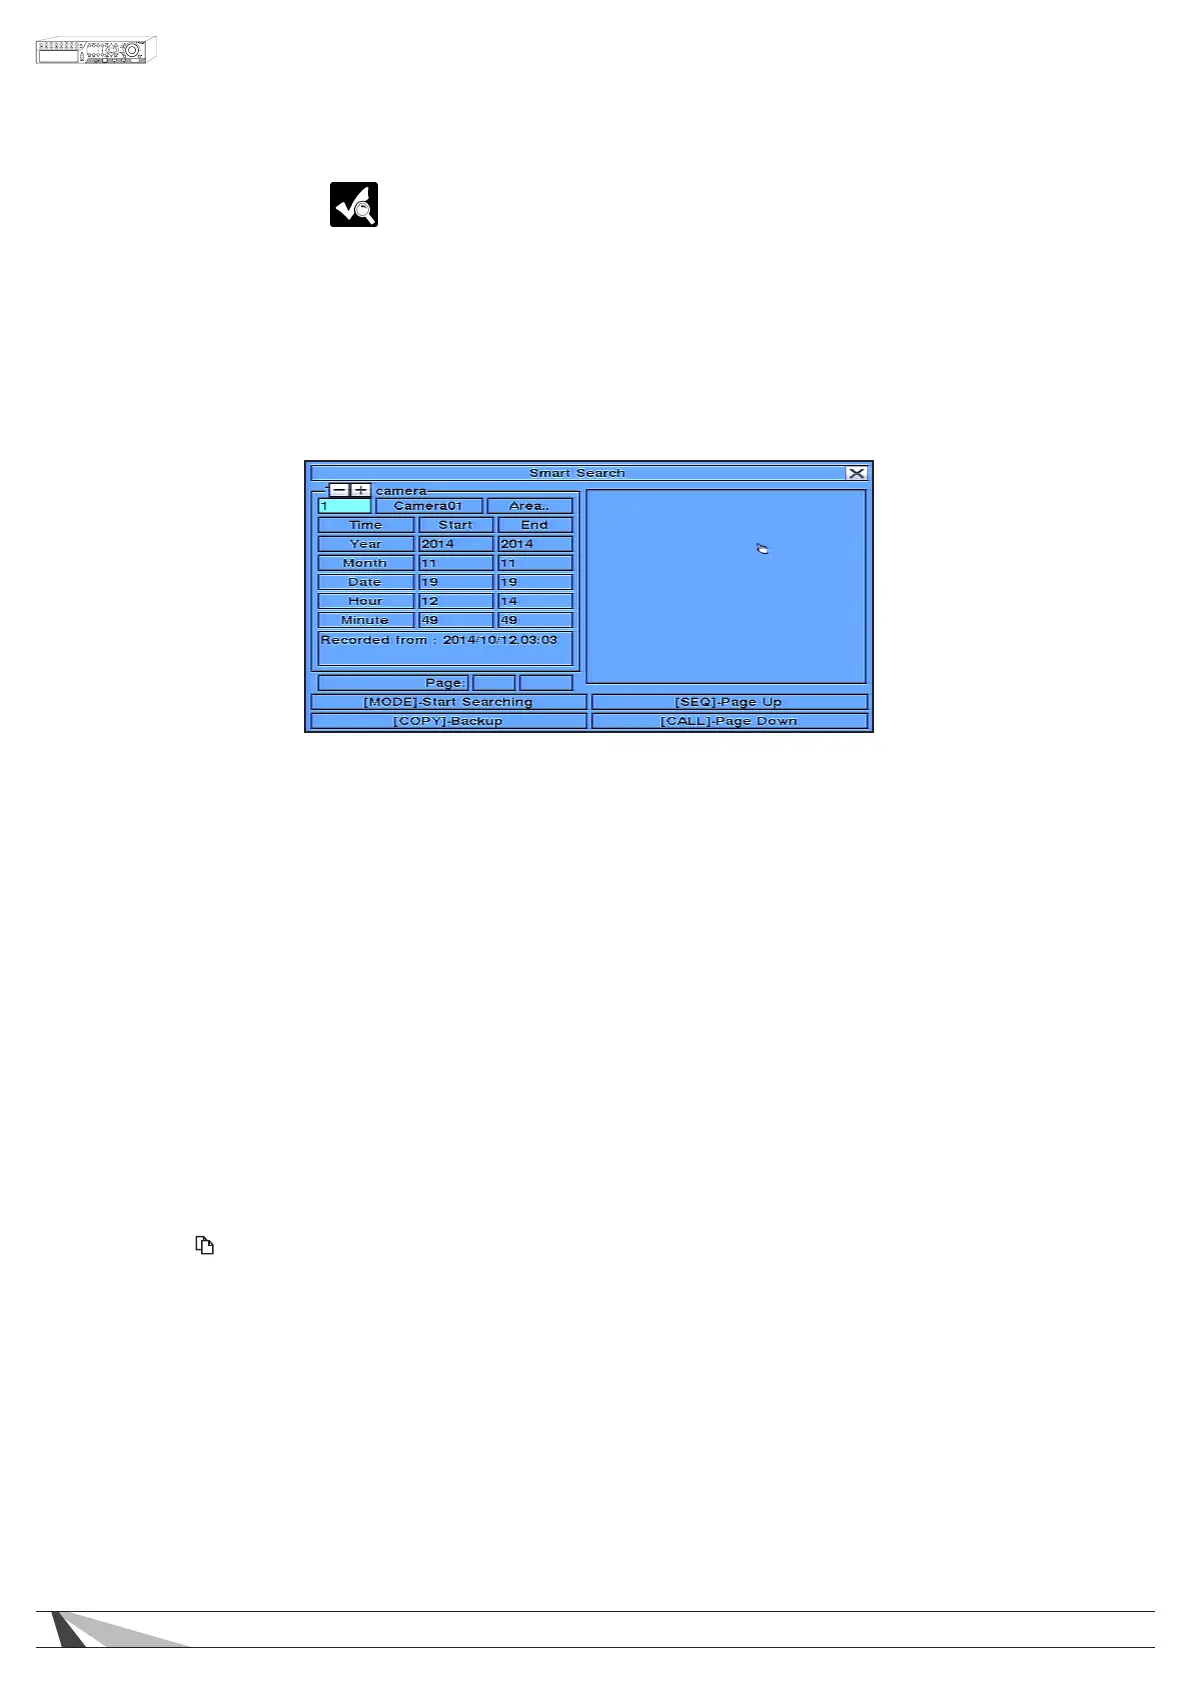
8.3. SMART SEARCH
The Smart Search feature allows the user to search for motion in a specic area of a video (camera) window.
This is helpful to narrow down the search results if only a portion of the video window contains the event in
question. For example, if a scene in an ofce includes a safe and the manager wants to review who accessed
the safe, the area of the video window that contains the safe could be dened as the only portion of the
recorded videos searched for motion.
Note:theareaofavideosearchedusingSmart SearchmustbepartofthedenedareaforMotion Detection
(seeSection 6.2.2).
To navigate and operate this menu:
•MODE
Press the Mode button on the front panel of the DVR or on the remote control to begin searching the
recorded video and audio based on the selected search Time, Camera, and Motion Area. Alternatively
use the mouse to set the parameters and begin the search. The search results will be displayed on the right
half of the dialog box.
Note:Topreventthe Smart Searchfeaturefromoverloadingthesystem,amaximumofupto500matched
lesor200GBofharddrivestorageforeachrecordpartitionwillbesearchedbasedonthestarttime
entered.
• SEQ
Use the SEQ button on the front panel of the DVR or on the remote control to scroll the results Page Up.
Alternatively use the mouse to select the Page Up option.
•CALL
Use the CALL button on the front panel of the DVR or on the remote control to scroll the results Page Down.
Alternatively use the mouse to select the Page Down option.
•Numeric
Press the numeric buttons on the front panel of the DVR or on the remote control followed by the ENTER
button to select the display page of the results. Alternatively use the mouse to click the Page Number box.
•Copy( )
Select the COPY button from the front panel of the DVR or on the remote control to backup (copy) the
selected type of recorded video (beginning from the Search Time) to the connected backup device. The
Backup menu (described in the Archive portion of Section 8.6) will be displayed. Alternatively use the
mouse to select the COPY button.
Thefollowingisabriefdescriptionforeachiteminthismenuanditsspecicoperations:
•CAMERAID
Press +/- buttons on the front panel of the DVR or on the remote control to change the camera ID to be
searched for matching les. Alternatively use the mouse to enter the Camera ID number.
•Start/EndTime
Press +/- buttons on the front panel of the DVR or on the remote control to modify the beginning and end
of the search time for the recorded video and audio. Enter the appropriate Year, Month, Date, Hour, and
Minute. Alternatively use the mouse to enter these parameters.
 Loading...