Printing using Windows
Xerox Phaser 3320DN/DNI
User Guide
32
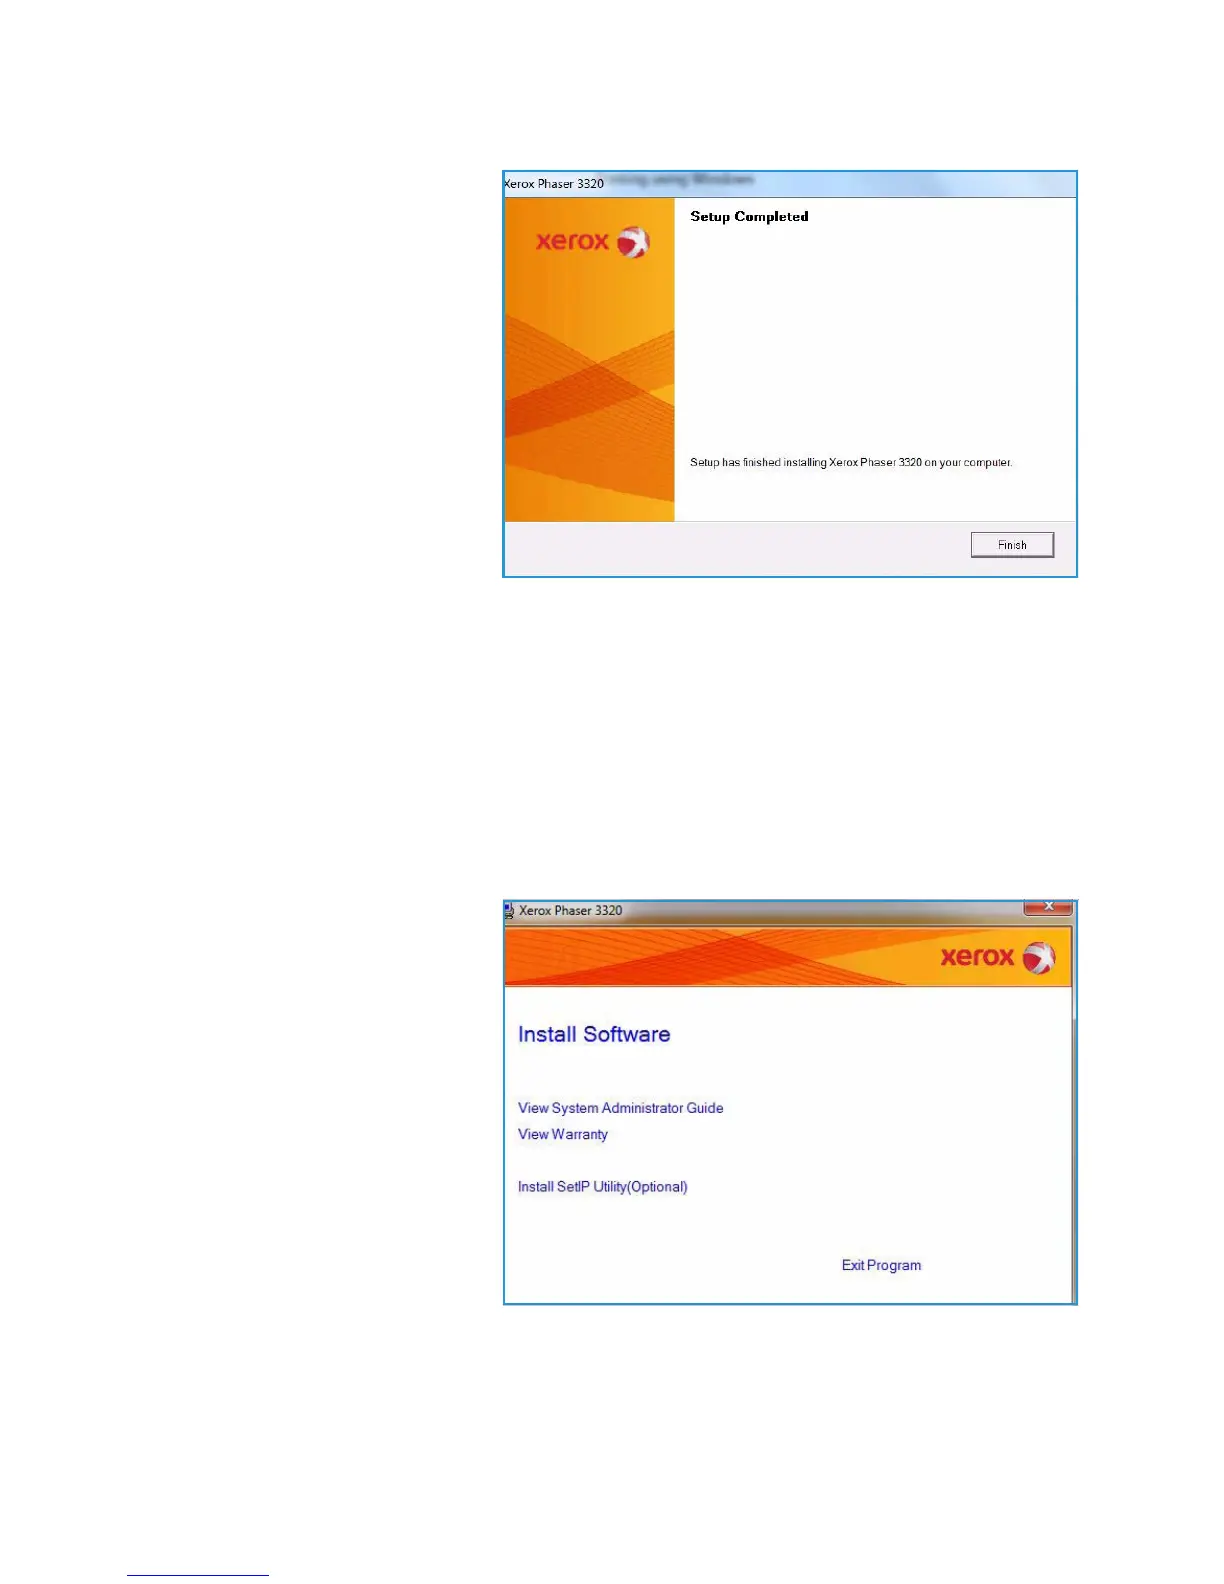
11. Select Finish.
Wireless Printer (Phaser 3320DNI)
When you connect your printer to a network, you must first configure the TCP/IP settings for the
printer. After you have assigned and verified the TCP/IP settings, you are ready to install the software
on each computer on the network.
Note: If you choose a wireless connection for your printer, you cannot use a wired connection at
the same time.
1. Make sure that the printer is connected to your computer with a usb cable and powered on. For
details about connecting to the network, refer to the System Administrator Guide.
2. Insert the supplied CD-ROM into
your CD-ROM drive.
The CD-ROM should
automatically run, and an
installation window appears.
• If the installation window
does not appear, select the
Start button and then Run.
Type X:\Setup.exe,
replacing “X” with the letter
which represents your drive
and select OK.
• If you use Windows Vista,
select Start > All programs
> Accessories > Run, and
type X:\Setup.exe. If the
AutoPlay window appears in Windows Vista, select Run Setup.exe in Install or run program
field, and select Continue in the User Account Control window.
3. Select Install Software.