4-49
Phaser 3635MFP
ADJ 8.1
Repairs and Adjustments
Draft 4
ADJ 8.1 Lead Edge Registration Adjustment
Purpose
To measure and adjust lead edge image to paper registration.
Check
NOTE: Both the Check and the Adjustment use an internal test pattern. Both are performed in
diagnostics.
Check the lead edge registration (top edge of portrait A4 or 8.5x11 inch). Perform the following:
1. Enter dC606 Internal Print Test Patterns.
2. Select test pattern 7.
3. Select Features. For simplex lead edge check, select 1 Sided. For duplex lead edge
check select, 2 Sided.
4. Select the tray. Select Start Test.
NOTE: Simplex copies exit face down. Duplex copies exit side 1 face down (side 2 face
up).
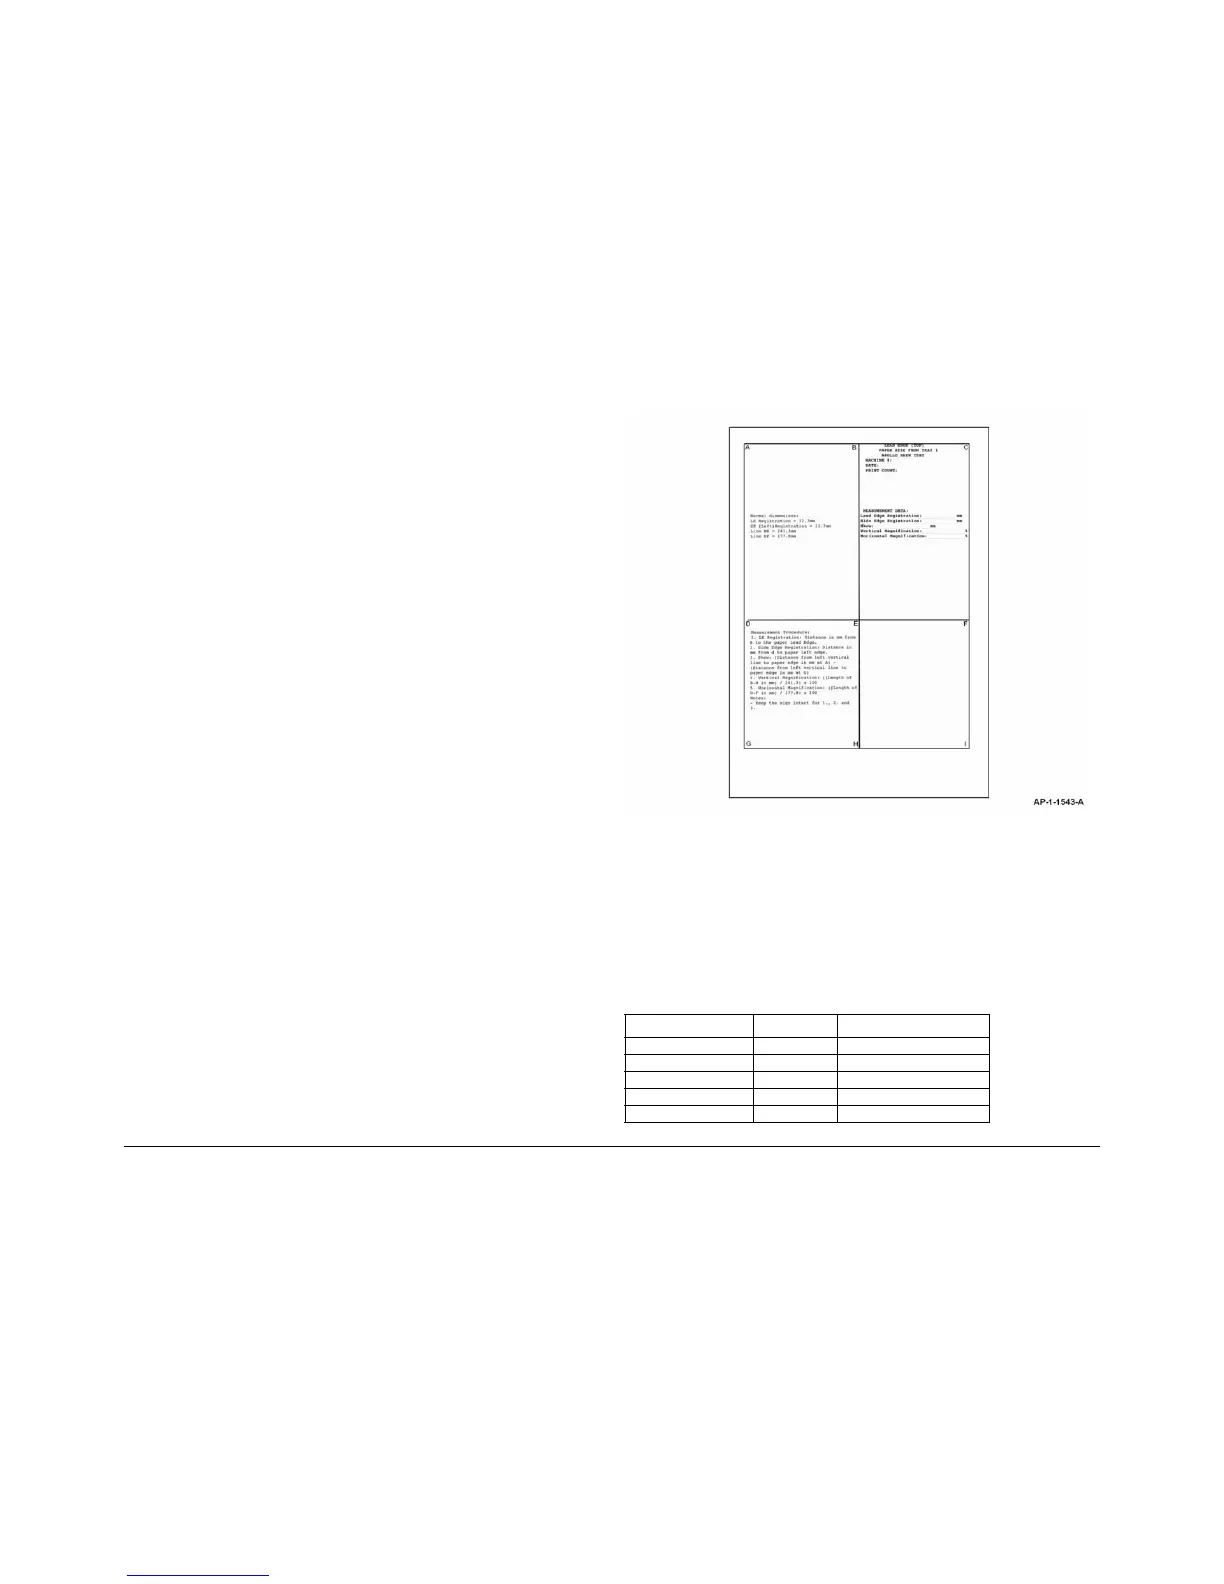
5. Measure the distance between the lead edge of the paper and the ABC line on the printed
test pattern, Figure 1.
Figure 1 Test pattern 7
6. If the distance measured is not 12.7mm (0.5 inch) +/-3mm (1/8 inch), perform the Adjust-
ment.
Adjustment
1. Select Exit (on the dC606 Internal Print Test Patterns screen).
2. Select Diagnostic Routines.
3. Select Copier Routines.
4. Select 131 NVM Read Write.
5. Refer to Table 1. Select the relevant NVM setting.
Table 1 NVM location
Mode Tray Location
Simplex 1 07-100
Simplex 2 07-200
Simplex Bypass 07-500
Duplex Side 1 1 07-140
Duplex Side 1 2 07-240

 Loading...


