c. Touch Print.
Note: After the printer has been powered on for 2 minutes, print the Configuration
Report.
• The TCP/IP address appears in the Network Setup section of the page.
• If the IP address that appears on the page is a system default address, such as
169.254.xxx.xxx, the printer did not acquire an IP address from the DHCP server.
• Wait 2 minutes, then print the Configuration Report again.
• After 2 minutes, if the IP address does not appear, contact the system
administrator.
d. To close the window, touch X.
AAuuttoommaattiicc DDaattaa CCoolllleeccttiioonn
The printer collects data automatically and transmits the information to a secure off-site location.
Xerox or a designated service provider uses this data to support and service the printer, or for billing,
supplies replenishment, or product improvement. Automatically transmitted data can include product
registration, meter readings, supplies levels, printer configuration and settings, software version, and
problem or fault-code data. Xerox cannot read, view, or download the content of your documents that
reside on or pass through your printer or any of your information-management systems.
To disable automatic data collection:
1. At your computer, open a Web browser.
2. In the address field, type the IP address of the printer.
3. Press Enter or Return.
4. On the Xerox
®
CentreWare
®
Internet Services Welcome page, select the link in the note regarding
automated services.
Selecting this link opens the SMart eSolutions Setup page in Xerox
®
CentreWare
®
Internet
Services. From this page, select Not Enrolled→Apply.
Note: Administrator credentials are required to disable SMart eSolutions. If you do not
have administrator credentials, contact the administrator for the printer.
MMaaiinntteennaannccee AAssssiissttaanntt
Your printer includes a built-in diagnostic capability allowing you to send diagnostic information
directly to Xerox. Maintenance Assistant is a remote diagnostic tool that offers a fast way to resolve
potential issues, receive assistance, and automate the troubleshooting or repair process.
EEnnaabblliinngg MMaaiinntteennaannccee AAssssiissttaanntt
Before you begin: If your network uses a proxy server, configure the Proxy Server settings of the
printer to ensure that the printer can connect to the Internet.
1. From the Printer Status window, click Help→Xerox
®
CentreWare
®
Internet Services.
2. From Xerox
®
CentreWare
®
Internet Services, click Status→SMart eSolutions.
3. From Smart eSolutions, click Maintenance Assistant.
Xerox
®
WorkCentre
®
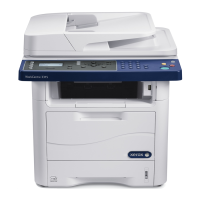
3335/3345 Multifunction Printer
User Guide
31
Features

 Loading...


