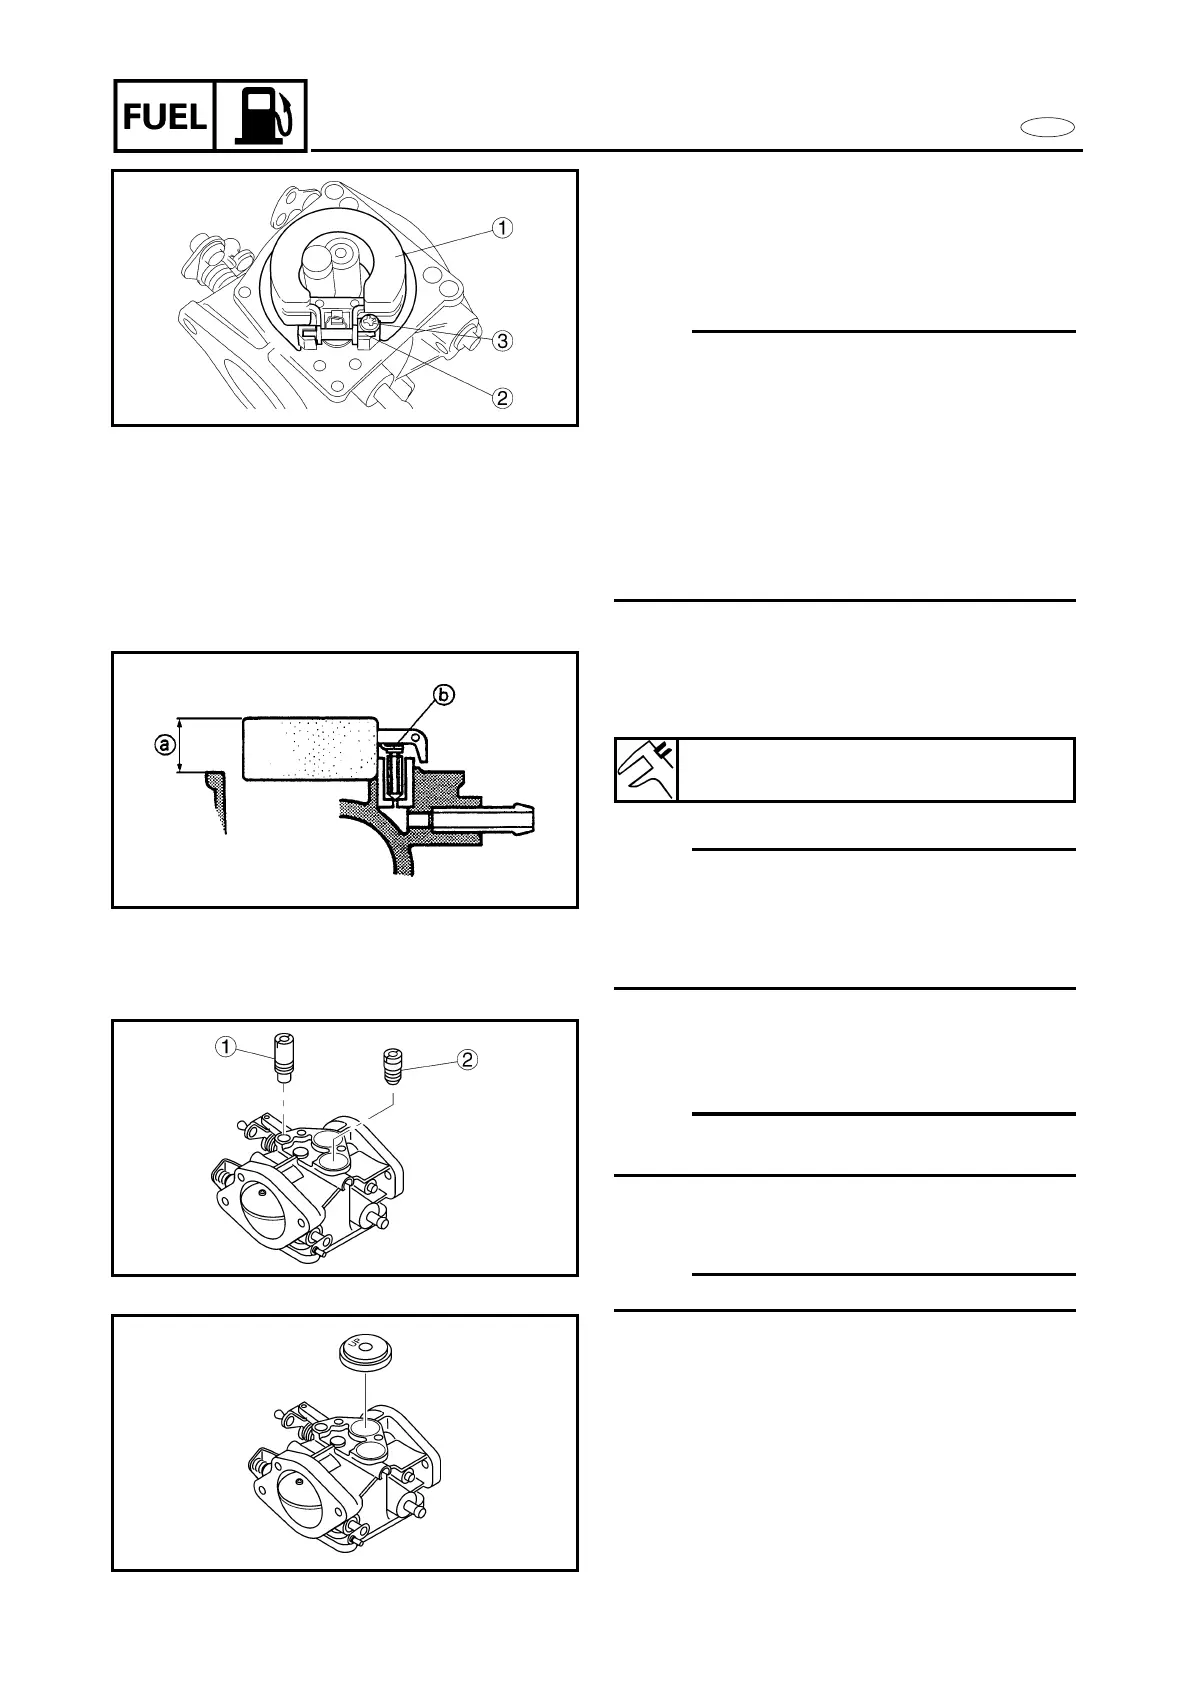
CARBURETOR
E
ASSEMBLING THE CARBURETOR
1. Install:
• Float 1
• Float pin 2
•Screw 3
NOTE:
• The float is installed together with the
needle valve, needle valve clip and the
needle valve cap.
• The float pin should fit into the slit in the
carburetor and retained with the screw.
• When installing the float into the
carburetor, place the needle valve into the
needle valve seat.
• After installation, make sure that the needle
valve seat.
2.Measure:
• Float height
a
Out of specification ➔ Adjusting the
float height by bending the tab
b
.
NOTE:
• The float should be resting on the needle
valve, but not compressing the needle
valve.
• Take measurement at the top of the float
flange opposite to its pivoted side.
3. Install:
• Main air jet 1
• Pilot air jet 2
NOTE:
Be careful not to mistake the installation
position of the main air jet and pilot air jet.
4. Install:
•Plate
NOTE:
Set the “UP” mark upward
5. Adjust:
•Pilot screw
Refer to the “ADJUSTING THE ENGINE
IDLING SPEED” on page 3-10.
Float height:
14.0 ± 2.0 mm (0.55 ± 0.08 in)
4-15