6D93G11
5-34
1
2
3
4
5
6
7
8
9
4. Lightly tap the valve spring retainer with
a plastic hammer to set the valve cotters
securely.
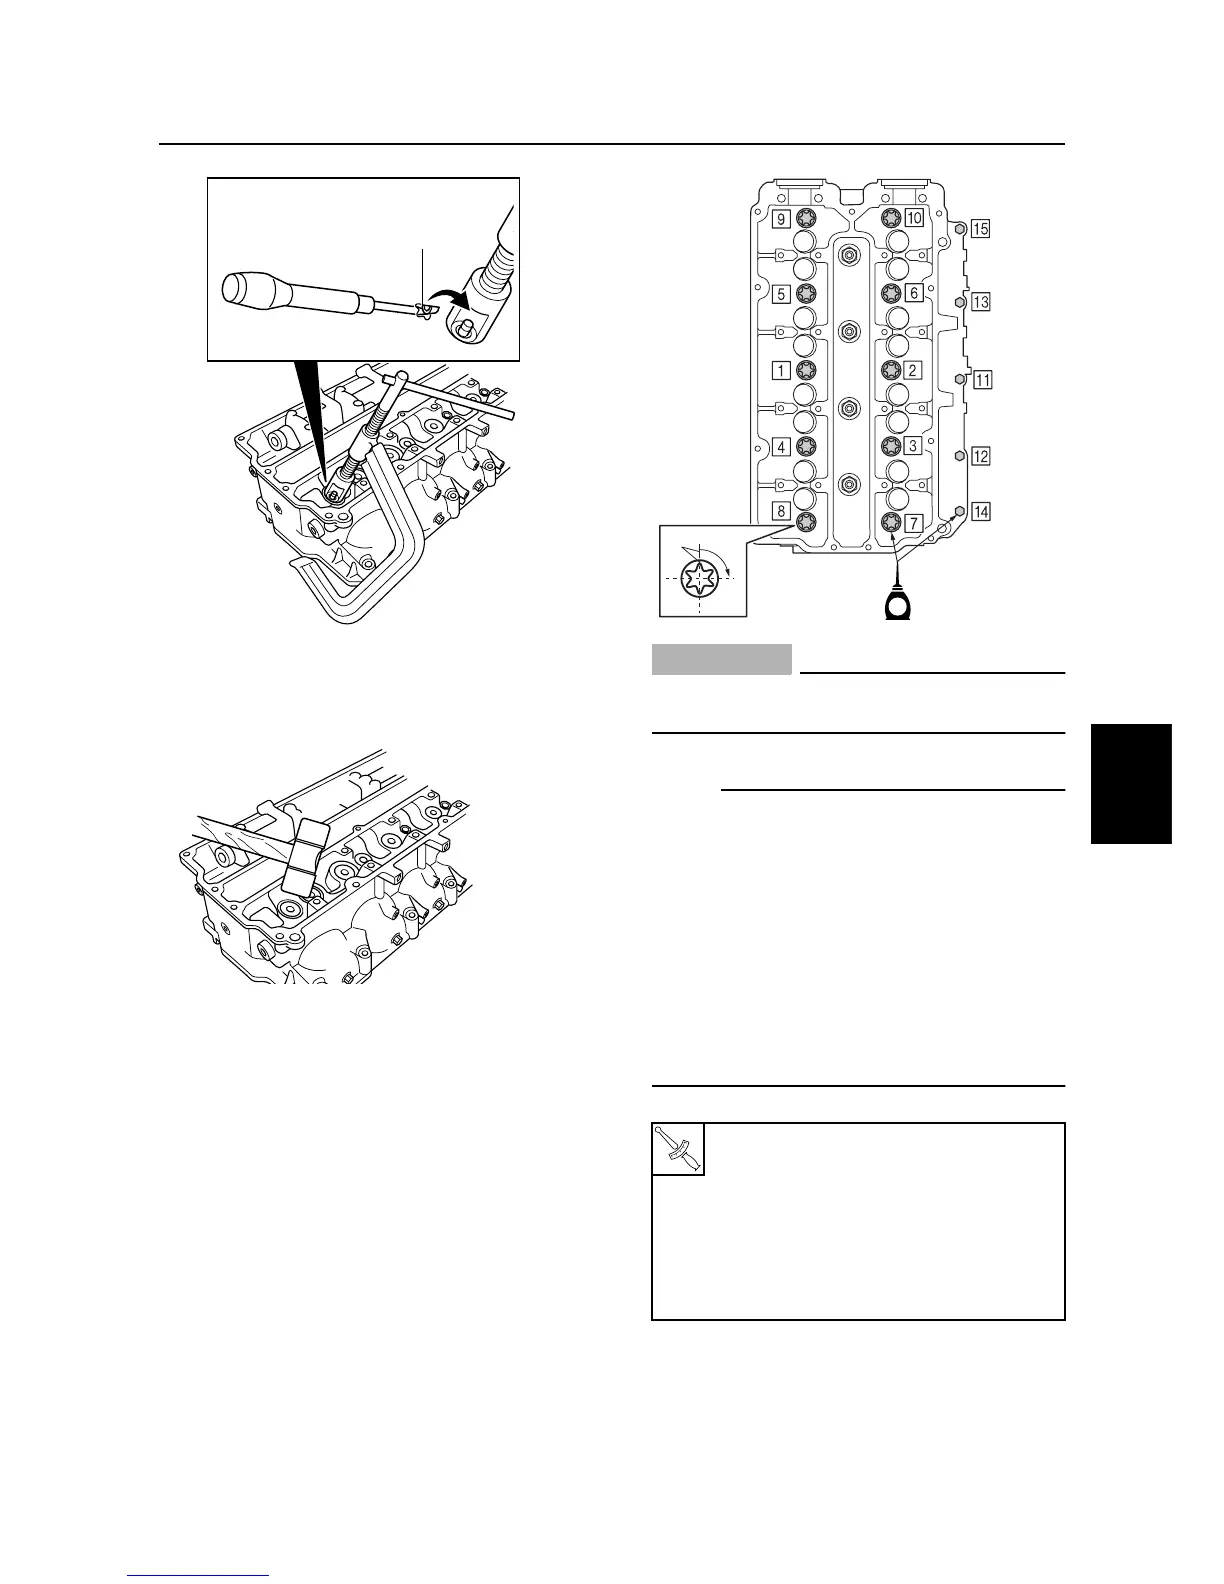
Installing the cylinder head
1. Check that the piston of cylinder #1 is at
TDC.
2. Install a new gasket and the cylinder
head, and then tighten the bolts to the
specified torques in the sequence
shown.
CAUTION:
Do not reuse the cylinder head gasket,
always replace it with a new one.
NOTE:
• Apply engine oil to the cylinder head bolts
before installation.
• Tighten the M10 bolts to the specified
torques in two stages first, and then tighten
the M8 bolts to 14 N·m (1.4 kgf·m, 10.3
ft·lb).
• Make a mark
a
on the M10 bolts and the
cylinder head, and then tighten the bolts
90° from the mark.
• Tighten the M8 bolts to 28 N·m (2.8 kgf·m,
20.7 ft·lb).
S60C5680
8
S60C5690
Cylinder head bolt (M10):
1st: 15 N·m (1.5 kgf·m, 11.1 ft·lb)
2nd: 30 N·m (3.0 kgf·m, 22.1 ft·lb)
3rd: 90°
Cylinder head bolt (M8):
1st: 14 N·m (1.4 kgf·m, 10.3 ft·lb)
2nd: 28 N·m (2.8 kgf·m, 20.7 ft·lb)
S6D85480
90˚
a
E
Cylinder head