LOWR
Lower unit
8-3
Removing the lower unit
• Make sure to disconnect the battery
cables from the battery, and remove the
clip from the engine shut-off switch.
• When removing the lower unit with the
power unit installed, make sure to sus-
pend the outboard motor. Otherwise, the
outboard motor could fall suddenly and
result in severe injuries.
• When loosening or tightening the pro-
peller nut, do not hold the propeller
using your hands.
1. Drain the gear oil. See steps 1–5 in
“Changing gear oil” (10-11).
2. Remove the cotter pin.
3. Set the gear shift to the N position.
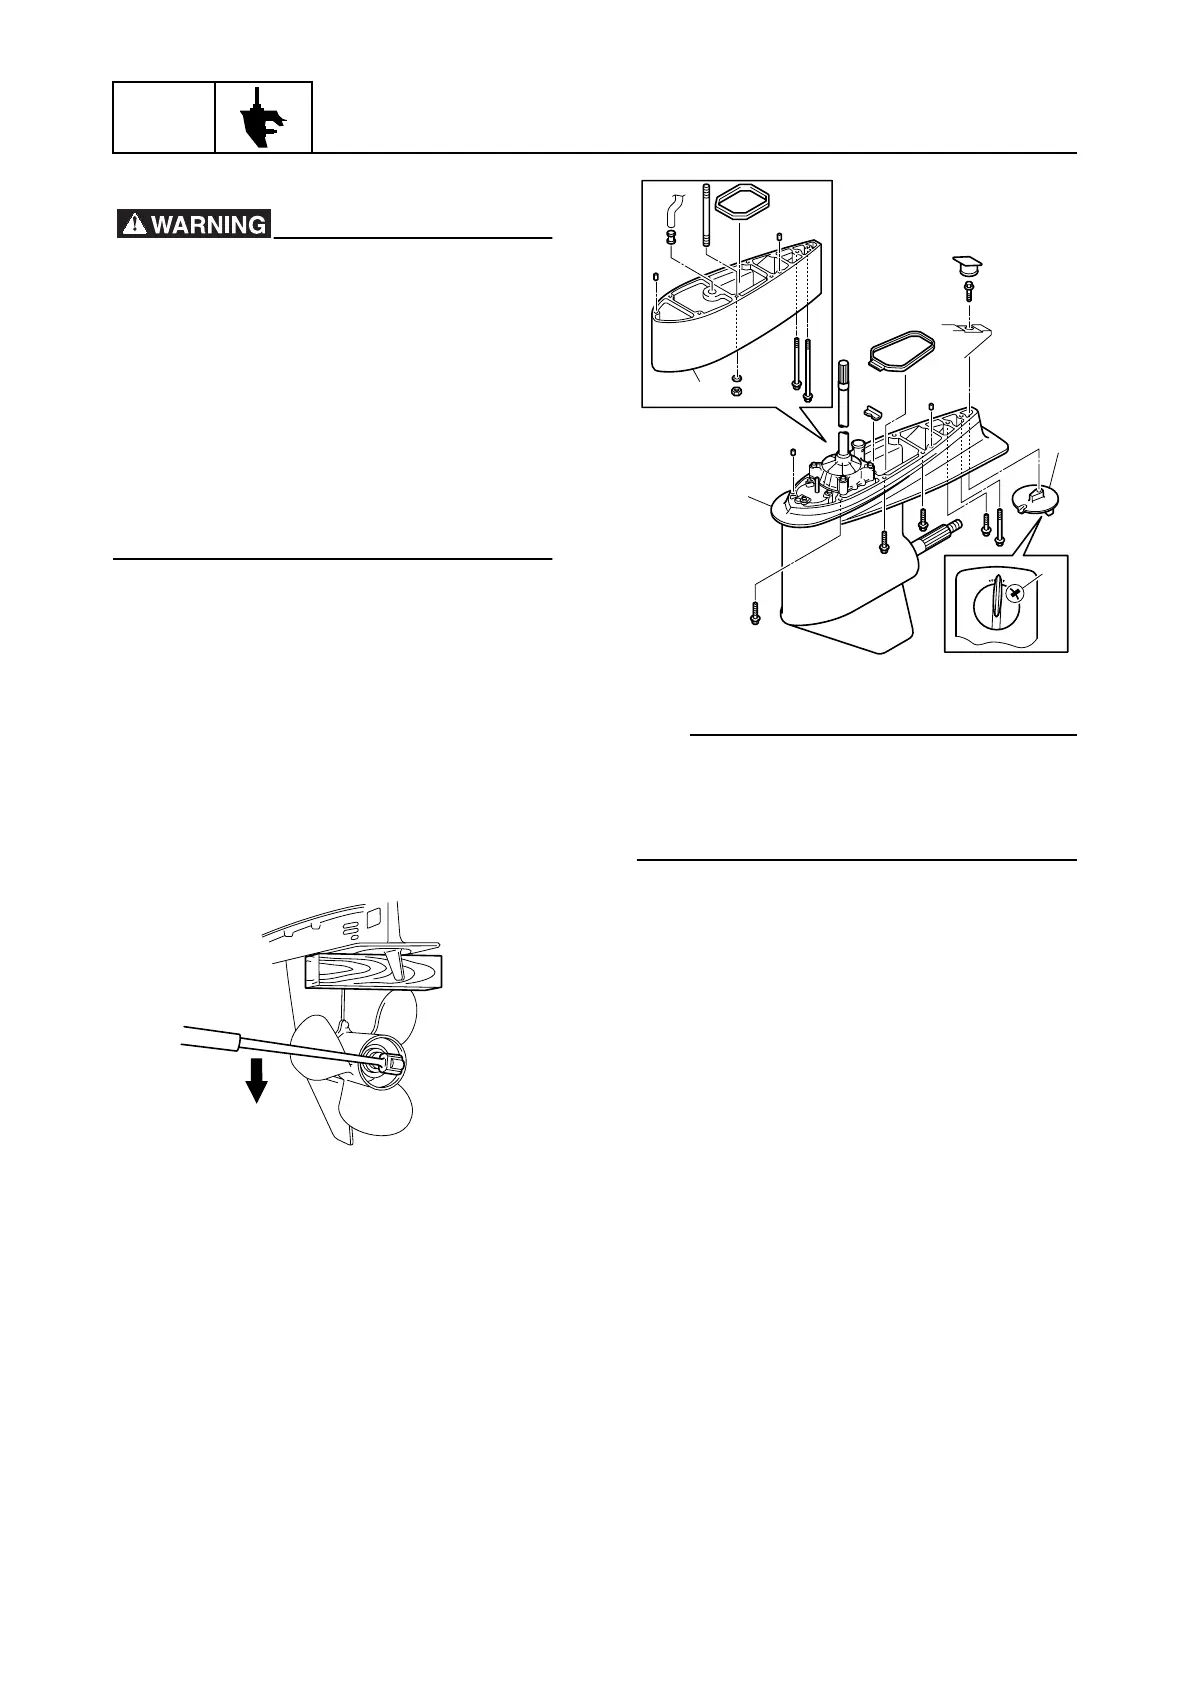
4. Place a block of wood between the anti-
cavitation plate and the propeller to keep
the propeller from turning, and then
remove the propeller nut and propeller.
5. Make a mark a on the trim tab 1 and
lower case, and then remove the trim
tab.
6. Remove the lower unit 2 and extension
3 (U-transom model).
È U-transom model
TIP:
When disassembling the lower unit, measure
the backlash before disassembly. See “Mea-
suring the forward gear backlash and reverse
gear backlash before disassembly” (8-40).
Checking the propeller
1. Check the propeller blades and splines.
Replace the propeller if cracked, dam-
aged, or worn.
Checking the lower unit anode
1. Check the trim tab. Replace if eroded.
Clean if there is grease, oil, or scales.
NOTICE: Do not apply grease, oil, or
paint to the trim tab.
1
3
2
È
a


 To Next Page