User Guide for T4 Series IP Phones
60
Configuring the SNTP Setting
Procedure:
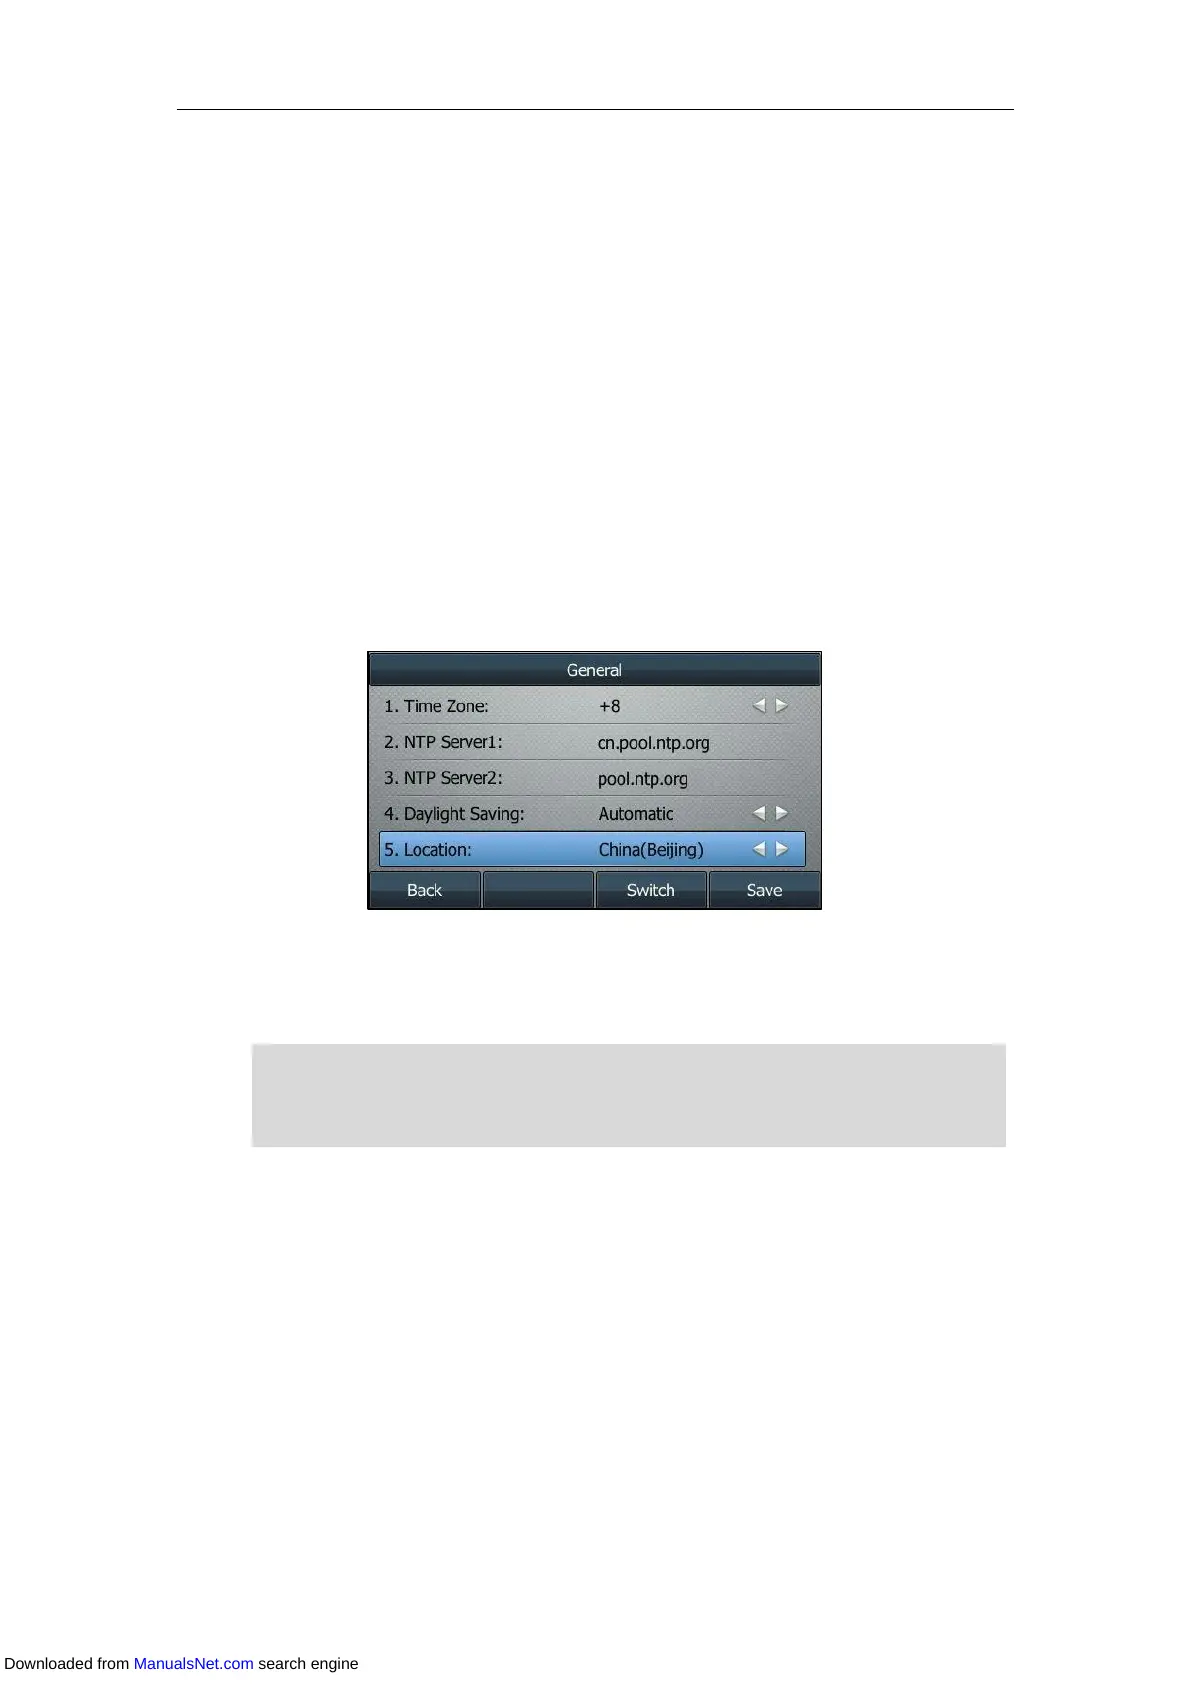
1. Navigate to Menu->Basic->Time & Date->General->SNTP Settings.
For the SIP-T48S/T48G IP phones, navigate to Menu->Basic->Time & Date->General.
And then select SNTP Settings from the pull-down list of Type.
For the SIP-T42S/T42G/T41S/T41P/T40G/T40P IP phone, navigate to
Menu->Settings->Basic Settings->Time & Date->SNTP Settings.
2. Select the time zone that applies to your area from the Time Zone field.
3. Enter the domain name or IP address of SNTP server in the NTP Server1 and NTP Server2
field respectively.
4. Select the desired value from the Daylight Saving field.
5. Select the desired time zone name from the Location field.
This field appears only if Daylight Saving field is selected to Automatic.
6. Press Save.
SNTP Setting is configurable via web user interface at the path Settings->Time & Date.
Note
Please refer to Appendix A – Time Zones for the list of available time zones on the IP phone.
If the phone cannot obtain the time and date from the Simple Network Time Protocol (SNTP)
server, contact your system administrator for more information.
Downloaded from ManualsNet.com search engine
 Loading...