52
Cooling Circuit
3.3 Valves
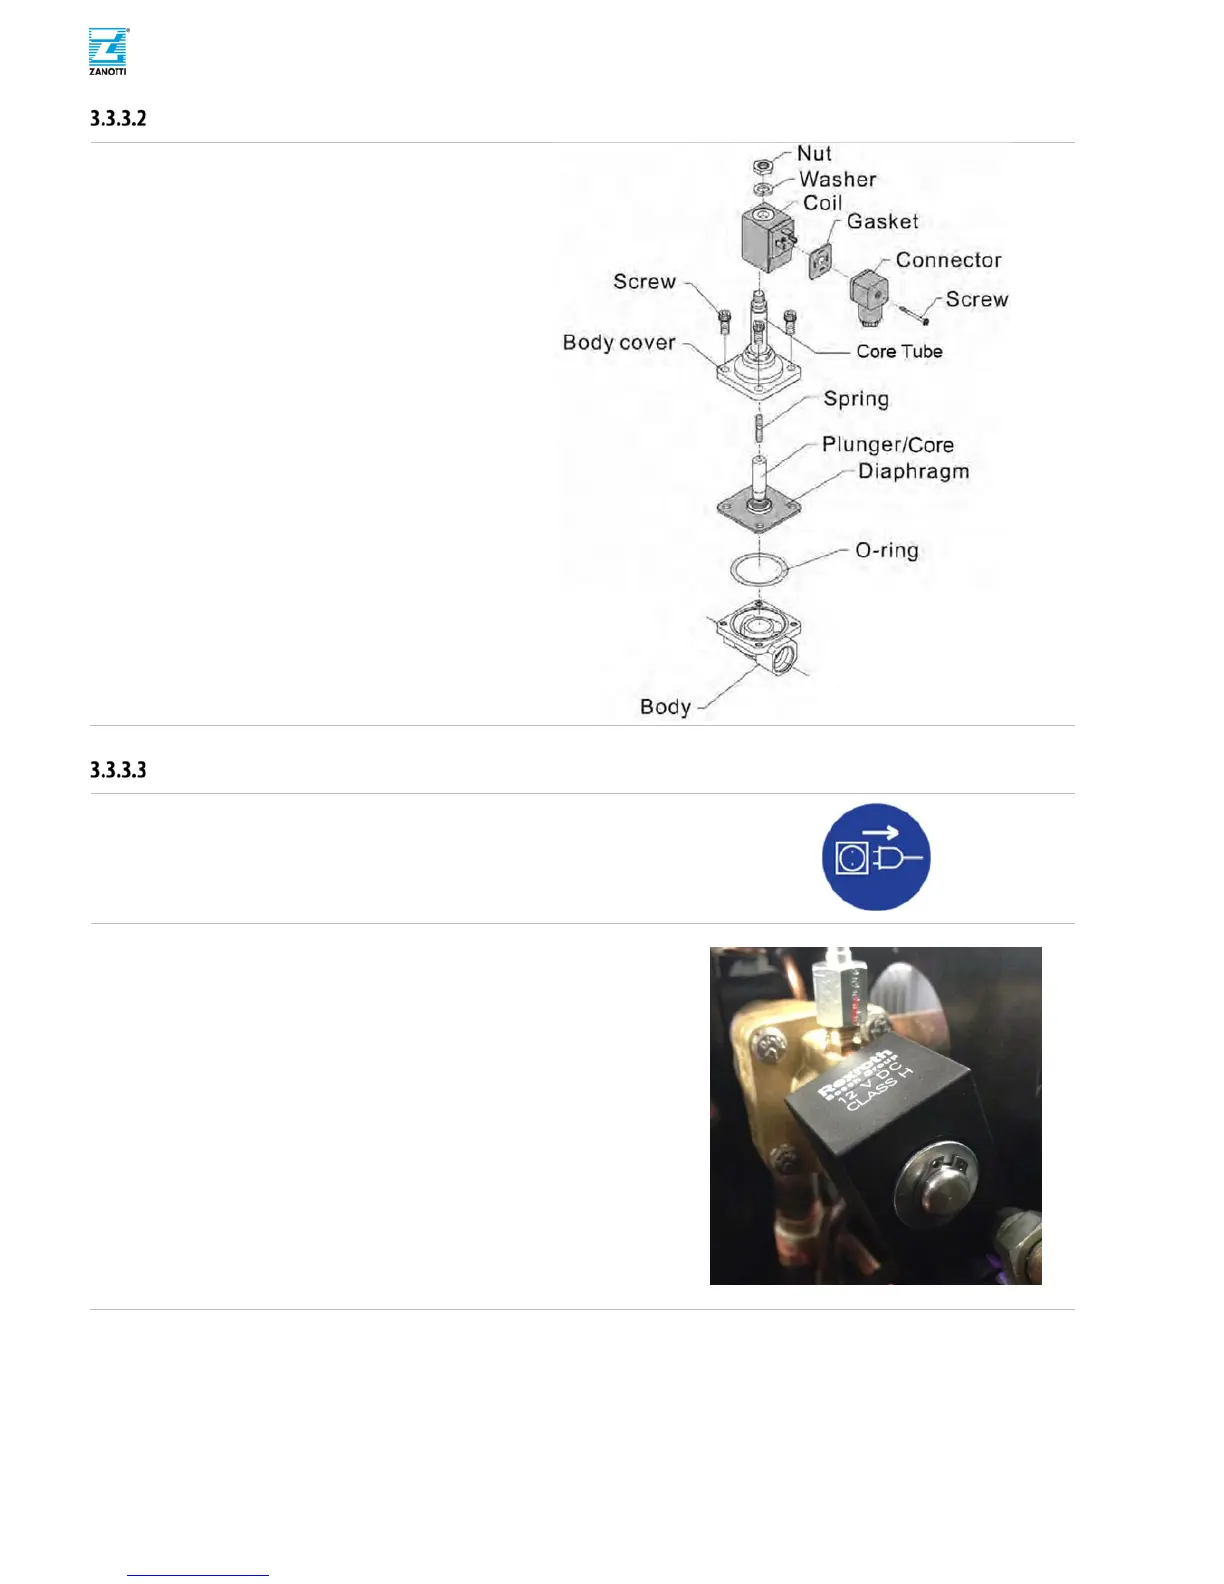
Valve Disassemble
(a)
Remove fixing nut and coil.
(b)
Unscrew cover from valve body.
(r)
CAUT
ION
!
Valve cover holds a
compress
ed spring! It may hump out by itself.
(c)
Remove and inspect valve diaphragm and
plunger.
(d)
Remove and check O-ring.
(e)
Visually check for dirt and clean inside
valve.
(f)
Assemble valve Cover, Spring and
Diaphr
agm Core
.
(g)
Place O-ring in position and screw Valve
cover assembly.
CAUT
ION
!
Lubricate O-ring with POE32
oil befo
re.
YS 3-Way Replacement
(a)
Disconnect unit from electrical supplies (Battery and Main).
(b)
Open unit door and right or refrigeration side cover and fold down
electri
cal Box.
(c)
Recover Refrigerant 3.2.2 Section.
(d)
Remove solenoid coil from valve releasing fixing nut or seeger
ring.
(e)
Disconnect equalization line from valve.
(f)
Release valve from plastic bracket.
CAUT
ION
!
Dismount valve sup- port avoiding melting and
burni
ng problems.
 Loading...