Motor and Drive System
Controller 30-41
30
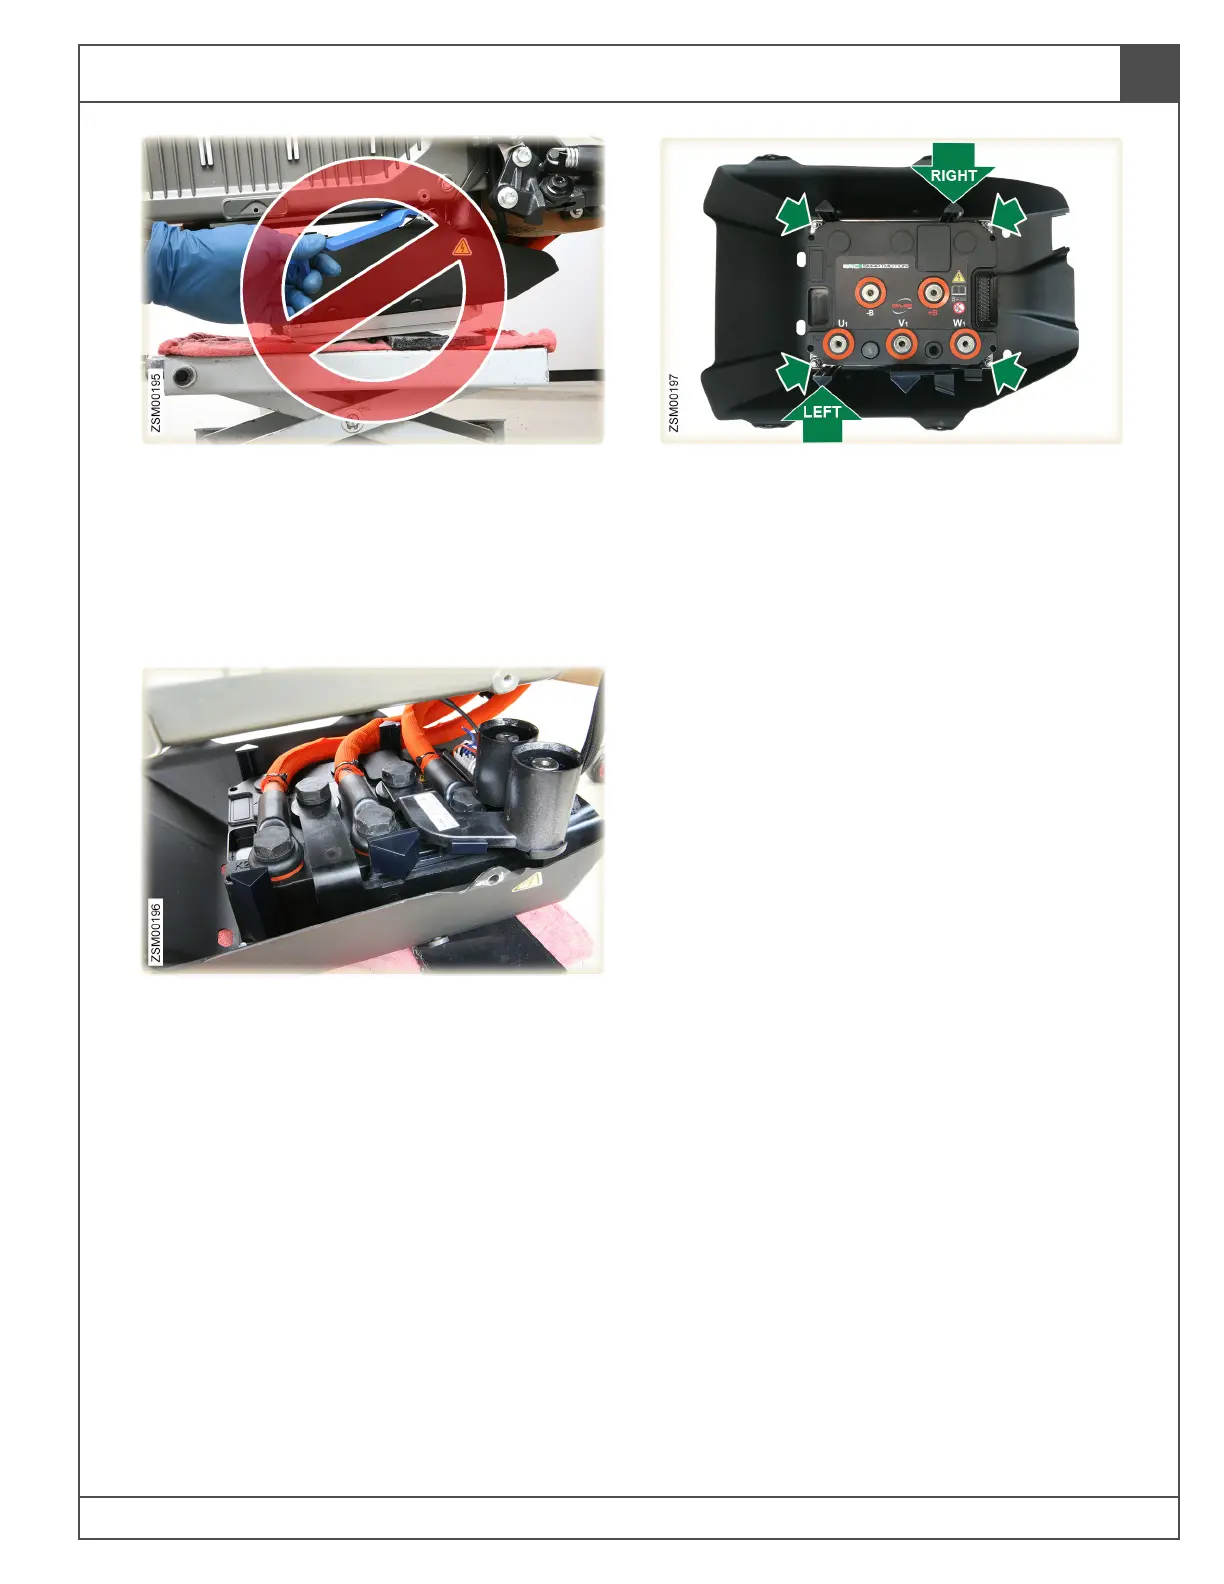
14. Using a non-marring pry tool, carefully pry the
controller assembly straight down. Alternate
from right to left. Alternating from side to side,
carefully pry between the controller carrier
and the power pack, to evenly release the
controller busbars from the power pack.
Note: This process will take a few minutes.
15. With the controller assembly released from the
power pack, lower the jack to gain access to
the fasteners.
16. Remove bolts (x4) and nuts (x4) securing the
controller to the controller carrier. Collect the
plastic controller safety stands (left and right)
and washers (x4). Tools: T30 (bolts) and
10mm wrench (nuts). Torque: 8 lb-ft (11 Nm).
17. Remove controller carrier from controller.
Installation
1. Installation is the reverse of the removal
procedure.