Power Pack
Power Pack 20-13
20
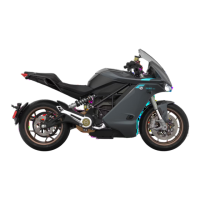
18. Torque the BMS header clamp bolts (x2) and
washers (x2). Tool: T20. Torque: 12 in-lb
(1.36 Nm).
Note: Hold header clamp completely still until
both bolts are seated and do not touch the flex
ribbon. Seating the pins in a controlled
manner is critical.
19. If the LEDs on the front of the BMS (located
under the test port) are blinking red, it is
possible that the pins are not seated correctly
and may require realignment. If realignment is
necessary, loosen the bolts (x2) securing the
header clamp and go back to step 17 and pick
a new position for the header clamp, then
hold the reset buttons (located above the
TEST port on the BMS) at the same time, for
5 seconds. Tool: T20.
20. If the BMS works after the installation, go to
step 25. If the BMS doesn’t work after
installation, continue to the following step.
21. Do not remove, but loosen bolts (x2) and flat
washers (x2) securing the header clamp to the
lower battery cell. Tool: T20.
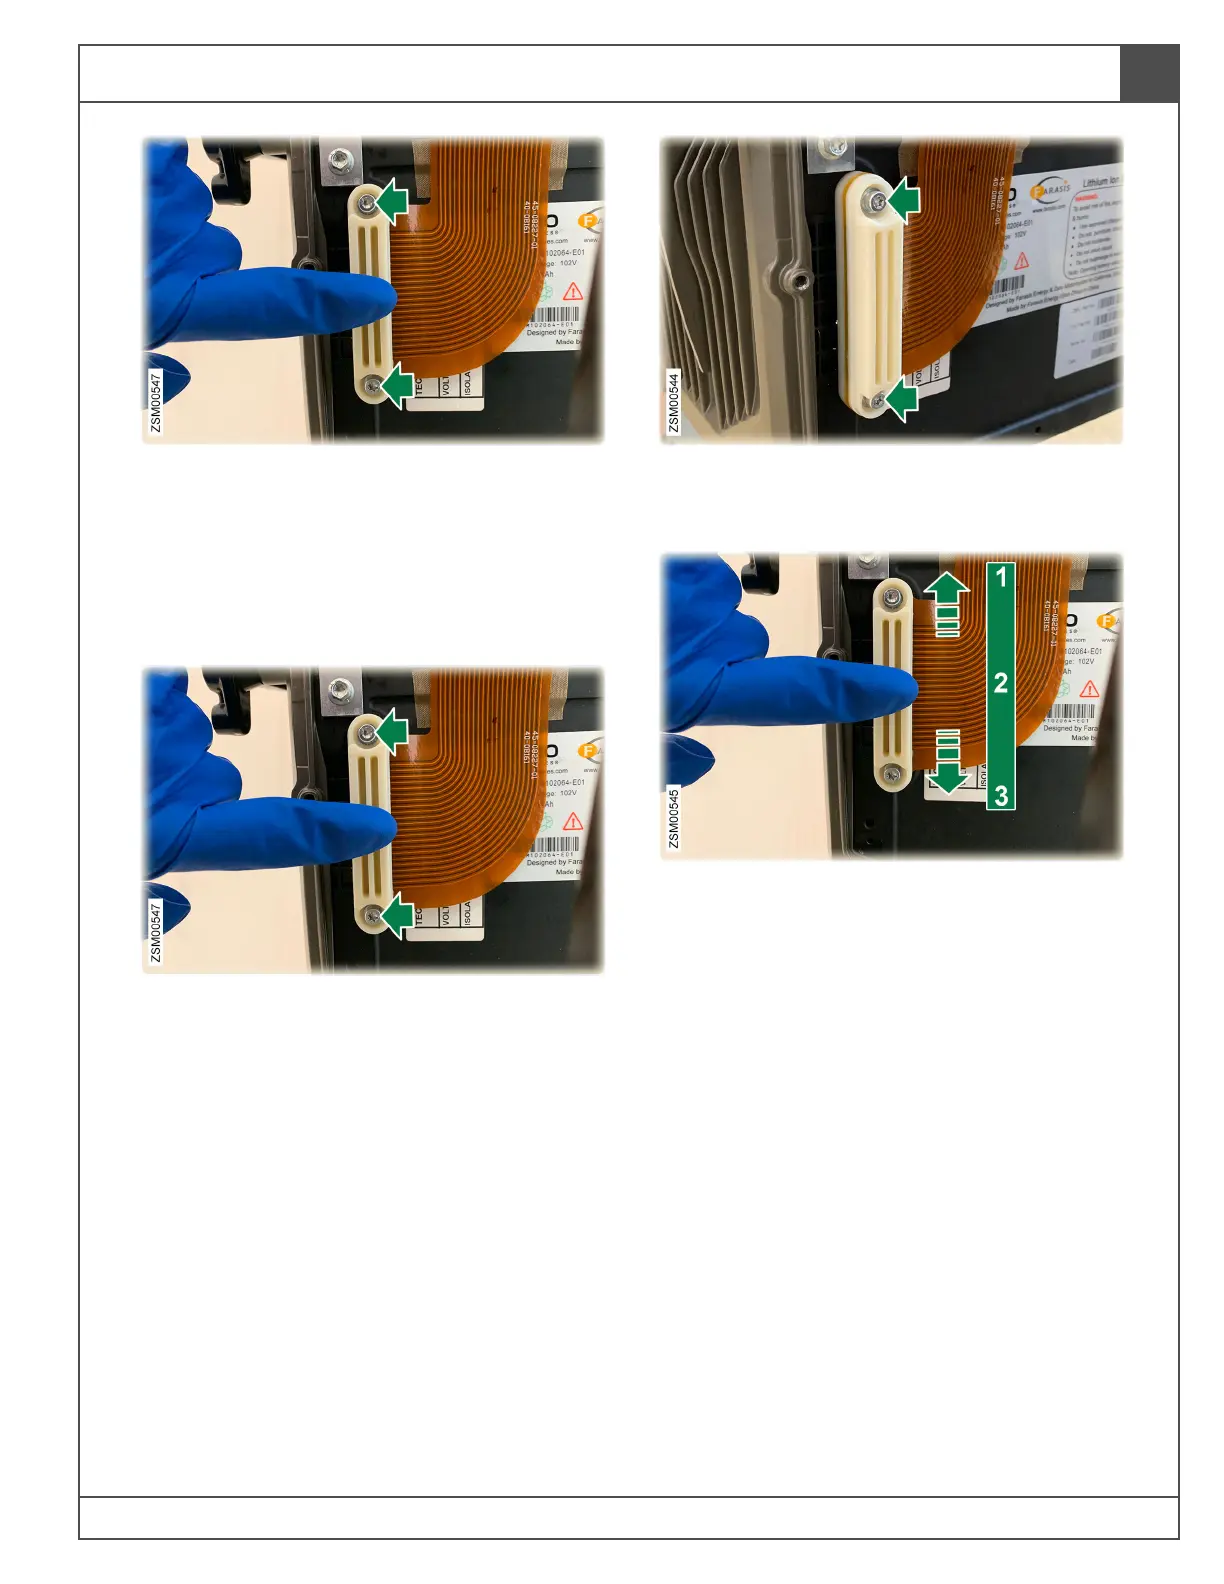
22. Pick a new position; 1, 2, or 3. The flex ribbon
cable pins may require realignment during the
installation process. There are three possible
positions for the header clamp (1: left, 2:
center, and 3: right). Align header clamp and
use a finger to hold desired position, then
tighten clamp bolts (x2) and flat washers (x2)
evenly.
Note: Tightening bolts evenly keeps the pins
aligned.
23. If the BMS doesn’t work, go back to step 21
and repeat the process in a different alignment
position, or go to the next step.
24. If you’ve exhausted all 3 positions of the BMS
flex ribbon header clamp, email Zero
Motorcycles Customer Service department.
• North America:
support@zeromotorcycles.com
• Zero Motorcycles Europe:
service.eu@zeromotorcycles.com