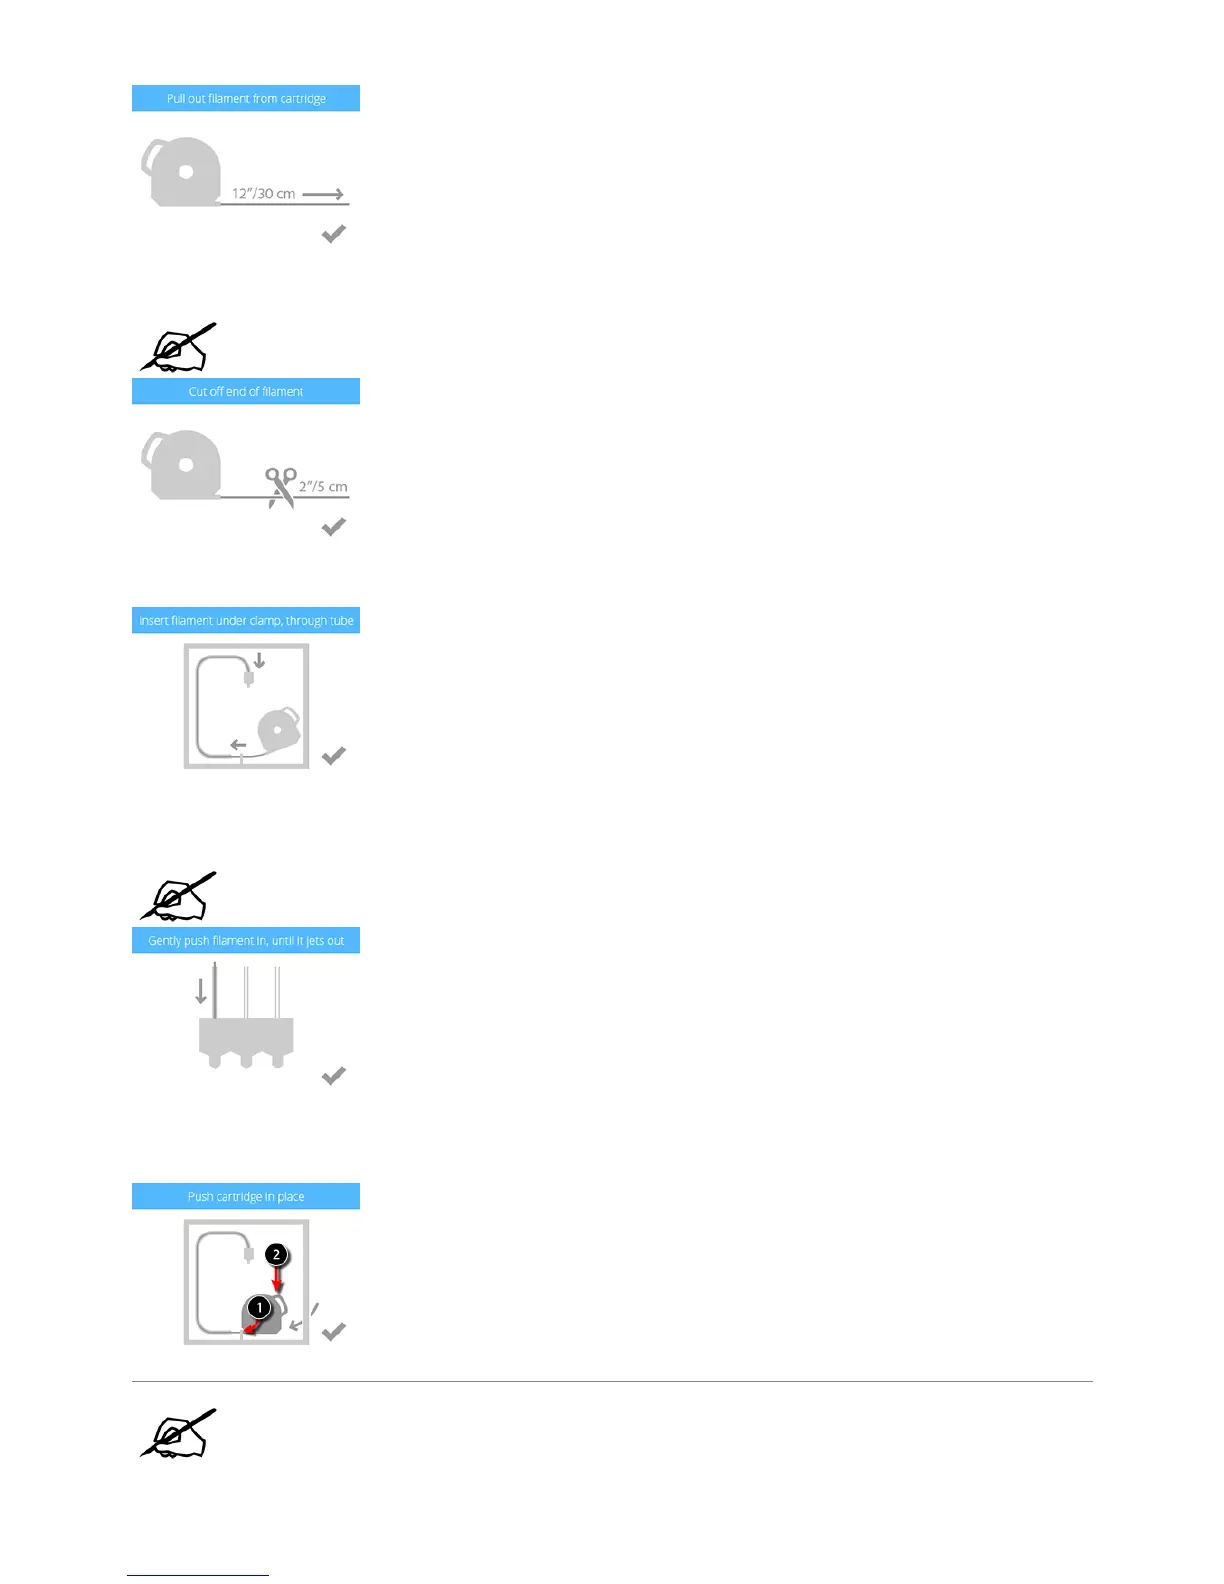
Cut off 2”/5 cm of print material from the end. Select the checkmark to continue.14.
NOTE: Ensure the material is not bent or creased. If the material is not straight, pull
out the damaged material from the cartridge. Cut off and dispose the portion that is
not straight.
Insert the print material under the cartridge clamp roller of cartridge bay 1 and into the material tube. Select the checkmark to continue.15.
Continue to manually feed the print material through the material tube until it begins to extrude from print jet 1 into the jet wiper assembly. Select the16.
checkmark to continue.
NOTE: When the material reaches far enough into the extruder, the extruder motor
will assist with feeding the material further into the print jet.
(1) Push the front of the cartridge into place. (2) Then, push the cartridge handle downward until the cartridge is fully seated in its cartridge bay mount.17.
Select the checkmark to continue.
NOTE: Ensure the front of the cartridge (A) where the material exits is seated under
the clamp roller and between the vertical alignment pins in the cartridge bay.