Apply two thin layers of Cube Glue to the print pad in an area of 50 mm x 50 mm. Select the checkmark to continue.6.
NOTE: For more information, refer to the section titled Applying Cube Glue.
NOTE: It may take several minutes to print the file.
When finished, remove the print pad and verify the Level Gap.7.
NOTE: Refer to the sections titled Reading The Z-Gap Calibration Print and Reading
The Print Pad Level Calibration Print.
NOTE: If any adjustments are needed, perform this procedure again after making the
adjustments. Make sure all glue and plastic residues have been removed prior to
performing this procedure again.
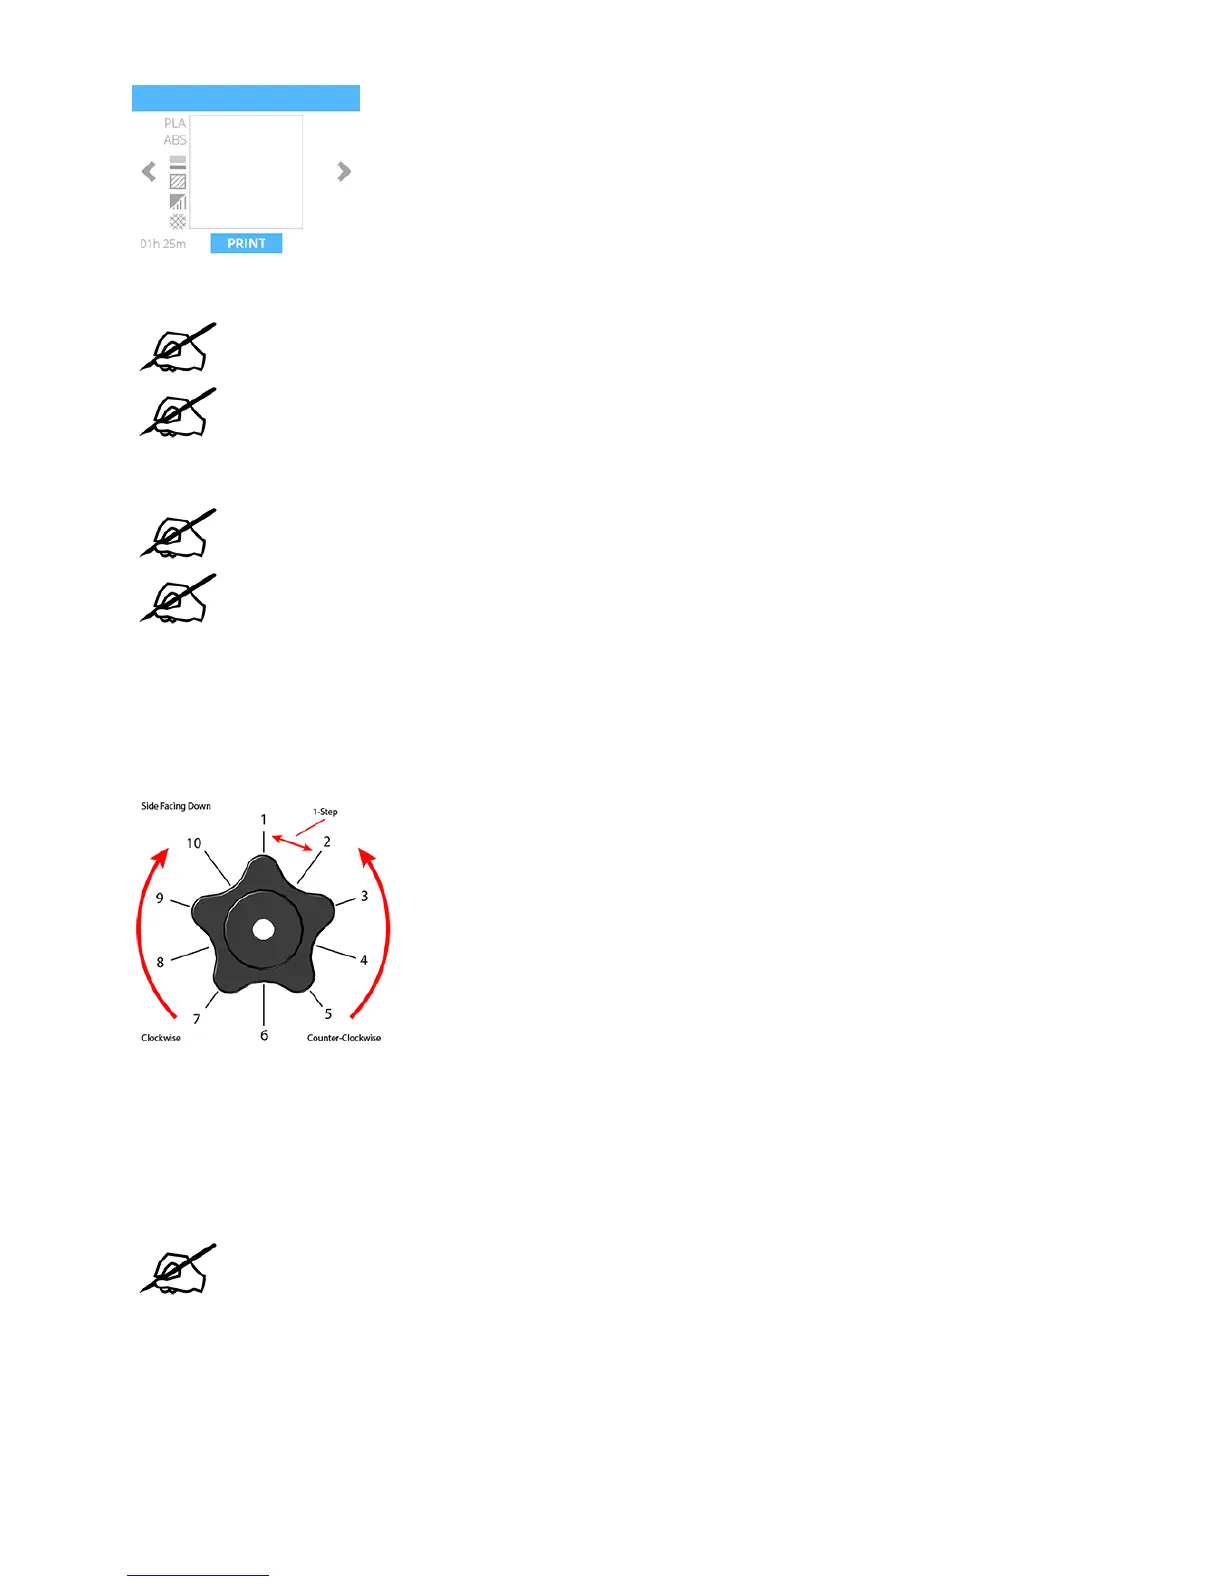
Adjustment Knob Measurement
Adjusting the level plate adjustment knob should initially be performed in 1-step increments. If a finer
adjustment becomes necessary, adjust the knobs in 1/2 step increments.
In the following illustration, the measurement between 1 and 2 is considered 1-step.
Adjusting the Z-Gap
The Z-Gap should be within specifications before adjusting the Level Gap. If adjustments to the Z-Gap are
necessary, perform the adjustments and then print the calibration file again to verify the correct Z-Gap. A
correct Z-Gap is indicated when there is no gap in the Closed Z-Gap measurement and there is a gap in
the Open Z-Gap measurement.
NOTE: The Closed Z-Gap (A) and the Open Z-Gap (B) are two different measurements
but should be read together.