Pg. 5
www.3xlogic.com | 877 3xLOGIC | helpdesk@3xlogic.com
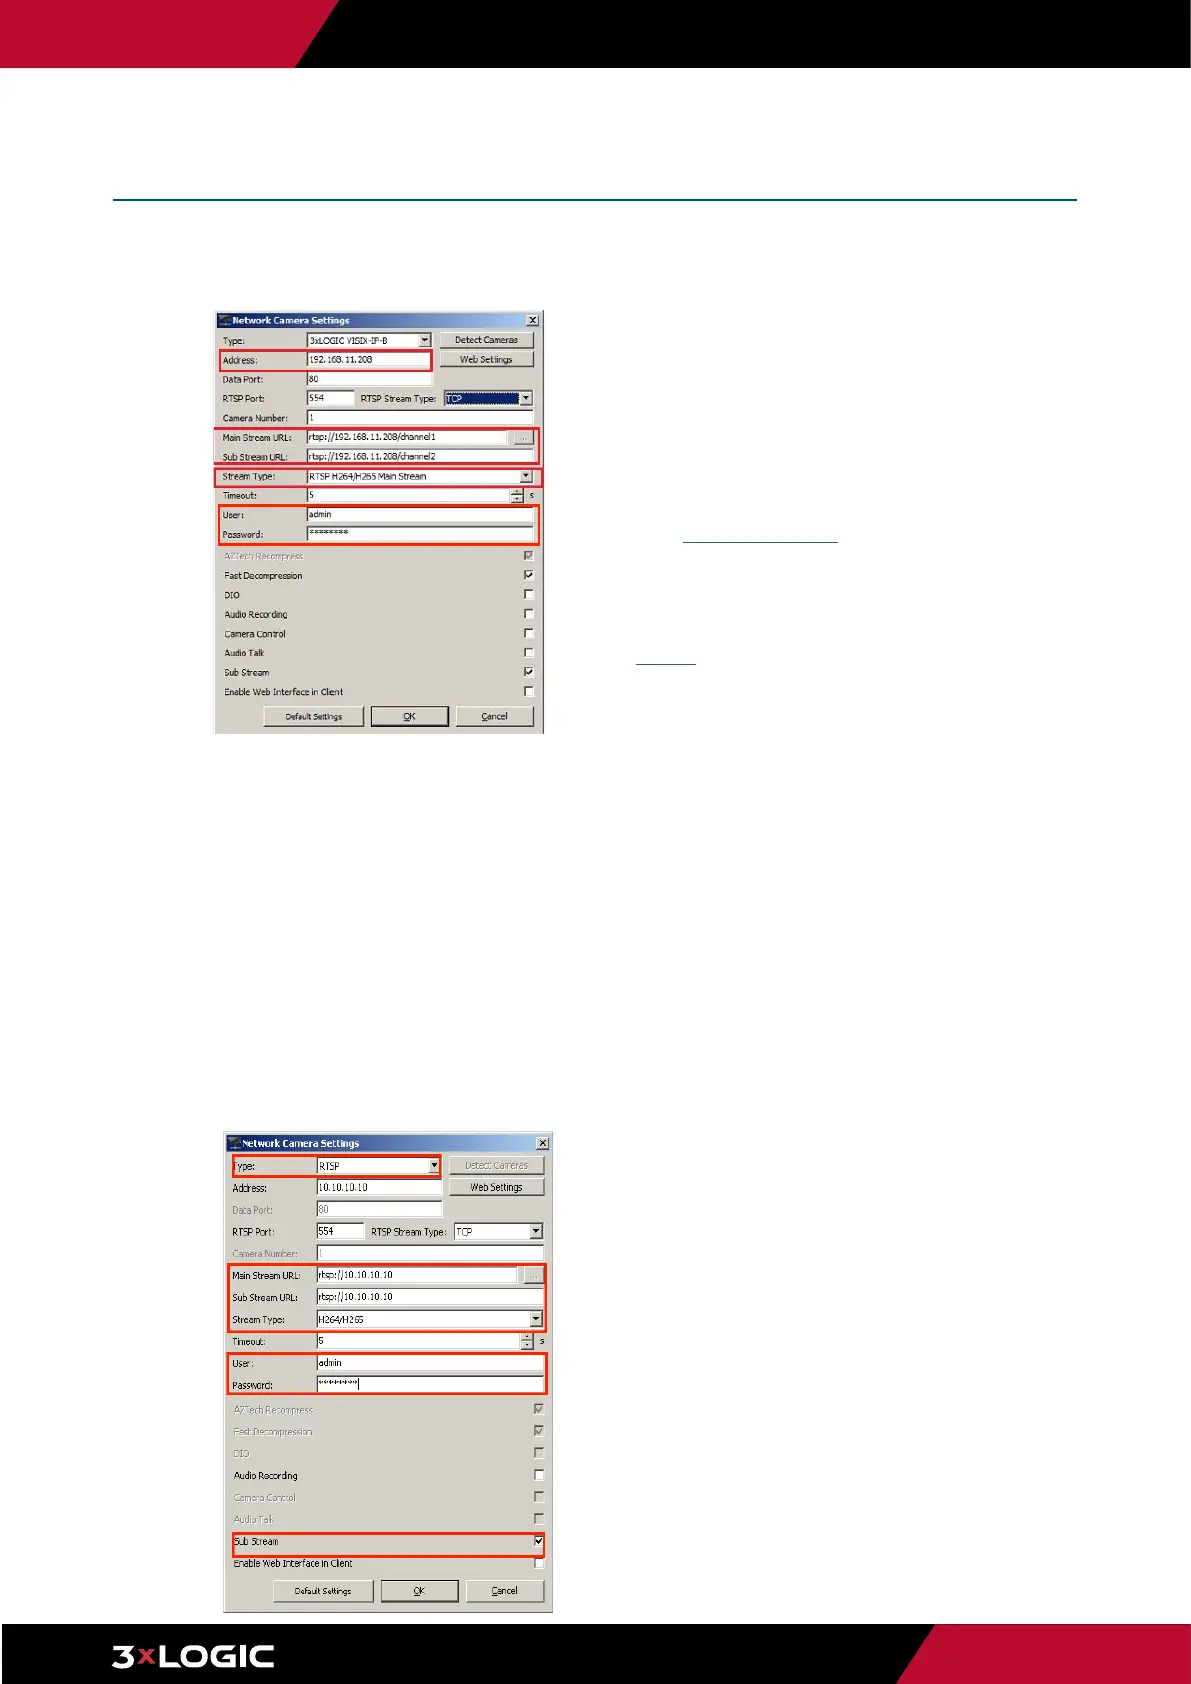
a. On VIGIL 11 series systems, select the camera from the utility list,
click Save to apply any new settings to the camera then click Save
to VIGIL. Camera information (highlighted in the below screenshot)
will be automatically added to the camera’s Network Settings form
in VIGIL Server.
b. On pre-v11 series systems, the information in the utility must be
used to manually fill out the Network Camera settings form in VIGIL
Server. Use the IP address and other available info for the camera
in the detection utility to fill out the following fields in the Network
Camera Settings form:
▪
Type: RTSP. (this setting was configured earlier in this section,
but be sure to confirm).
▪
Address: Enter the IP address of the camera as displayed in the
detection utility.
▪
Main Stream URL: rtsp://IP.ADDRESS/channel1
▪
Sub-Stream URL: rtsp://IP.ADDRESS/channel2 (this field may
be greyed out if the Substream box has not been toggled on).
▪
Stream Type: H264/H265
▪
User: admin
▪
Password : Use the new password you configured earlier in
this section.
▪
Sub Stream - Toggle this box to enable substream.
Quick Start -
Adding a VISIX Gen III Camera to VIGIL
xi. After the utility has auto filled the fields, or you have manually entered the
information, click the OK button. Set the Recording Speed fields to Set by
Camera and click OK or Apply. The camera will now be saved to VIGIL Server.
Your Camera should now be added to VIGIL Server and should
begin recording via motion detection automatically. View live ,
playback and more via VIGIL Client. See "Quick Setup - Viewing
the Camera in VIGIL Client" for more information.
Troubleshooting Tips
▪
Failure to Save Camera to VIGIL Server
Login to the camera and confirm the default username and password have been
changed. In keeping with modern security practices, the camera cannot be added
to VIGIL Server with the default credentials in place.
Be certain to install the latest available firmware available for the camera at the
3xloigc.com Software Download Center.
▪
- Delay, Frame Skipping When Live Viewing in VIGIL Client
/ VIGIL Server System High CPU Usage
Adjust the camera’s codec and resolution in the camera’s browser UI. This can be
especially helpful when cameras are interfaced with older VIGIL Server systems.
See SB 200008 for more information.
 Loading...