Refitting, motor axis 4
The procedure below details how to refit motor, axis 4.
NoteAction
DANGER
Turn off all:
• electric power supply to the robot
• hydraulic pressure supply to the robot
• air pressure supply to the robot
Before entering the robot working area.
1
Art. no. is specified in Required equip-
ment on page 292.
Make sure the o-ring on the circumference
of the motor is seated properly. Lightly lub-
ricate the o-ring with grease.
2
Connect to connector R2.MP4:
• +: pin 2
• -: pin 5
In order to release the brakes, connect the
24 VDC power supply.
3
xx1400000990
Foundry Plus:
Apply Loctite 574 flange sealant on the
contact surface.
4
Art. no. is specified in Required equip-
ment on page 292.
Fit the two guide pins in two of the motor
attachment holes.
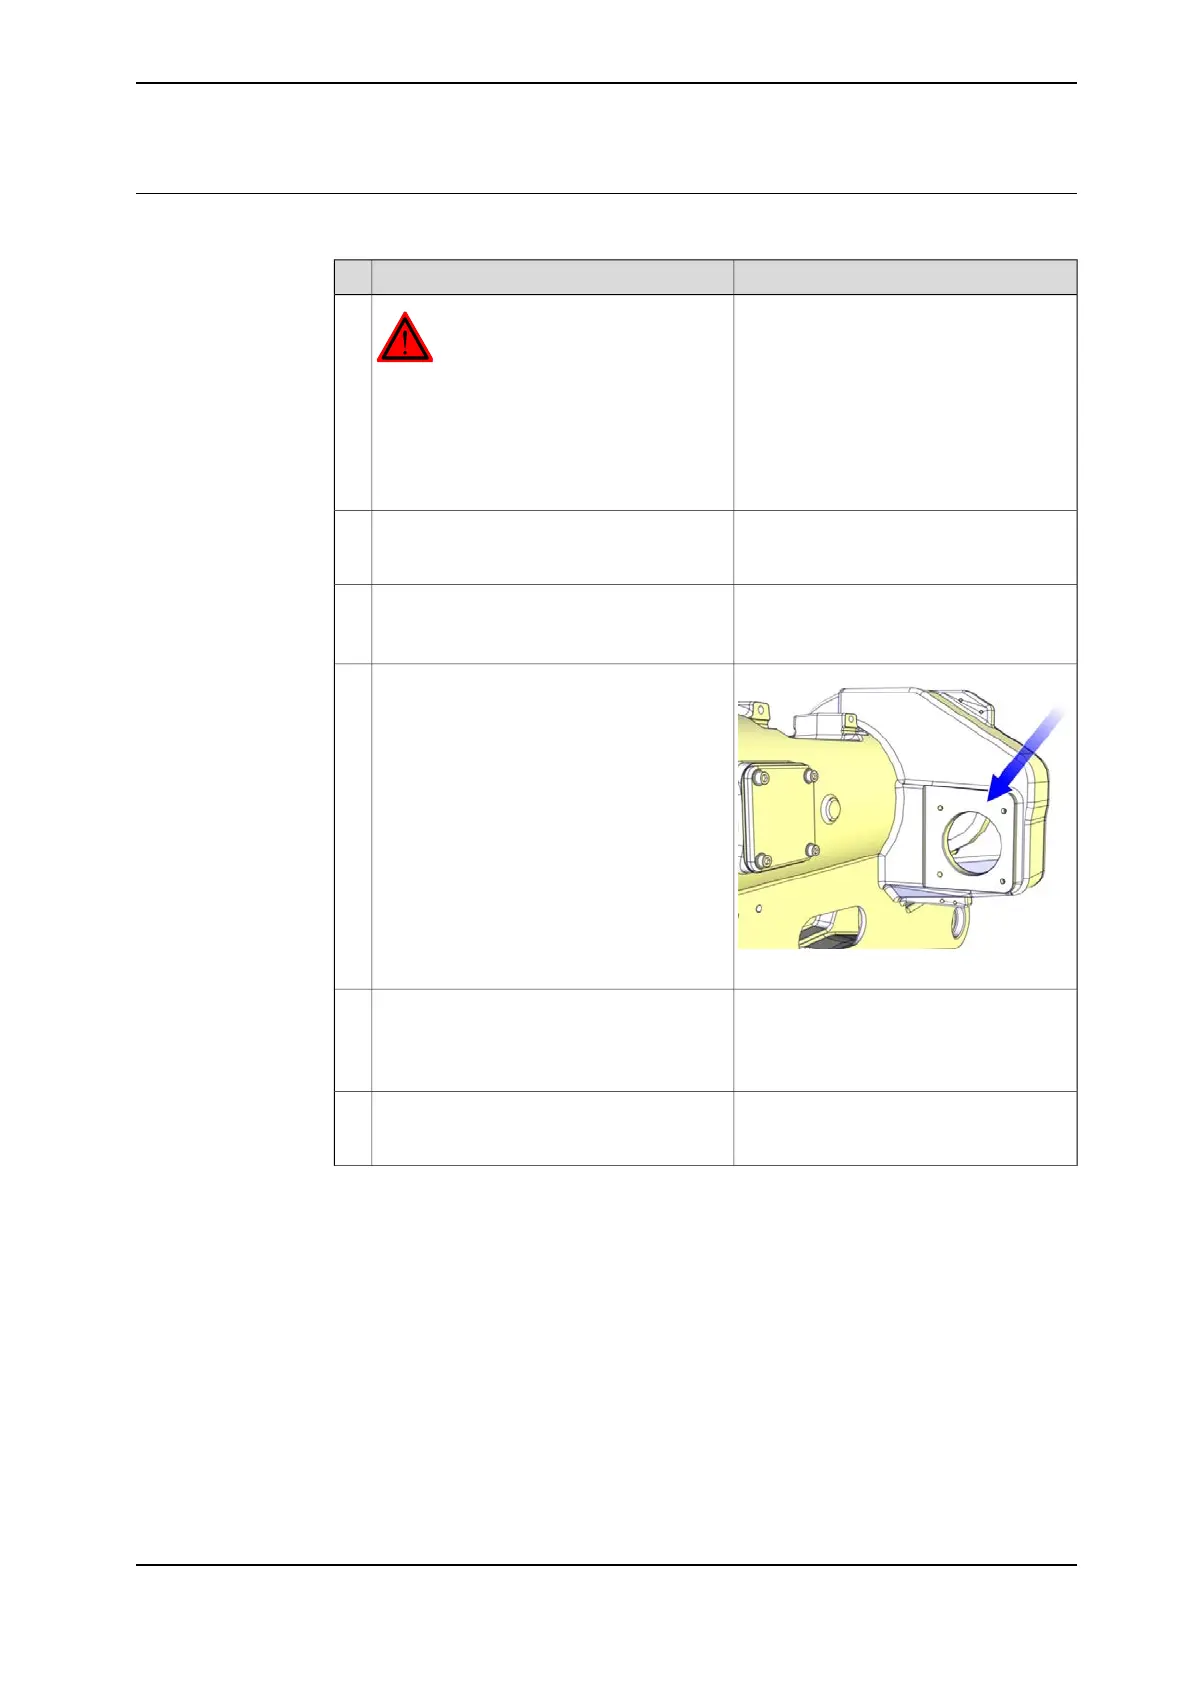
5
Shown in the figure Location of motor on
page 292.
Make sure the motor pinion does not get
damaged!
Fit the motor with guidance of the pins,
making sure the motor pinion is properly
mated to the gear of gearbox 4.
6
Continues on next page
Product manual - IRB 6660 295
3HAC028197-001 Revision: S
© Copyright 2007-2018 ABB. All rights reserved.
4 Repair
4.6.3 Replacement of motor, axis 4
Continued