EMC Tables
110 | ACIST RXi System User’s Guide 901700-001,01 2019-09 English
Appendix: Ao Interface Box
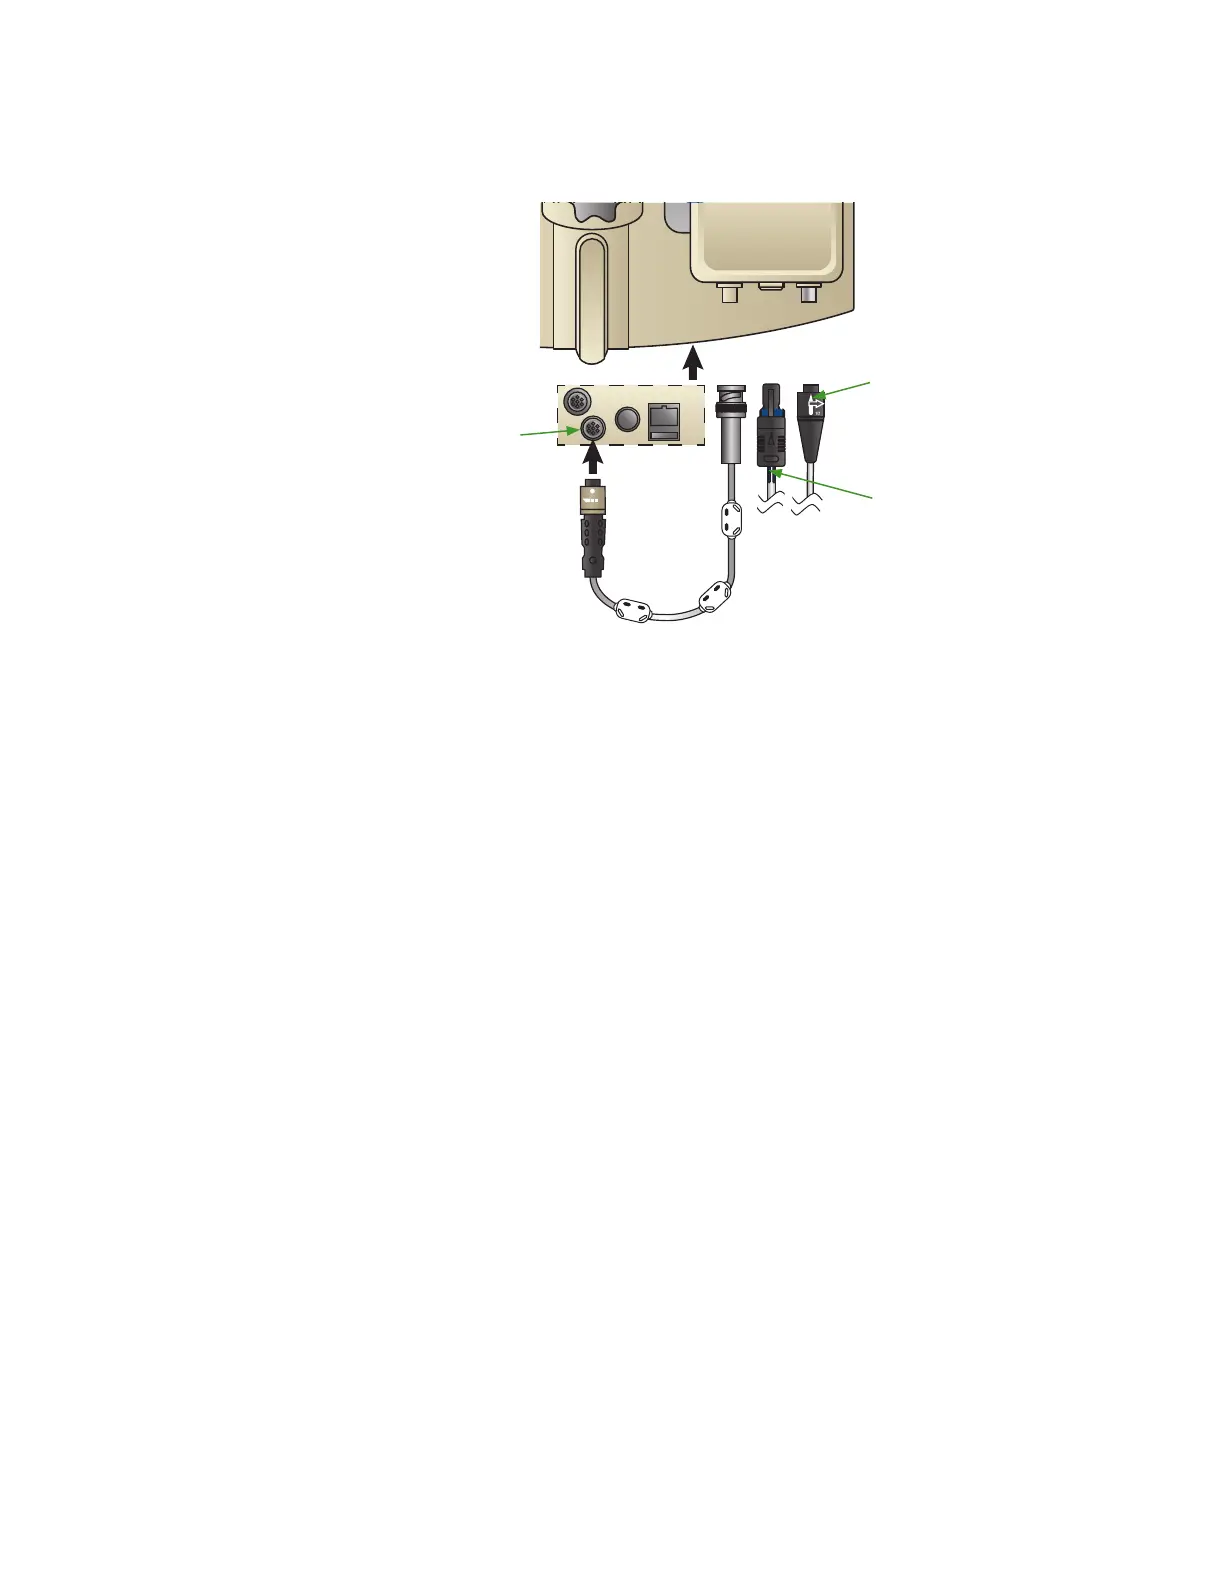
1. Insert the metal BNC connector (#1) on the short cable (PN 301764) to
connector #1 on the interface box. Twist to lock it in place.
1 2 3
1 2 3
To Hemo System
To Transducer
Gray
Connector
2. Connect the other end of the cable to the RXi Ao input connector as
shown in the illustration above. Push the connection until it clicks to lock
it in place.
3. Pull gently on each end of the cable to ensure they are fastened securely.
4. Attach the cable with the gray and blue connector to the middle connector
on the interface box (#2). Align the black arrow on the female end of the
cable connector with the gray arrow on the male connector on the box.
Push the connector in until it clicks to make the attachment secure. Pull
gently on the cable to ensure it is fastened securely.
5. Connect the other end of the cable to the cath lab invasive blood pressure
(IBP) transducer that would normally connect to the hemo system. Aer
making the connection, tug slightly on the connector (but do NOT
twist) to ensure the connection is locked.
6. Insert the black connector (#3) on the hemo cable into the rightmost
connector on the box by aligning the arrows on the connectors and
pushing to lock it into place. Aer making the connection, tug slightly on
the connector (but do NOT twist) to ensure the connection is locked.
7. Connect the other end of the cable to the hemo system into the position
that the aortic pressure input would normally connect.
 Loading...