14
INSTALLATIONCONFIGURATIONOPERATION
FURTHER
INFORMATION
INDEX
RECEIVER
TRANSMITTER
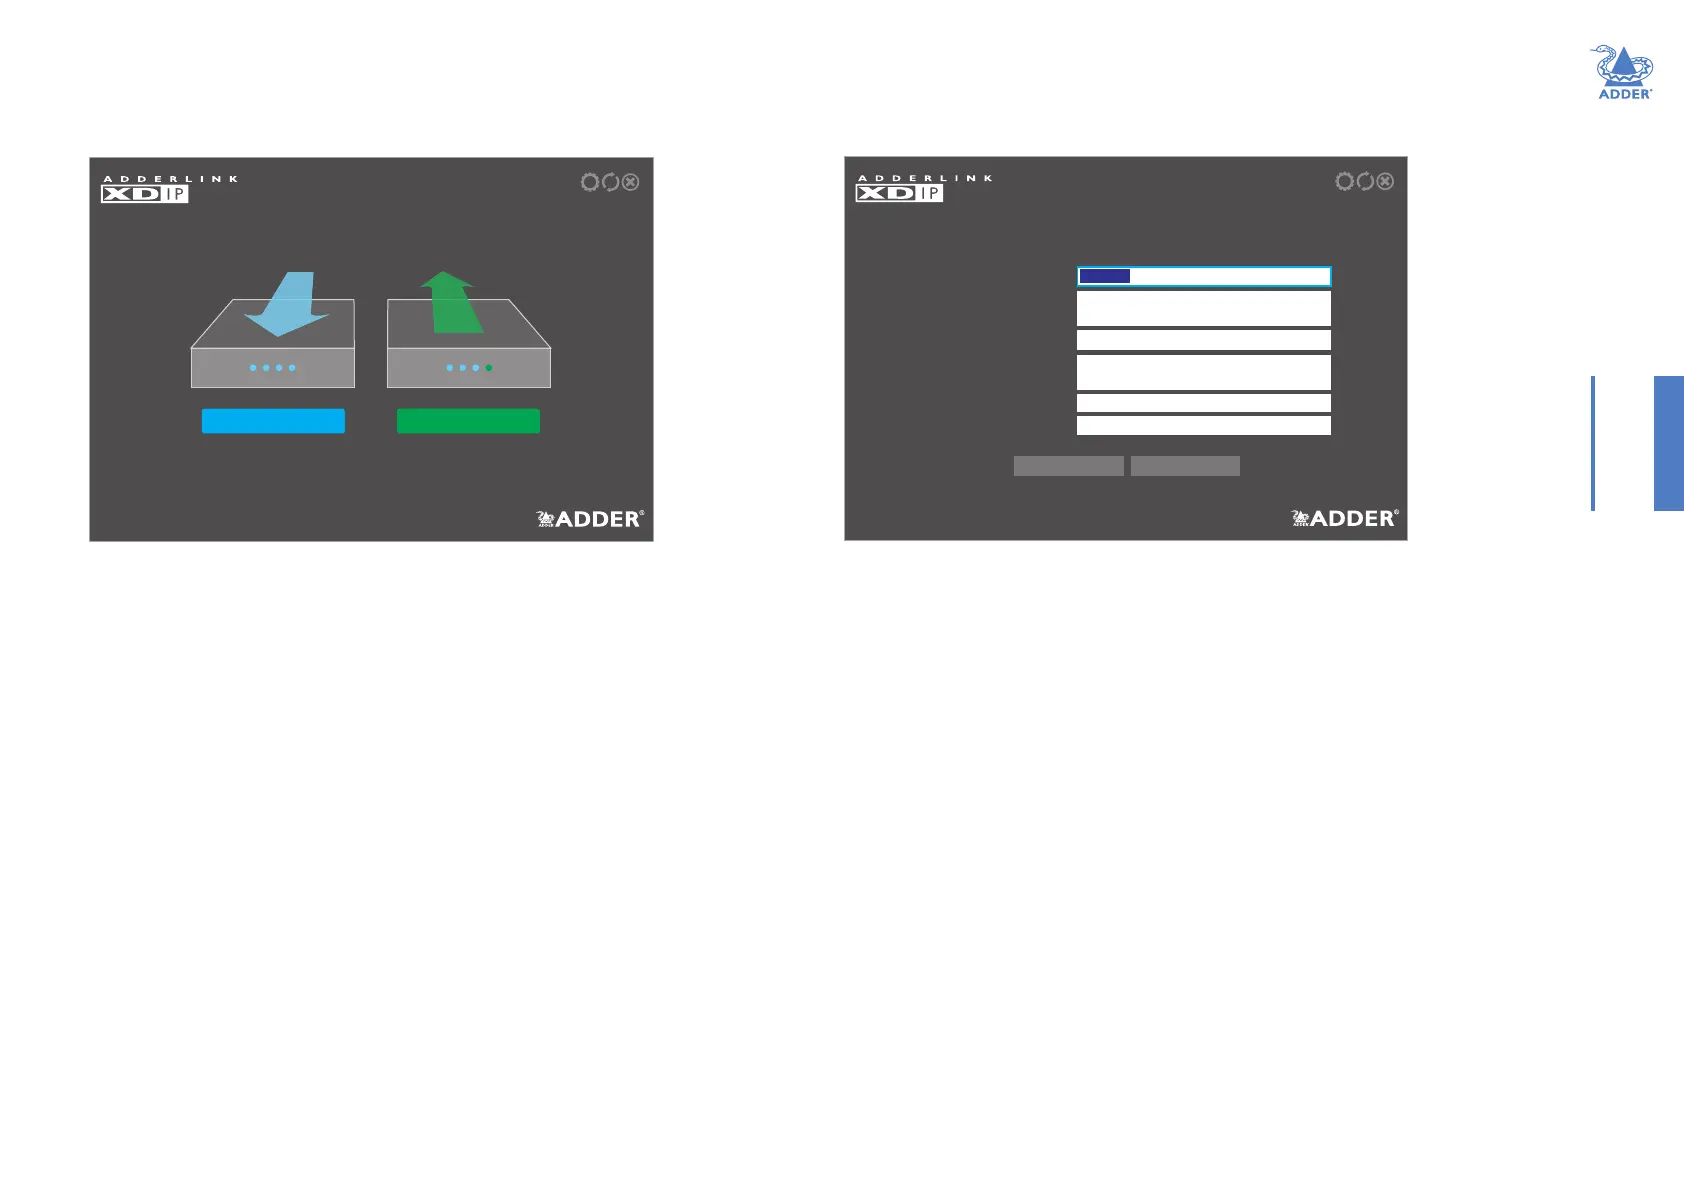
SETUP - Receiver or Transmitter?
Is this node a receiver or transmitter? After restoring to defaults
you can change this in the future.
Note:Whenusingthecongurationwizardtocreateafullinstallation,itisquickerandmore
efcienttocongurealltransmittersviaanodethatwillbecomeareceiver,ratherthan
conguringeachoftheintendedtransmittersseparately.
6 Choose the required setting:
• If you are setting up a mixture of receiver(s) and transmitter(s), click
the RECEIVER option.
• If you are creating a transmitter to add into an existing installation, click
the TRANSMITTER option. See page 17.
SETUP - Basic Information
Enter the names, descriptions and admin password for this
receiver.
Receiver Name
Receiver Description
Computer Name
Computer Description
NewAdmin Password
Confirm Admin Password
Description
Local Computer
Description
Password for Node Configuration
Password for Node Configuration
Receiver 1
Cancel OK
If you chose the RECEIVER option, you will now be given the opportunity to enter
details for the node to which your console peripherals are currently connected:
You will now be given a choice of turning this Start of Life node into either a receiver
or a transmitter:
7 Enter the details for this receiver, including the password (required to administer the
conguration details). The Computer Name/Description elds refer to a local computer
connected directly to this receiver, if present.
Note: Passwords can be left blank, but this is not recommended.
8 Click OK.
INITIAL CONFIGURATION (continued)
continued