4-Channel Digital Video Recorder
13
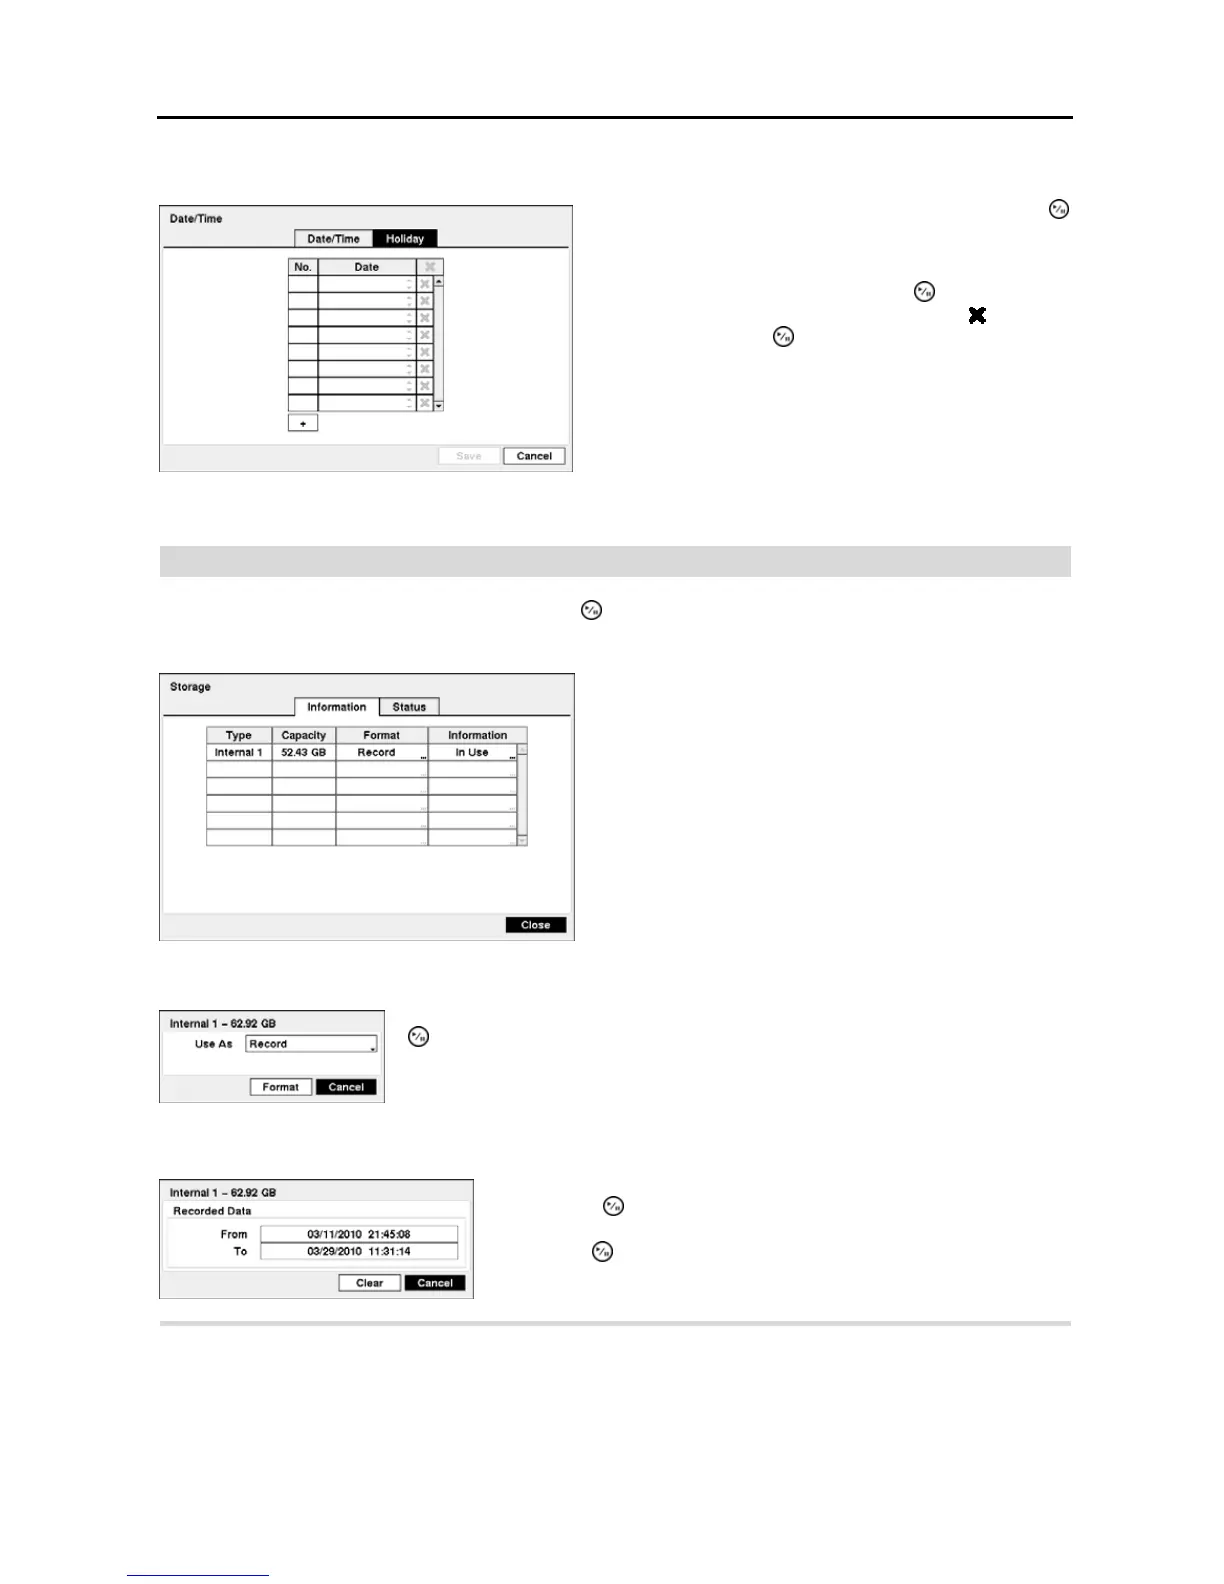
Highlight the Holiday tab, and the Holiday setup screen appears.
Storage
Highlight Storage in the System menu and press the button. The Storage setup screen appears and displays
information about the DVR’s storage devices.
The Information column displays whether the device is being used or not. Other indicates the device has been used
for another DVR.
Highlight the Status tab, and the Storage Status setup screen displays.
Figure 11 ─ Holiday setup screen.
You can set up holidays by highlighting
+
and pressing the
button. The current date appears.
Highlight the month and day and change them by using the
Up and Down arrow buttons. Press the
button to add the
date. Dates can be deleted by highlighting the
beside the
date and pressing the
button.
NOTE: Holidays that do not fall on the same date each
year should be updated once the current year’s holiday
has passed.
Figure 12 ─ Storage Information setup screen.
The information in the Type column describes the storage
device.
The capacity of the storage device is displayed in the Capacity
column.
The Format column displays whether the device is used for
recording (Record) or not (Not Using). Not formatted
indicates the device is not formatted.
Highlight the box in the Format column for the desired storage device and press the
button. You will be able to format the device for recording. When selecting Not
Using from Use As and highlighting the Format button, the device will not be used
for recording.
Highlight the box in the Information column for the desired storage device
and press the
button. The box beside Recorded Data – From / To
displays the time information of recorded data. Highlighting Clear and
pressing the button will clear all video data. You will be asked to verify
that you wish to clear all data before the DVR erases the video data. Clear
All Data… will not clear the System Log.
 Loading...