4-Channel Digital Video Recorder
37
Alarm Reset
Selecting (Alarm Reset) in the Search menu resets the DVR’s outputs including the internal buzzer during an alarm.
It is the same as pressing any button on the front panel when the alarm is activated.
Data Source
Selecting (Data Source) in the Search menu allows you to select the data source to be searched. Selecting Record
searches recorded data on primary storage installed in the DVR, and selecting Other searches recorded data on storage
used for another DVR then installed in this DVR.
Exit
Selecting (Exit) in the Search menu exits the search mode and enters the live monitoring mode.
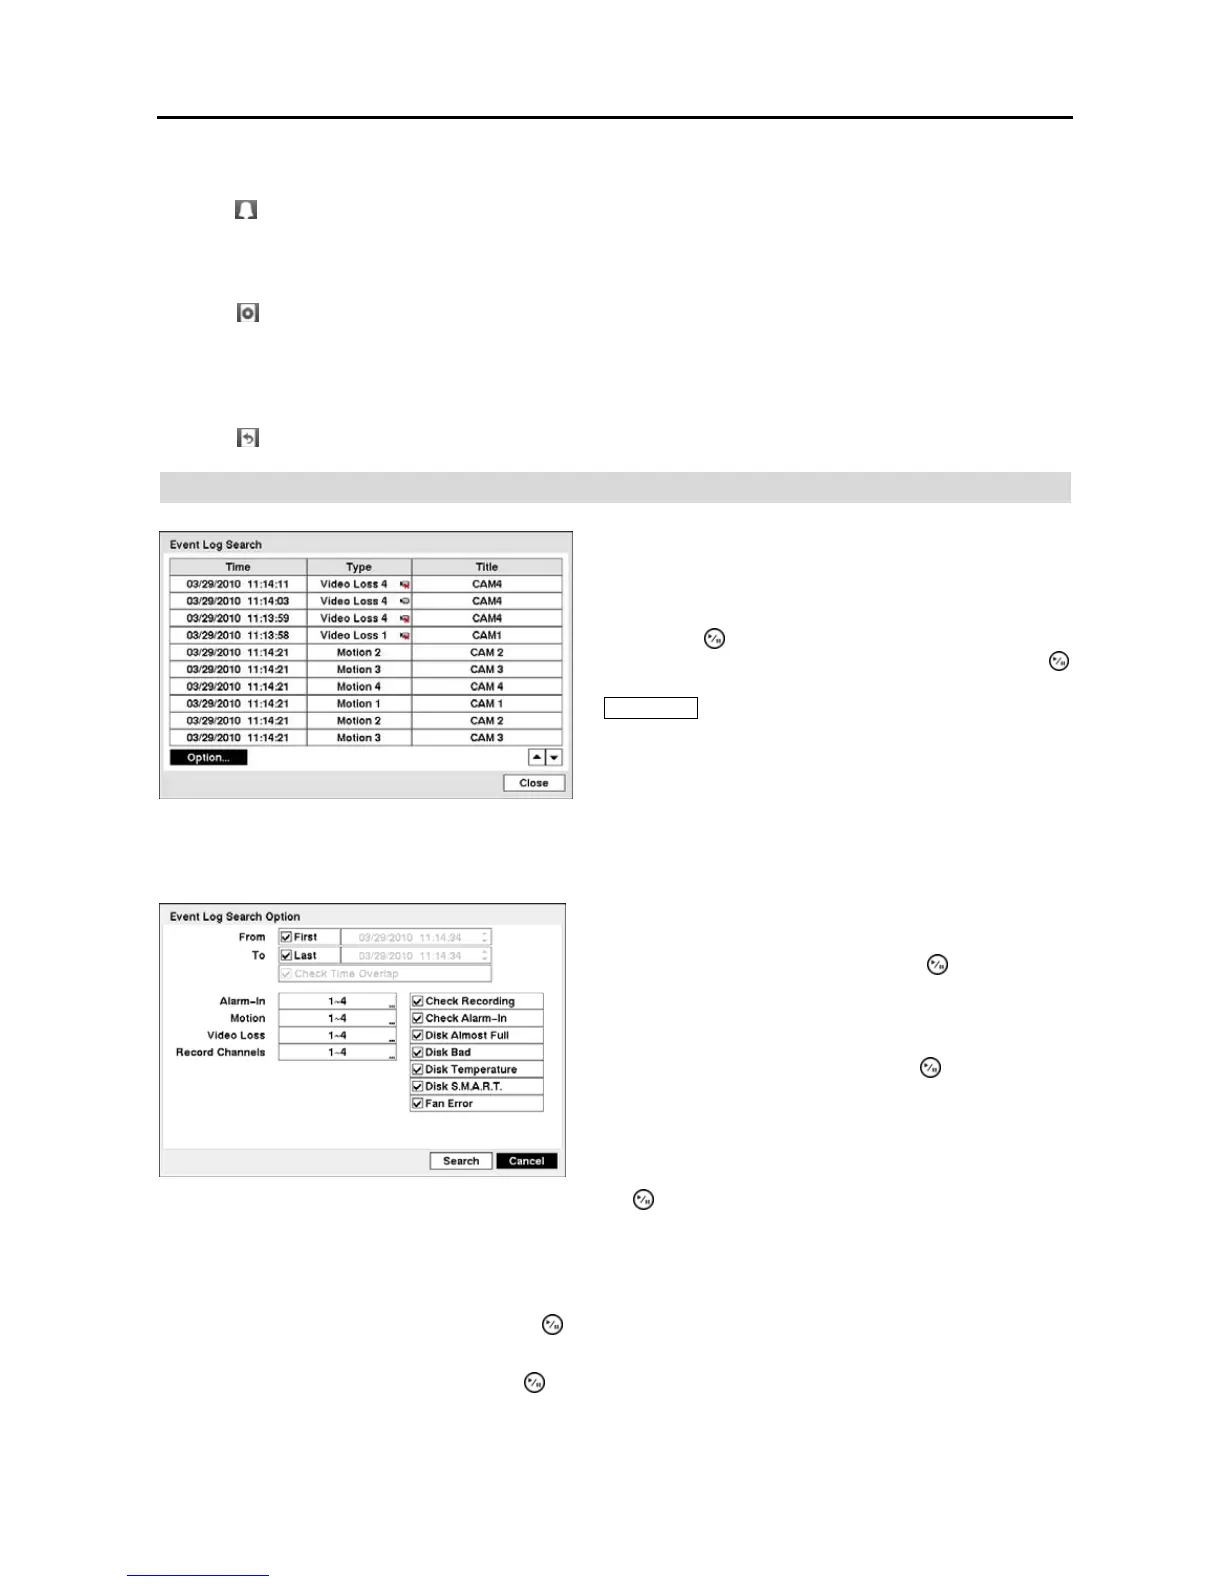
Event Log Search
You can also narrow your event search by selecting the Option… button and setting up the new search condition.
Highlight the box beside Check Time Overlap and press the button. It toggles between On and Off. You will only
be able to turn the Check Time Overlap on or off if a user-defined date and time is set to From and To. If the DVR’s
date and time have been reset, it is possible for the DVR to have more than one overlapping start and stop time. When
set to On, you will be asked to select one of the overlapping start and stop time. When set to Off, the DVR will display
search results from all start times to all stop times.
Highlight the box beside Alarm-In and press the button. You can select the alarm inputs that you want to include
in your search.
Highlight the box beside Motion and press the button. You can select the cameras for which you want any reports
of motion detection.
Figure 49 ─ Event Log Search screen.
The DVR maintains a log of each time the Alarm Input port
is activated. The Event Log Search screen displays this list.
Use the arrow buttons to highlight the event for which you
would like to see video.
Pressing the (Play/Pause) button will extract the event
video and display the first image of the event. Pressing the
button will start playing the “event” video segment. Pressing
PLAYBACK button returns to live monitoring.
NOTE: It is possible that no recorded image displays on
the current screen. Change the screen mode to 2x2, and
you will be able to easily see the cameras that have recorded
video during target time.
You can search video from the first to last recorded images, or
you can set the start and stop times and dates.
Highlight the box beside From and press the button to toggle
between On and Off. When set to Off, you can enter a specific
Date and Time. When set to On, the search will be from the
first recorded image.
Highlight the box beside To and press the button to toggle
between On and Off. When set to Off, you can enter a specific
Date and Time. When set to On, the search will be from the
last recorded image.
 Loading...