User’s Manual
22
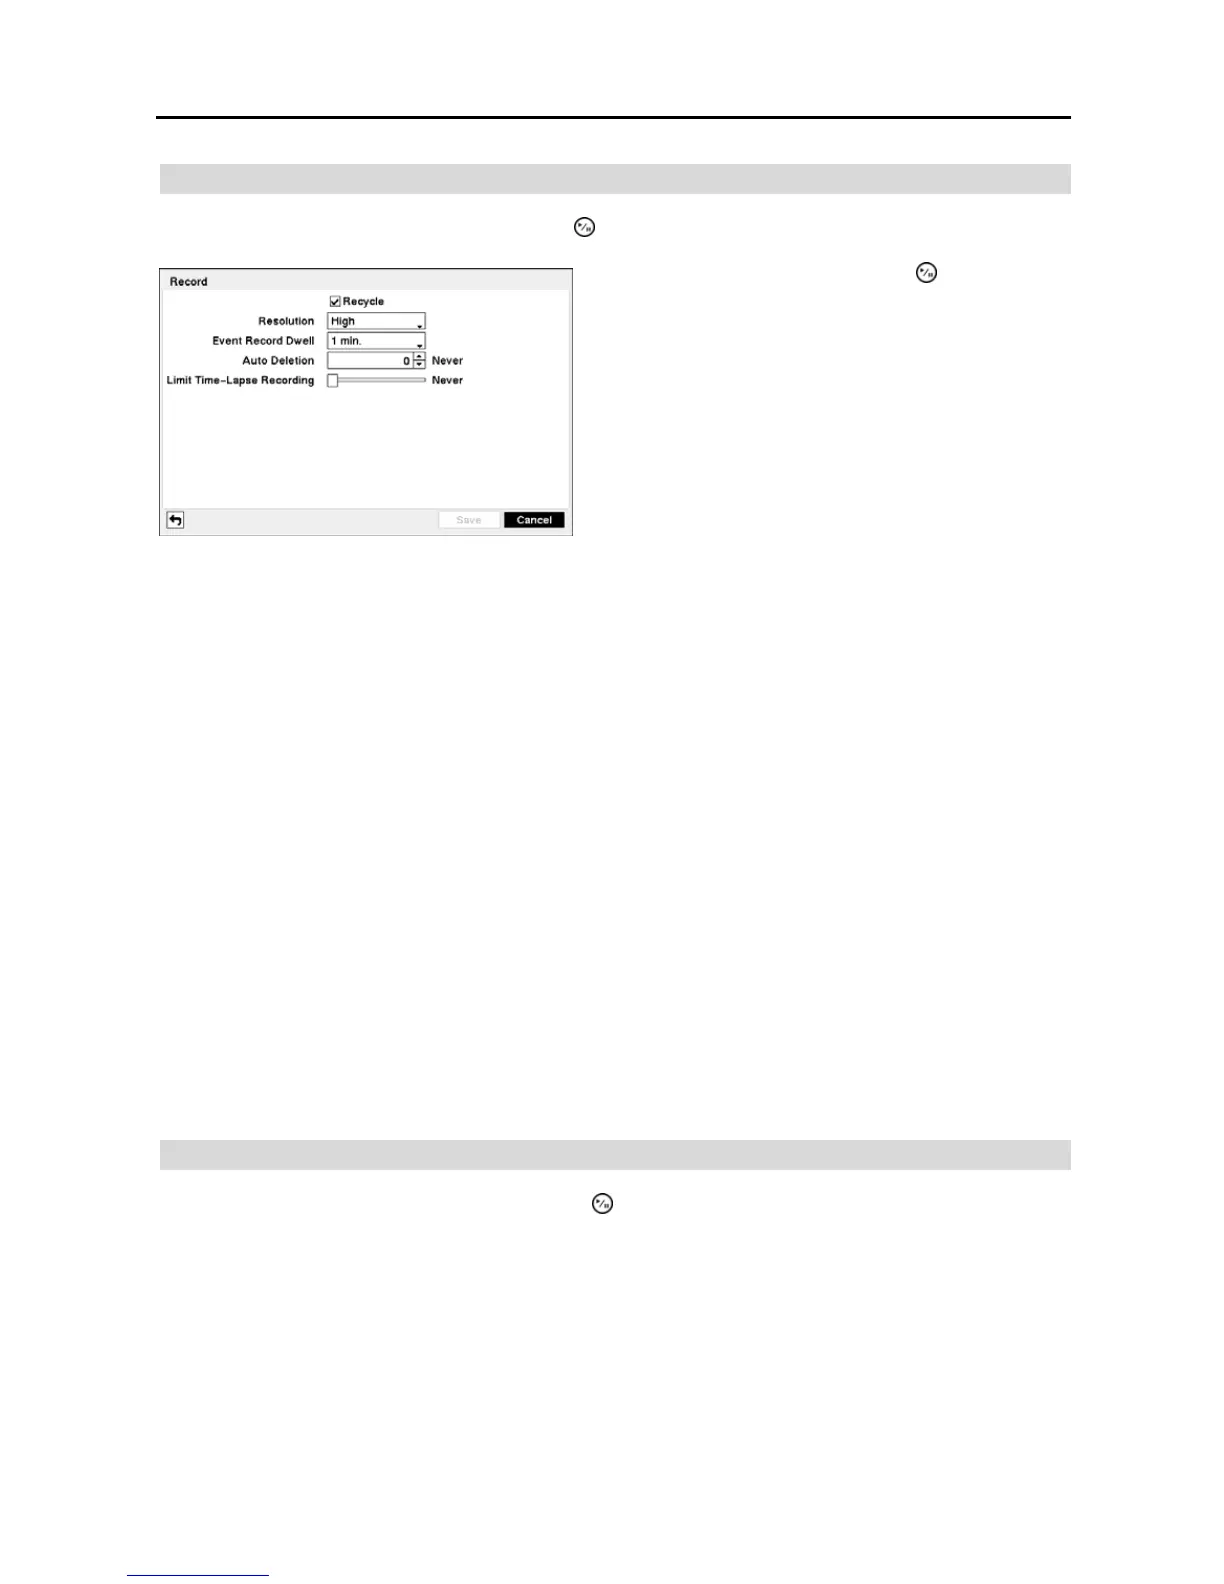
Record
Highlight Record in the Record menu and press the button. The Record setup screen appears.
Highlight the box beside Auto Deletion, and use the Left and Right arrow buttons to adjust the length of time recorded
data will be kept from 1 to 999 days. The DVR automatically deletes video recorded earlier than the user-defined period
under three conditions: at midnight, whenever the system reboots or whenever the user changes the Auto Deletion settings.
Selecting Never will disable the Auto Deletion function.
Highlight the slide bar beside Limit Time-Lapse Recording, and use the Left and Right arrow buttons to adjust the
length of the maximum storage time for time-lapse recording from 1 to 99 days. The Limit Time-Lapse Recording
feature will function when the storage device has enough space to record video data longer than the preset period. When
this feature is On, the DVR records over the oldest “time-lapse” video once all available storage has been used in the
Recycle mode, so more event video can be saved. Selecting Never will disable the Limit Time-Lapse Recording function.
NOTE: When the storage device does not have enough space to record video data longer than the preset Limit
Time-Lapse Recording period, the DVR records over the oldest video data (time-lapse or event video) as it would
in the Recycle mode even if this feature is turned On.
NOTE: The maximum storage time is only an estimate because the amount of space required to store video varies
depending on many factors such as motion and image complexity.
CAUTION: When more than one disk is installed in the unit, the DVR records video on the disks
sequentially based on time. And these sequentially recorded videos have the advantage that you can
search recorded video easily even though a disk is removed from the unit. However, video recorded
in the same time range might be saved on different disks by channel and by the type of recording mode.
Once the Limit Time-Lapse Recording is set to On, the DVR will maintain this recording limitation
even after disabling the function. If you want the DVR to record video on the disks sequentially based
on time again, you must format all disks that are currently used for recording.
Schedule
Highlight Schedule in the Record menu and press the
button, and the Schedule setup screen appears.
Figure 30 ─ Record setup screen.
Highlighting Recycle and pressing the button toggles
between On and Off. In the Recycle mode, the DVR records
over the oldest video data once all available storage space
has been used. When Recycle is turned off, the DVR stops
recording once all available storage space has been used.
Highlight the Resolution box and select from Very High,
High and Standard.
Highlight the Event Record Dwell box and set the length of
time you would like to record for the associated event. You
can set the dwell from 5 seconds to 1 minute. Refer to Event
Actions screen in this chapter for information regarding event
recording.
 Loading...