Chapter 3 Instrument operation
27
Osmo1® Single-Sample Micro-Osmometer User Guide
5. Place a new sampling tip on the sampler with the
plunger wire inserted carefully into the middle of the
tip (Figure 14).
Verify that the tip is straight and firmly seated.
Figure 14: Place new sampling tip on Sampler
6. With your thumb on the plunger top and fingers
grasping the barrel as shown in Figure 15, depress
the plunger; then insert the tip into the liquid sample
at least 1/4" (6 mm) below the surface.
Gently release the plunger to load a 20-μL sample.
Figure 15: Acquire sample
7. Look at the sample you have just drawn. If there are
voids or bubbles in the sample, discard it and load
another sample that does not contain voids.
8. Remove any sample on the outside of the tip using a
clean, lint-free, non-ionic paper. Quickly swipe the
end of the sampler tip to remove any excess sample
protruding beyond the tip (Figure 16).
NOTE: Be careful not to remove any of the sample
below the acceptable meniscus line. See
Figure 17 for the proper sample level.
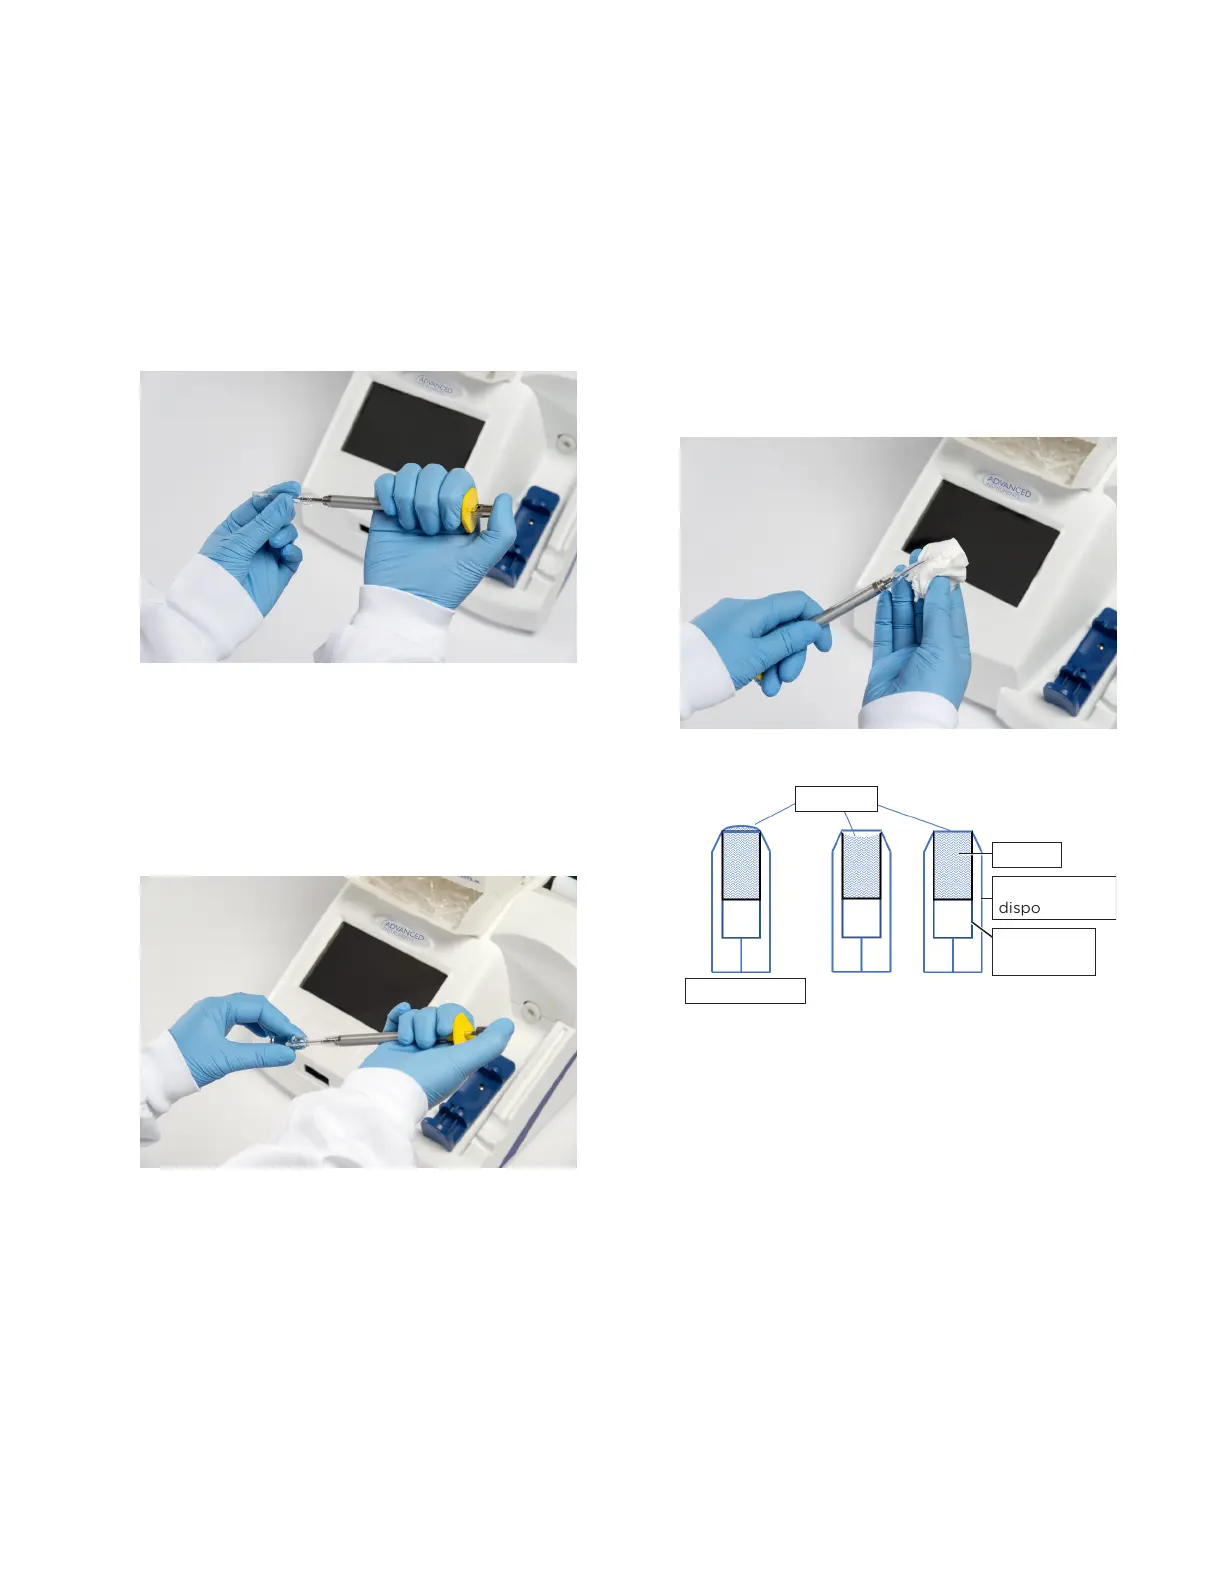
Figure 16: Wipe tip
Meniscus
Acceptable
Before wiping
Unacceptable
Sample
Plastic
disposable tip
Teflon
plunger tip
Figure 17: Sample tips and levels