Chapter 5: Troubleshooting
Primary Trouble Isolation
5–6
Primary Trouble Isolation
7KHDFWLRQVLQWKH3ULPDU\7URXEOH,VRODWLRQDUHGRQHZLWKRXWGLVDVVHPEOLQJWKHLQVWUXPHQW
,QWHUDFWLRQRIWKHIURQWSDQHOZLWKWKHUHVWRIWKHLQVWUXPHQWDQGRWKHULQGLFDWRUVDUHXVHG
WRKHOSLGHQWLI\WKHSUREOHPDUHD
$OHWWHULVDVVLJQHGWRER[HVLQWKHIORZFKDUW7KHOHWWHUFRUUHVSRQGVWRDVSHFLILFVHFWLRQLQ
WKHUHIHUHQFHWH[W%HVXUHWRXVHWKHIORZFKDUWLWVHOIIRU\RXUWURXEOHVKRRWLQJSDWK
A Perform power-up.
1 Power-on the instrument.
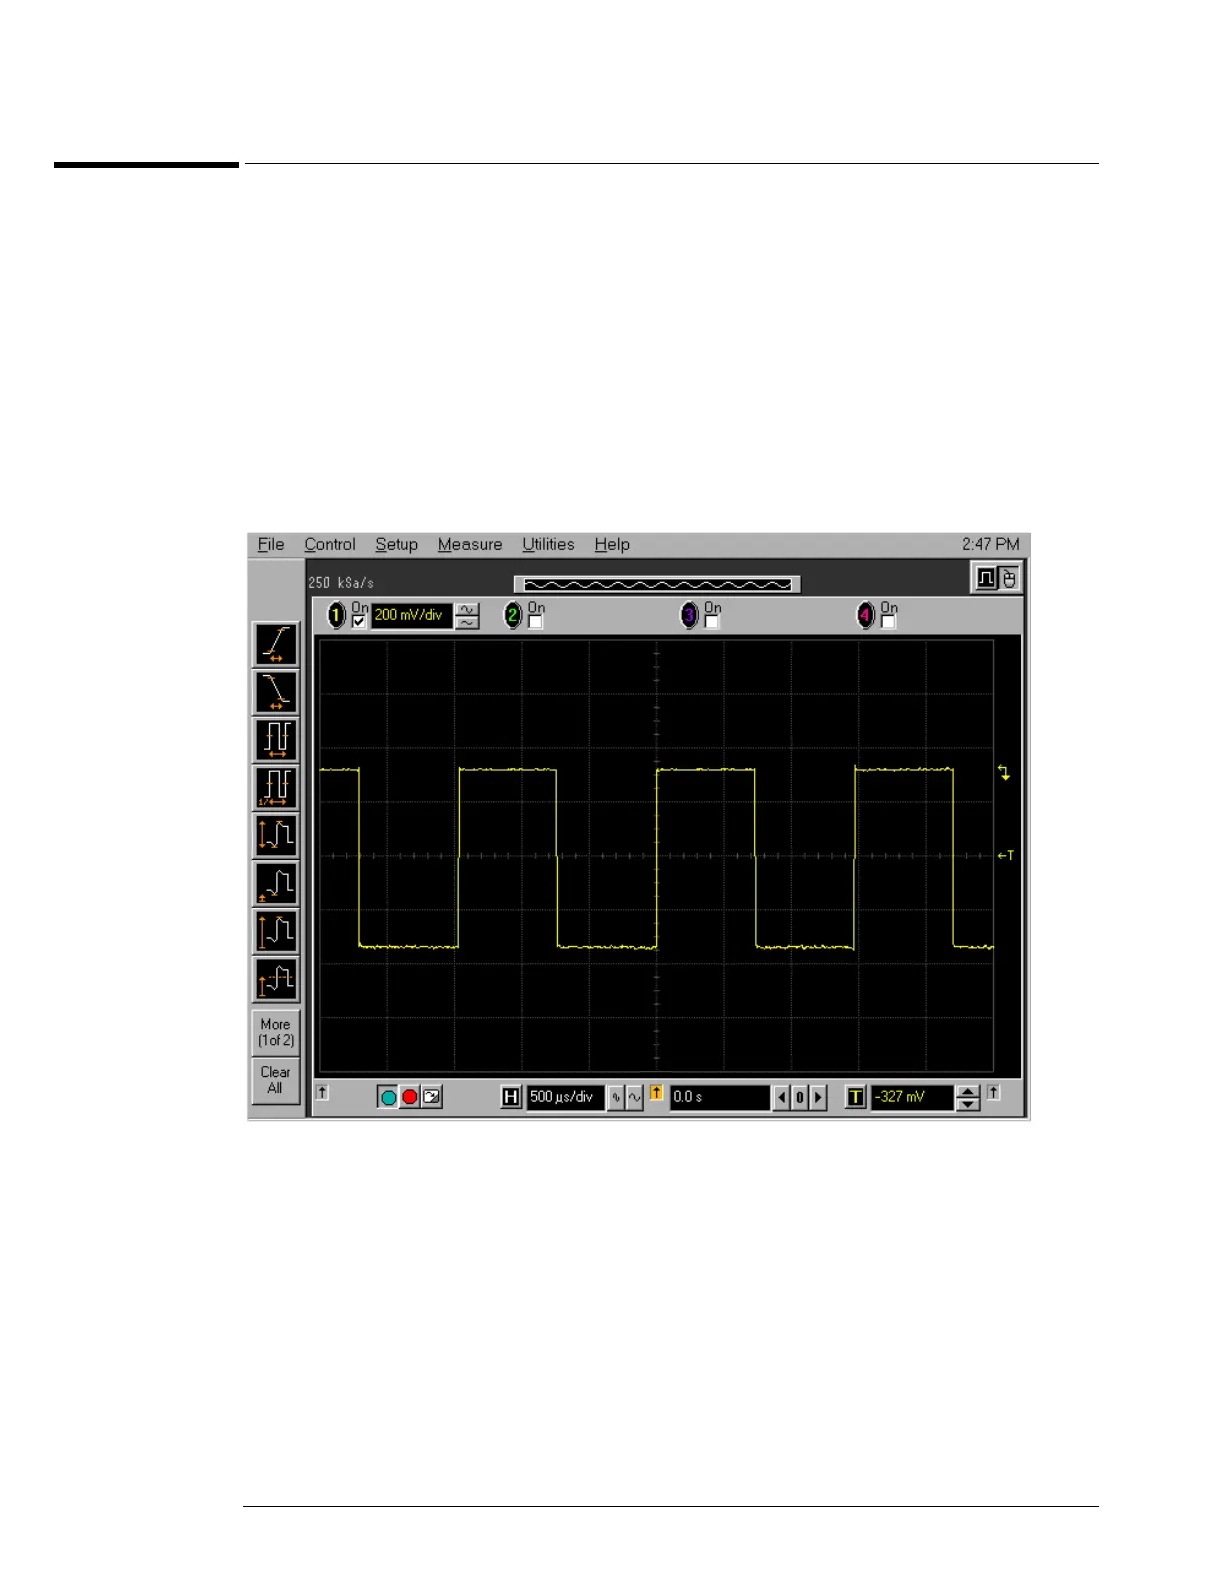
A short time after the instrument is turned on, the scope graticule is displayed on the
screen. The screen should look similar to the next figure. The exact appearance may vary
depending on the setup selected before the instrument was turned off.
Figure 5-2
Power-on Display Default (Graphical Interface Disabled)
2 Press the Default Setup key.
B Check the display.
7KHGLVSOD\RQWKHVFUHHQVKRXOGEHVLPLODUWRWKHILJXUHDERYH,IWKHUHLVQRGLVSOD\RQWKH
RVFLOORVFRSHIODWSDQHOGLVSOD\DIWHUSRZHUXSJRWRWKH1R'LVSOD\7URXEOH,VRODWLRQ
)ORZFKDUWRWKHUZLVHJRWRVWHS&