Chapter 6: Replacing Assemblies
To remove and replace the AutoProbe assembly
6–7
To remove and replace the AutoProbe assembly
When necessary, refer to other removal procedures.
Figure 5-5
AutoProbe Assembly
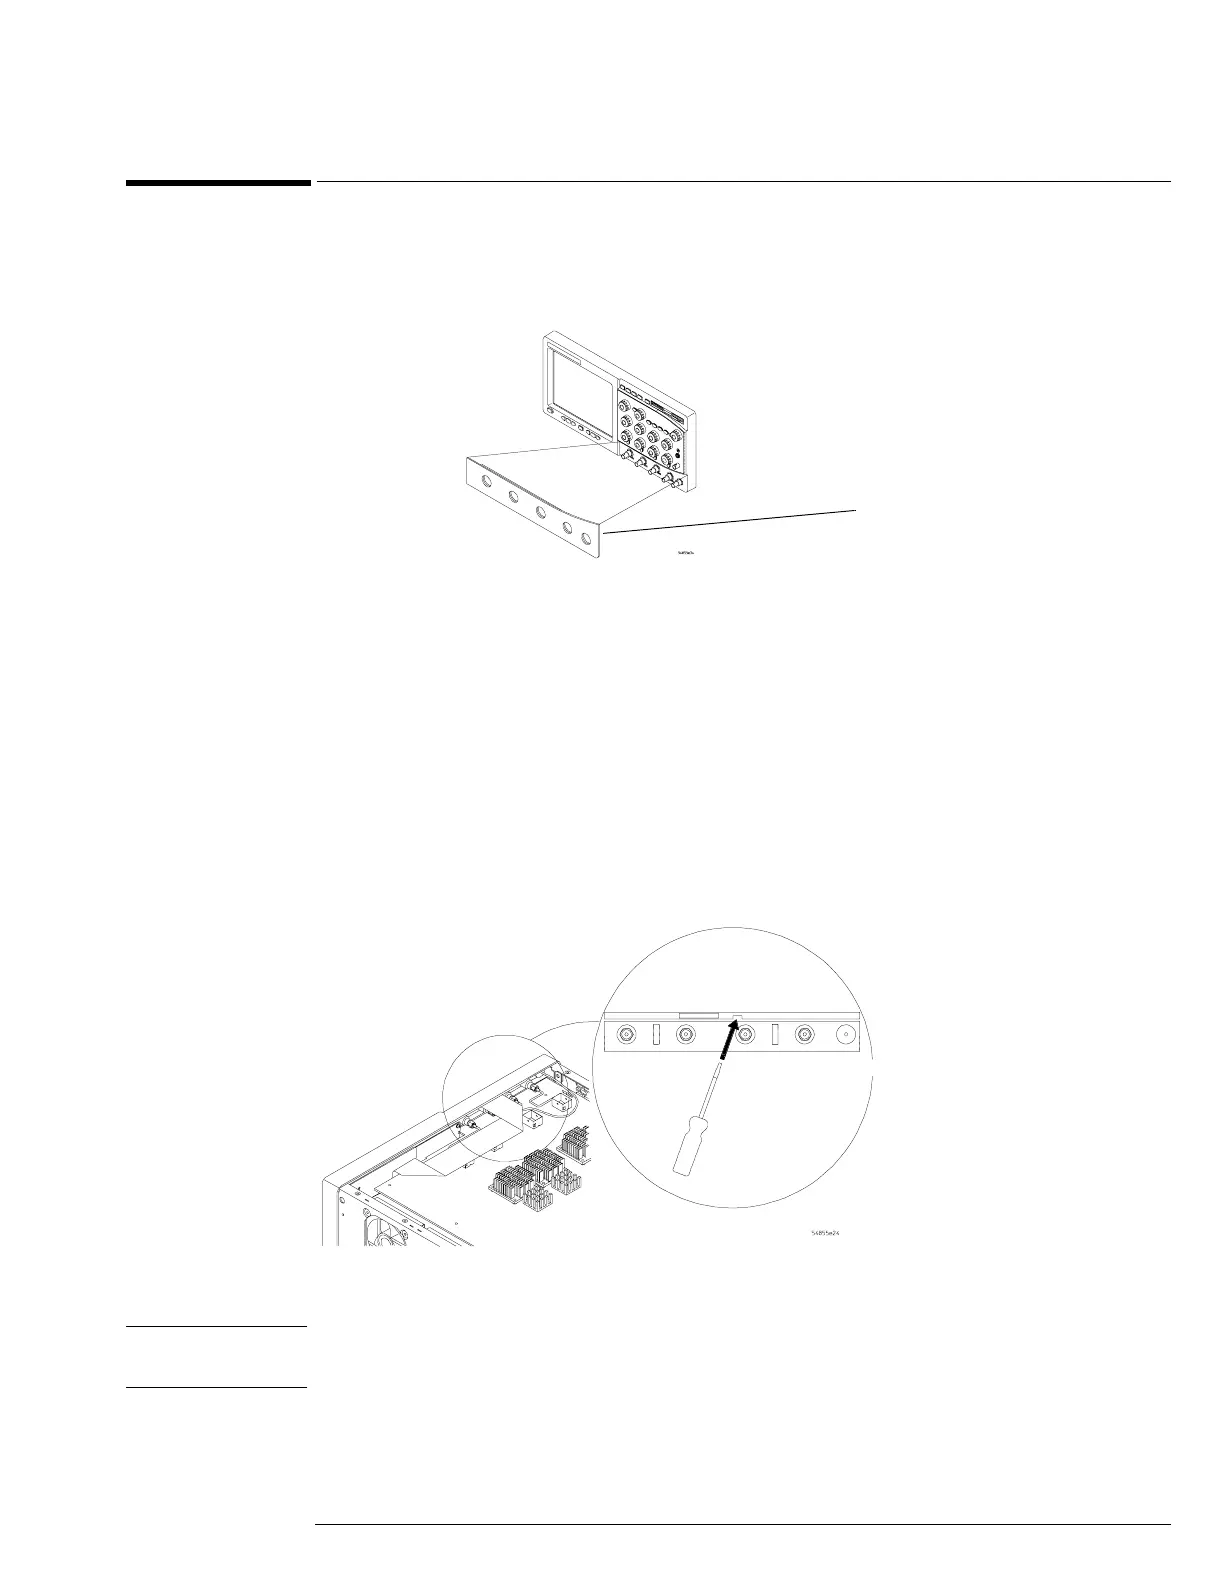
1 Disconnect the power cable and remove the top and bottom covers.
2 Remove the AutoProbe assembly, the subpanel, and the probe connector assembly that
fits around the front-panel BNC connectors, by doing the following:
a Place the unit so the bottom is facing up.
b Locate the access hole on the inside of the front-panel assembly which is below and
almost between channel 2 and channel 3 BNC connectors.
c From the back of the front panel, put a small screw driver or other slender pointed object
through the access hole to push the AutoProbe assembly faceplate away from the front
panel assembly.
Figure 5-6
Access Hole
CAUTION AVOID DAMAGE TO THE RIBBON CABLE AND FACEPLATE!
Do not pry around the edge of the assembly. Doing so may damage the ribbon cable or faceplate.
AutoProbe
Assembly
A16