Chapter 2: Setting Up the Oscilloscope
To connect a printer
2–11
To connect a printer
If you have a parallel (Centronics) printer, you will need a parallel printer cable, such as an C2950A
(2 m) or C2951A (3 m) cable. Go to step 1.
If you have a serial printer, you will need a 9-pin to 25-pin serial printer cable, such as an 34398A
cable, plus the 34399A adapter kit. Some printers may require other cable configurations, but the
oscilloscope has a 9-pin serial connector. Go to step 5.
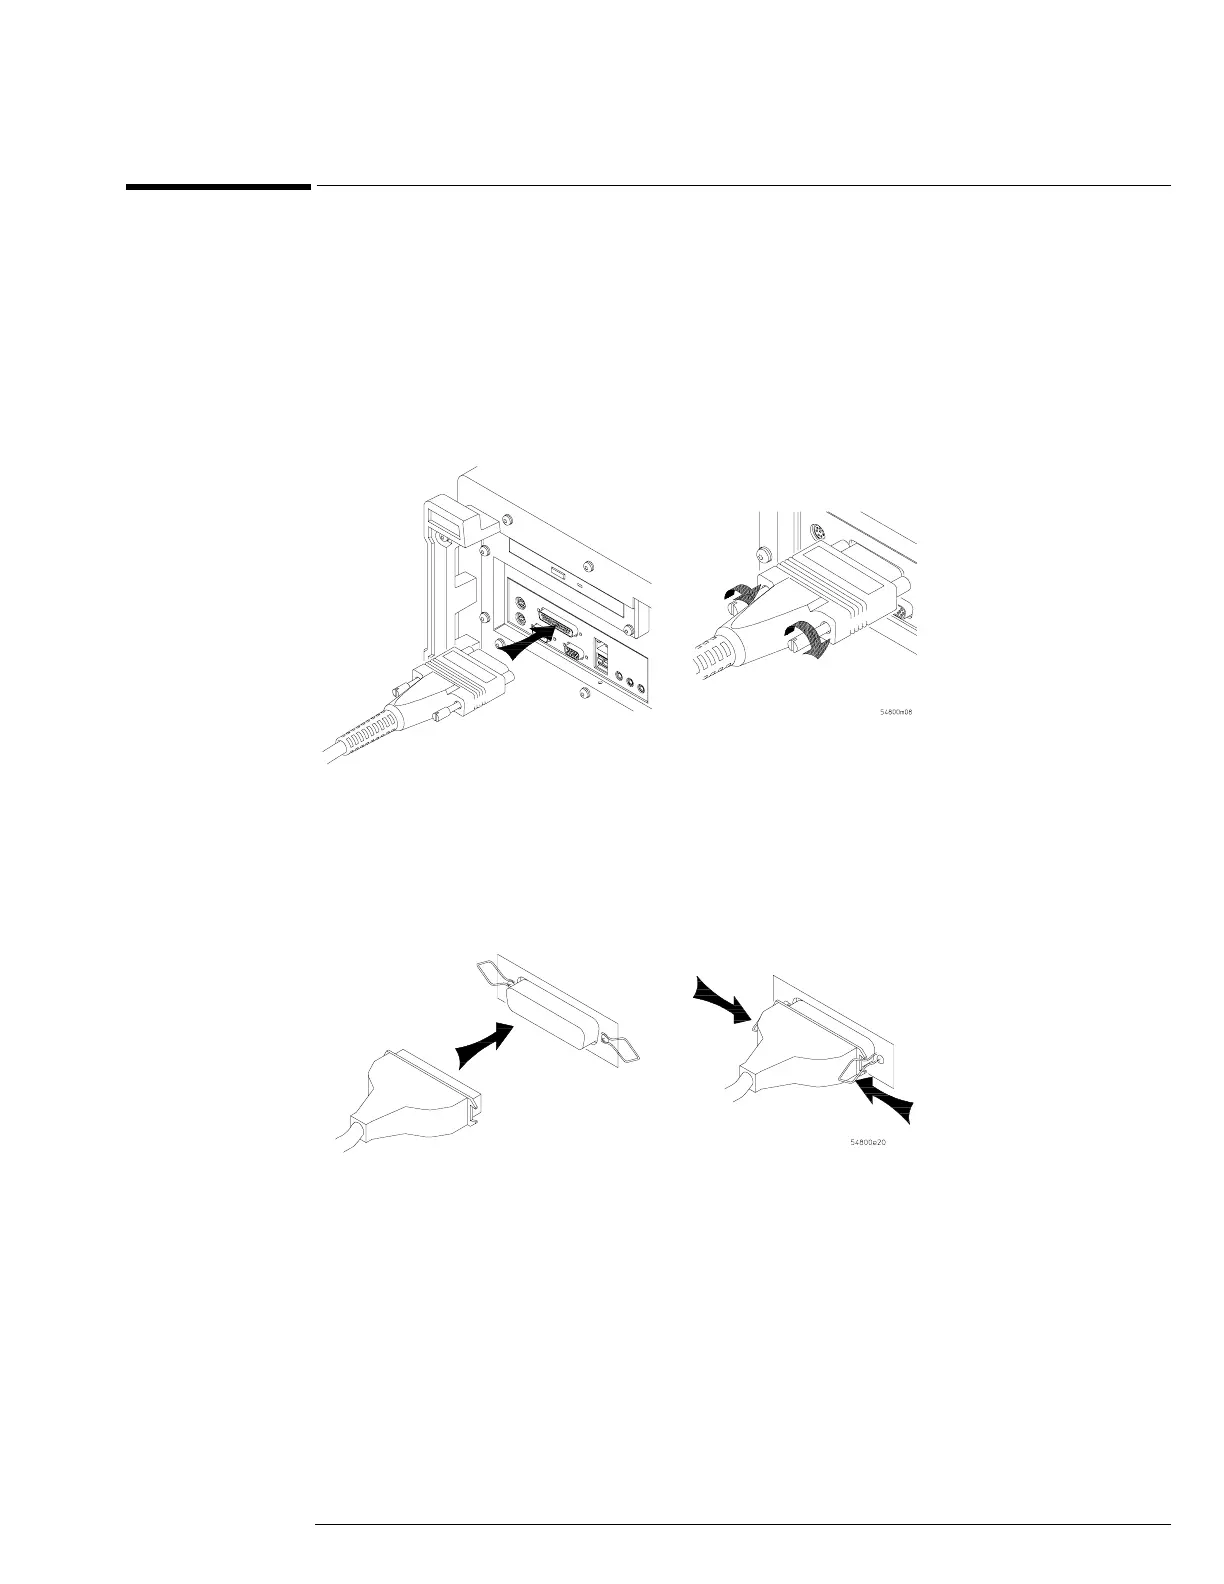
1
Attach the 25-pin small “D” connector to the printer output connector on the rear of the
oscilloscope. Tighten the thumbscrews to secure the cable.
Figure 2-10
Attaching the Small “D” Connector
2 Attach the larger 36-pin “D” connector to the printer. Latch the wire bails into the tabs on
each side of the connector.
Figure 2-11
Attaching the Larger “D” Connector
3 Set the printer configuration to use the “Centronics” or “Parallel” interface, if necessary.
See the documentation for your printer.
4 Go to “To install the printer software” in Chapter 3.
Port on Printer