Chapter 6: Replacing Assemblies
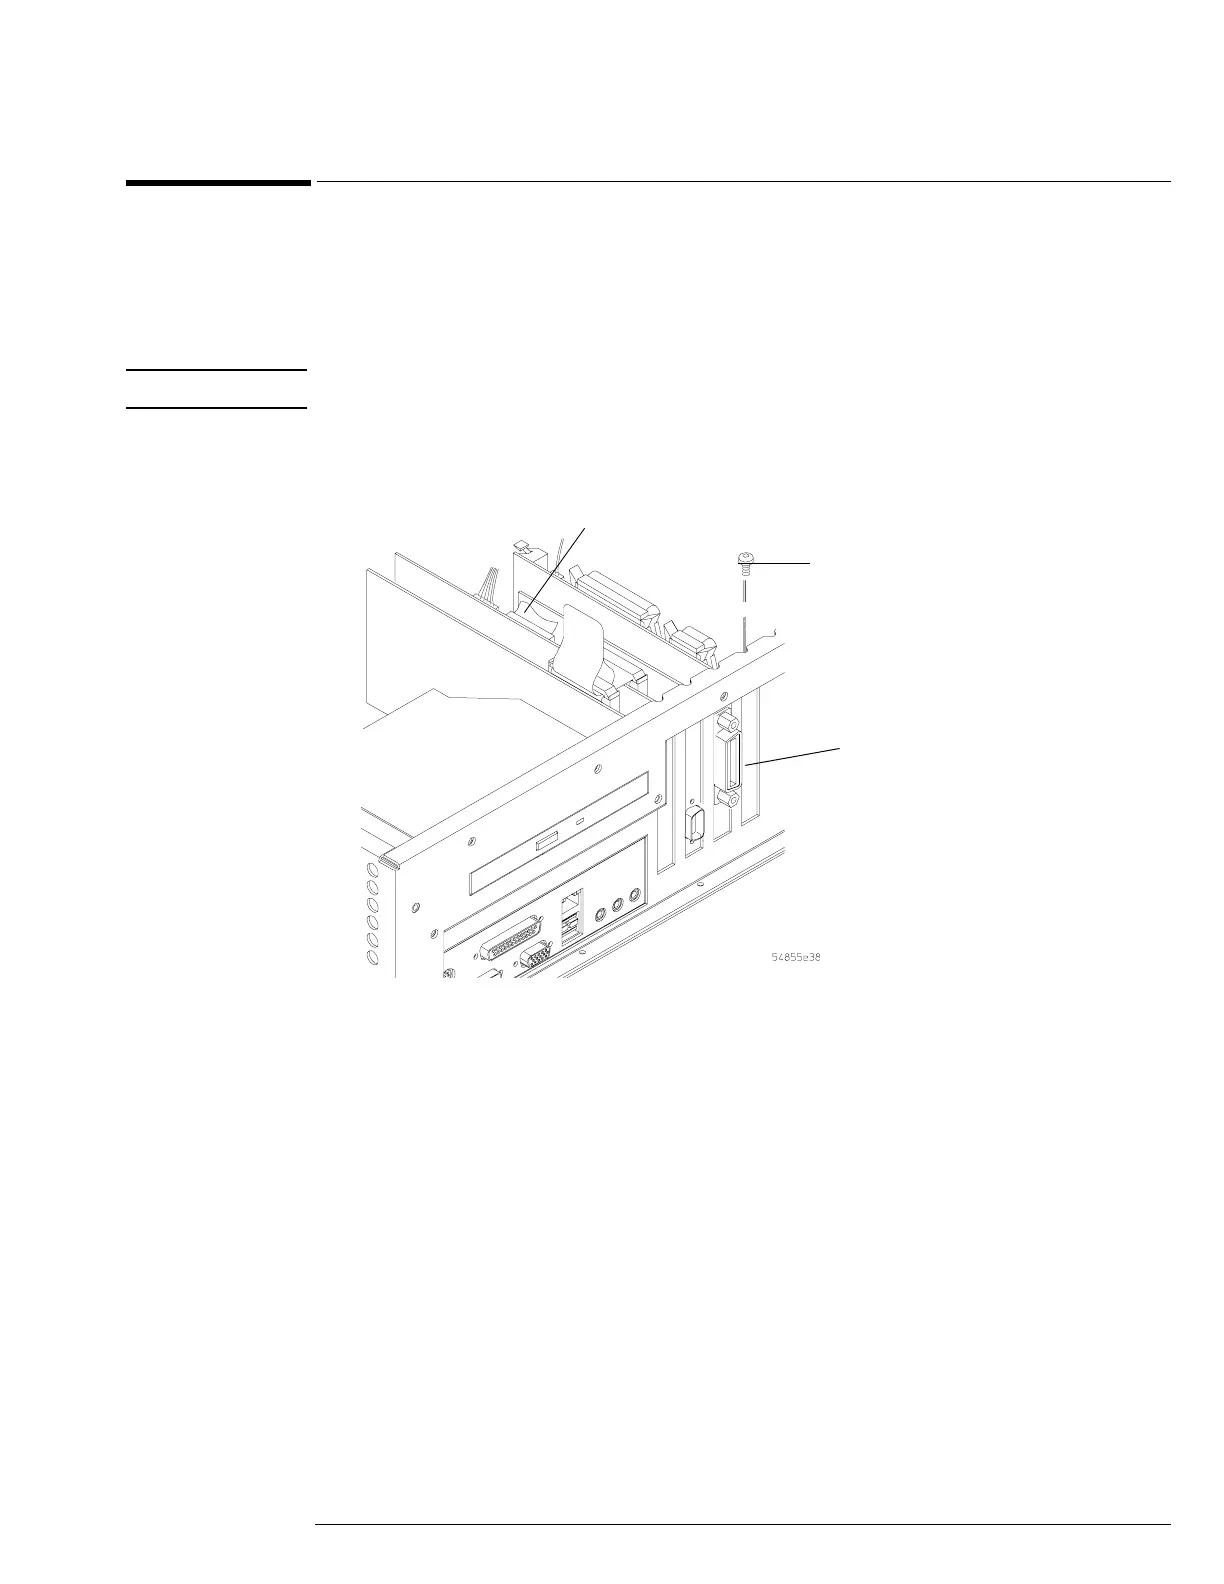
To remove and replace the GPIB interface board
6–23
To remove and replace the GPIB interface board
When necessary, refer to other removal procedures.
1 Disconnect the power cable and remove the top cover.
2 Remove the Torx T15 screw that secures the GPIB board to the rear of the chassis.
3 Pull the board up to disengage it from the motherboard, then lift up and out of the chassis.
CAUTION BE CAREFUL NOT TO SNAG THE DISPLAY CABLE W11.
4
To replace the board, reverse the removal procedure.
Figure 5-23
Removing the GPIB Interface Board
T15
screw
GPIB
Board
Display Cable W11