Chapter 6: Replacing Assemblies
To remove and replace the keyboard and flat-panel display assemblies
6–17
5
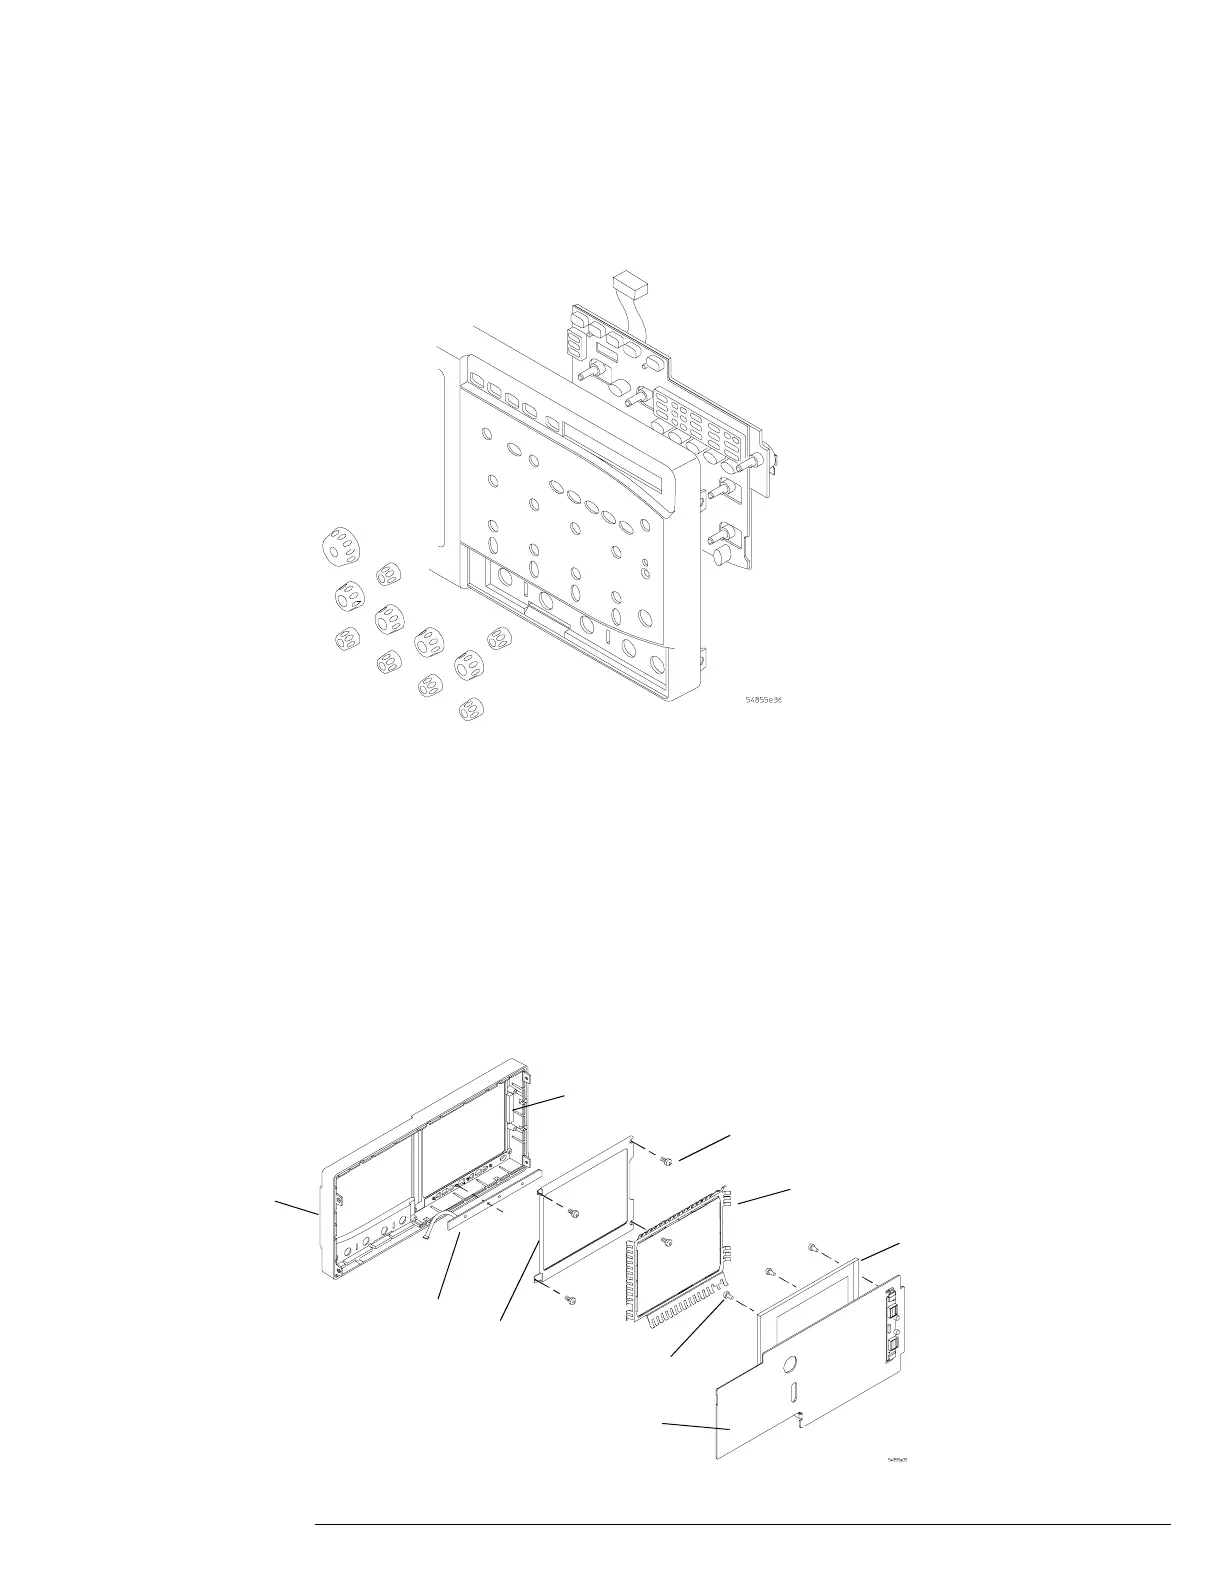
To remove the main keyboard, disconnect the cursor keyboard cable W13, pull off the
knobs, and lift out the keyboard.
Figure 5-17
Main Keyboard Knobs and Cable
6 To remove the flat-panel display from the front-panel cover plate:
a Disconnect the two backlight cables from the backlight inverter board (see previous
figure).
b Remove the three Torx T10 screws securing the display to the cover plate.
7
To remove the cursor keyboard and flat lens:
a Remove the display spring. Note orientation of spring for reassembly.
b Remove the four Torx T10 screws that secure the corners of the lens bracket.
c Carefully remove the lens.
You can lift the cursor keyboard directly out of the front casting.
Figure 5-18
Removing the Cursor Keyboard
Cursor
Keyboard
Flat
Lens
Torx
T10
Front
Casing
Display
Spring
Front-panel
Cover Plate
Torx
T10
Flat-panel
Display
Lens
Gasket