Chapter 6: Replacing Assemblies
To remove and replace the internal hard disk drive
6–28
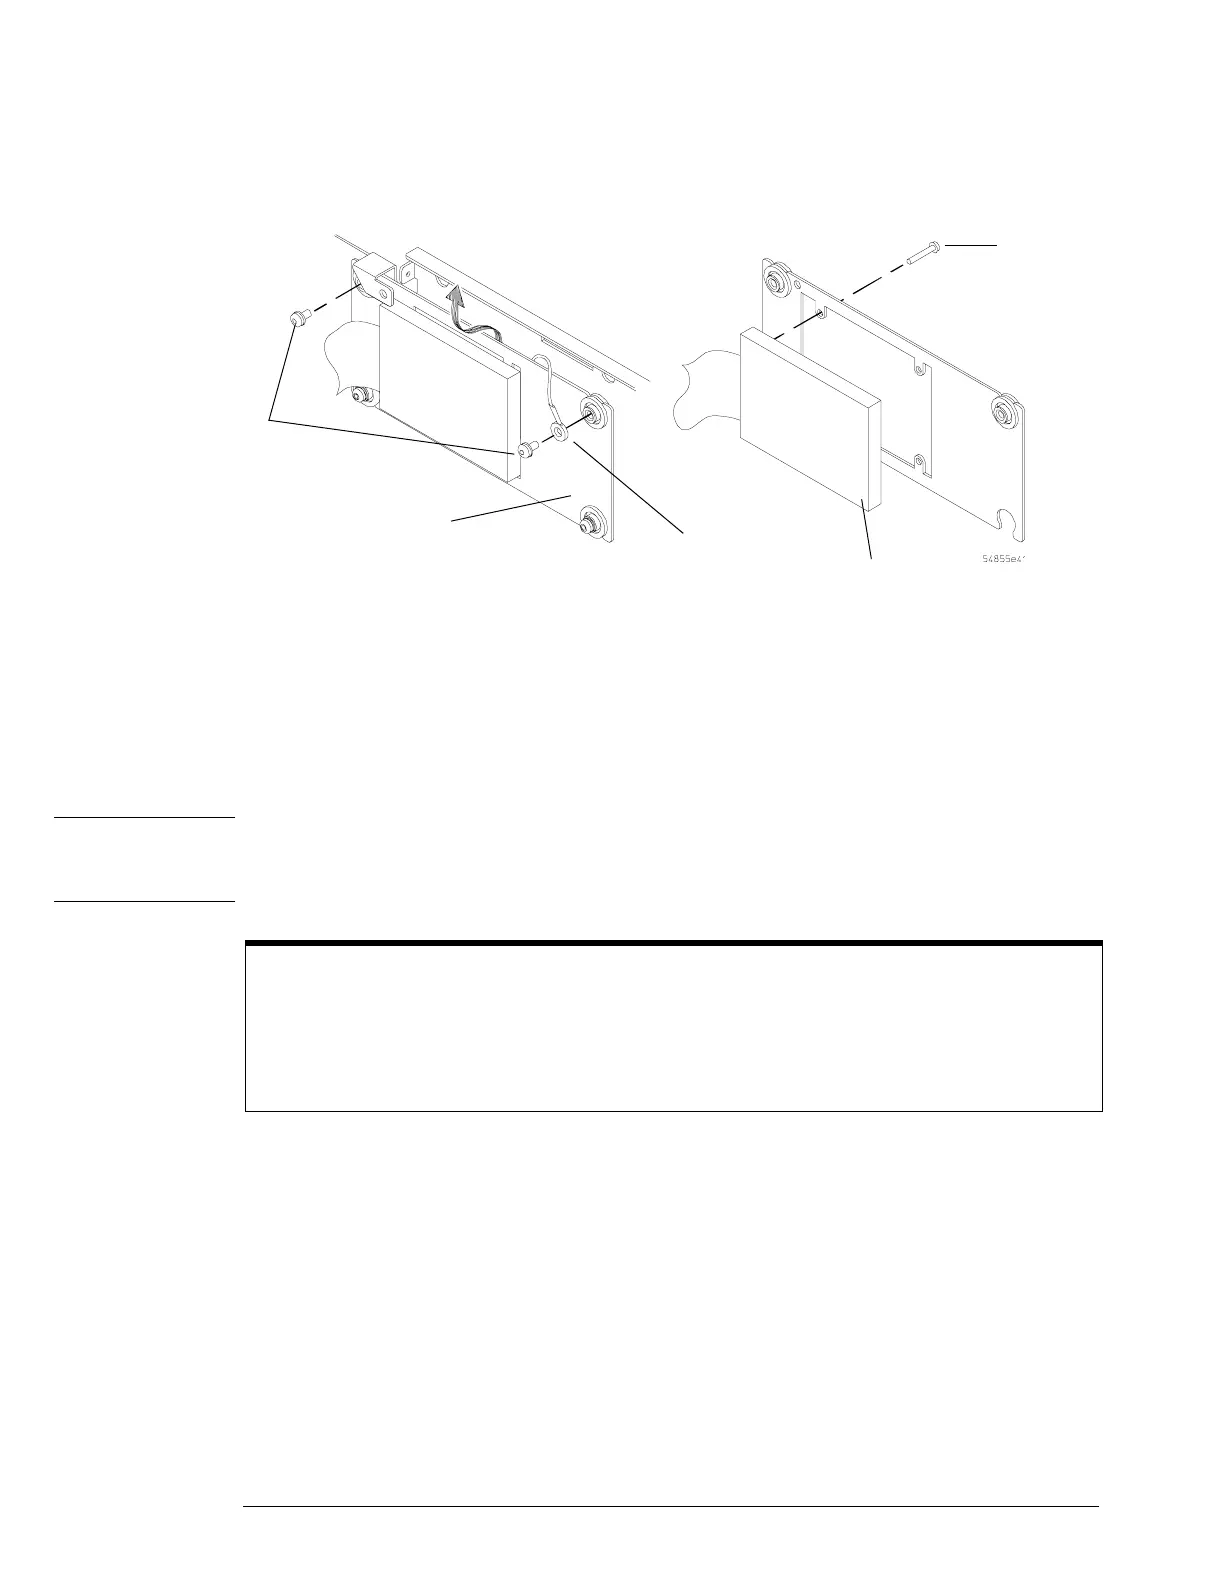
Figure 5-28
Removing the Internal Hard Disk Drive
4 Lift the disk drive assembly enough to clear the lower shock mounts, then move assembly
toward fans enough to clear the chassis bracket under the floppy disk drive, then lift the
disk drive out of the chassis.
Some cables may need to be removed to allow removal of the disk drive.
5 Remove the four T10 Torx screws holding the disk drive onto the shock mount.
6 To replace the hard disk reverse, the above procedure with a new hard drive.
CAUTION DO NOT OVER TIGHTEN THE SCREWS!
Do not overtighten the T10 screws that secure the Internal Hard Disk Drive to the bracket. Torque
to 3 in-lbs.
Reinstalling the internal hard drive
1. Make sure the assembly is inserted into the center slots of the lower shock mounts.
2. Be sure to reconnect the hard drive ground cable to the upper-right shock mount screw.
3. Tighten the upper shock mount screws to 18 in-lbs.
Hard Disk
Drive
Shock
Mount
Plate
Ground
Cable
T10
Screw
T20
Screws