Installation Guide
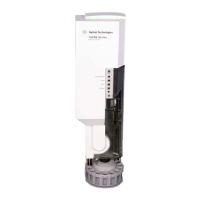
Installing the G2613A Injector
5
4. Front location:
Turn the injector so that the turret is facing the front of the GC. Lower the
injector until the alignment pin in the base enters the alignment hole in the
injection port cover.
Back location:
Turn the injector so the turret faces the left side of the GC. Lower the injector
until the alignment pin in the base enters the alignment hole in the injection
port cover.
5. Check your work:
• The injector must be vertical.
• The alignment pin must be properly seated in the alignment hole.
• The injector feet should touch the injection port cover.
If the injector will not sit upright on the GC, check that the plumbing and
cabling under the injection port cover are properly routed in their channels.
Choosing the turret type to use
Your G2613A Injector comes with 2 types of turrets, a standard turret for use
with or without a tray, and an alternate 8 sample position turret which is used
without a tray. If you are using the optional G2614A Tray, the injector comes pre-
configured with the proper turret type.
If you are not using a tray, you may use 1 to 3 sample vials in the standard turret.
If you wish to use up to 8 sample vials, you may remove the standard turret and
install the alternate 8 sample position turret. See Removing The Turret for
details.
Note After changing turrets, it is recommended that you perform the turret alignment
procedure described on page 17.
 Loading...
