HM135/HM435 Programmer software guide
Preliminary version Page 16
5.4 Defining TX calls: Call1, Call2, Emergency, Transpond and Auto ID (ANI)
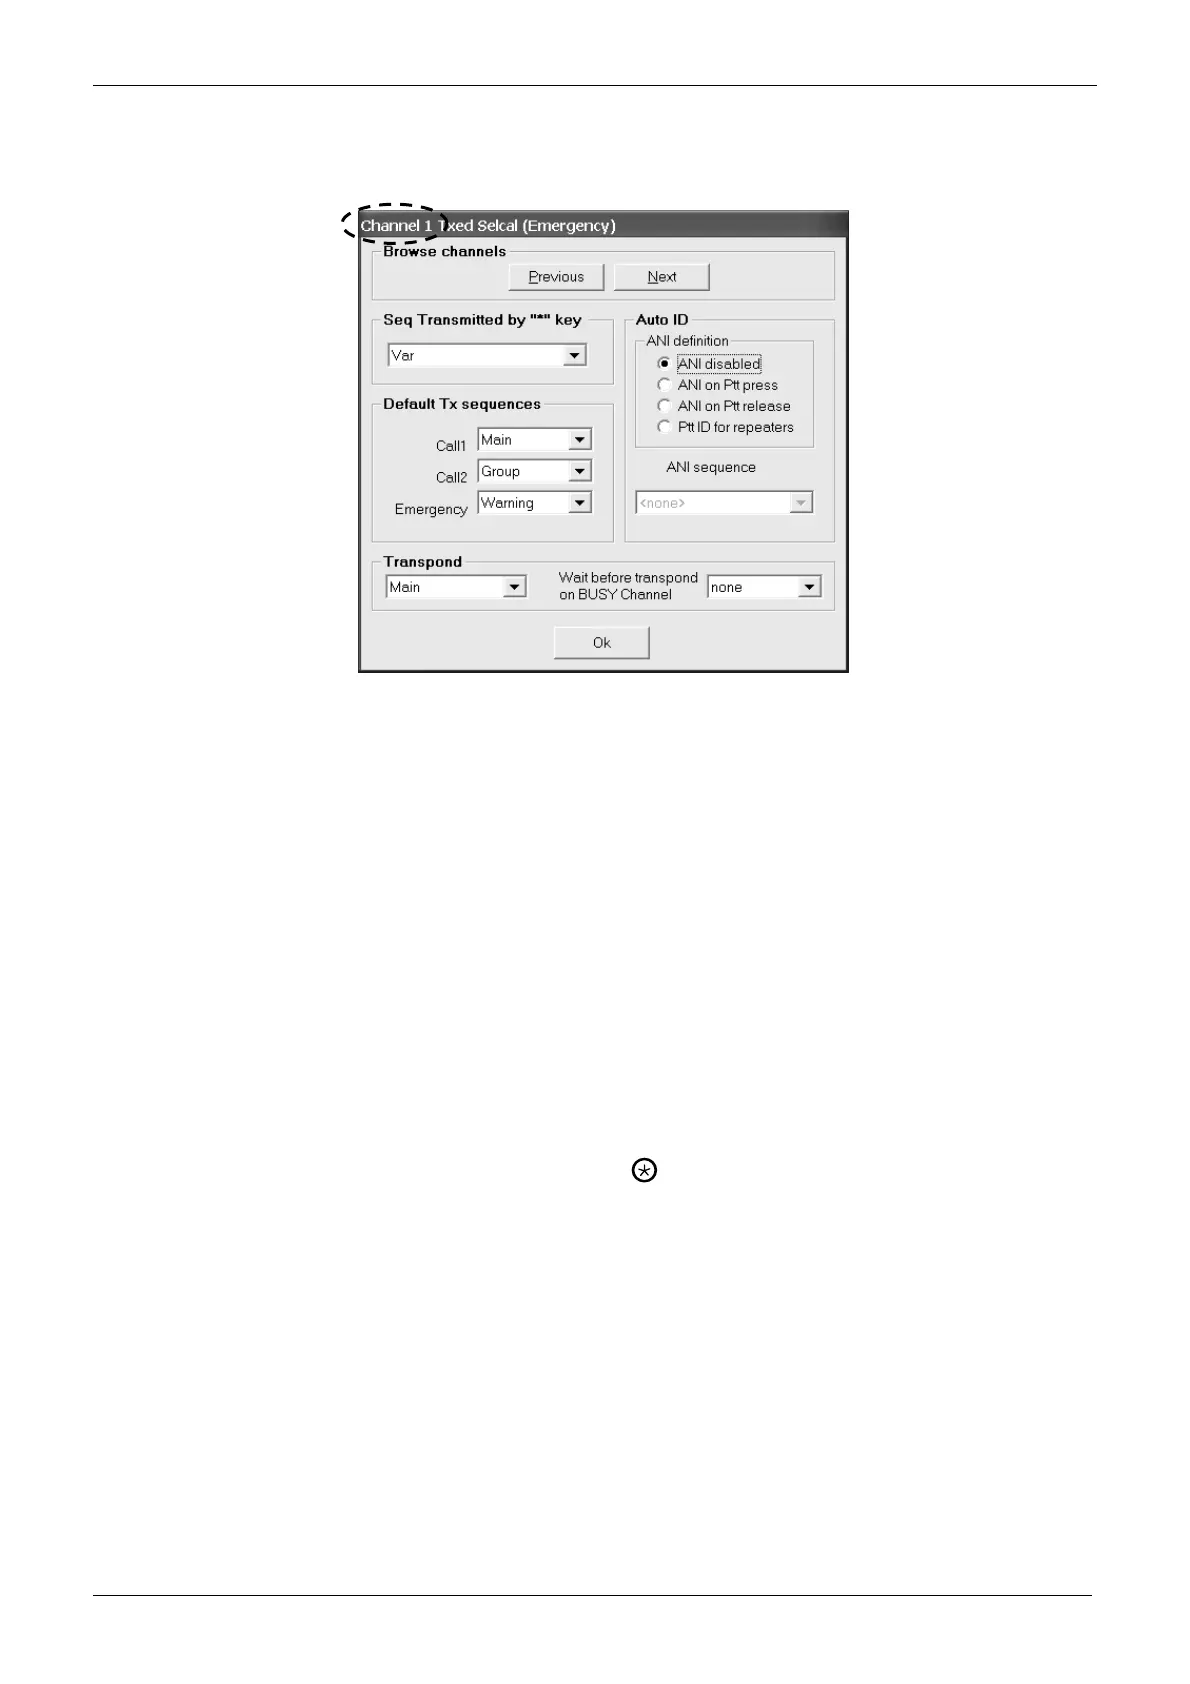
1) Make sure to be on the right RF channel and, from the Selcal setup area, click on TX sequences button: the Channel X Txed Selcal
(Emergency) window will open.
2) Be sure you are selecting parameters on the proper channel (shown in the heading of the window - Channel 1 in the example). If you
want to set up another channel click Previous or Next buttons to select the appropriate channel.
3) Select the TX Sequence you want to send as Call 1 by clicking the Call1 drag down button in the Default Tx sequences area and then
click the appropriate sequence (in the example we have chosen Main).
4) Select the TX Sequence you want to send as Call 2 by clicking the Call2 drag down button in the Default Tx sequences area and then
click the appropriate sequence (in the example we have chosen Group).
5) Select the TX Sequence you want to send as emergency by clicking the Emergency drag down button in the Default Tx sequences
area and then click the appropriate sequence (in the example we have chosen the sequence Warning).
The Emergency selcall can be transmitted not only by the keypad, but also by an appropriate connection in the rear connector. For
further information, please contact the engineering office at CTE International.
6) You can now define one of the previously programmed sequences to be sent when a selcall is recognized. Click the drag down button in
the Transpond area and then click the appropriate sequence (in the example we have chosen the sequence Main). You can also set the
time which the radio has to wait before sending the transpond sequence just set if the channel is busy. Just go to the Wait before
transpond on BUSY Channel drag down button and select the time you need which is available in 2.5 sec. steps
7) Select the condition in which you want the transceiver be sending the ANI by activating the related radio button in the Auto ID area: ANI
disabled, ANI on Ptt press, ANI on Ptt release or Ptt ID for repeaters.
8) Unless you have left ANI disabled, the ANI sequence drag down button will be activated: click it and select the TX Sequence you want
to use as ANI.
ANI (Automatic Number Identification), is a tone sequence transmitted before or after the normal voice transmission in order to identify
the radio in use. These last two steps allows you to set the condition in which the transceiver will automatically send it as well as the
sequence to be transmitted.
9) Define the variable TX sequence you want to transmit by pressing the
(call) key on the microphone with keypad by clicking on Seq
Transmitted by “*” key drag down button in the Seq Transmitted by “*” key area and selecting one of the available calls (we have
selected Var).
10) Now you have two choices:
If you need to program the said parameters for another channel go back to step 2).
If you don’t need to program the said parameters for other channels press the OK button and go to the next paragraph.
5.5 Monitor Key Behaviour
You can define the behaviour of the monitor function (e.g. activated by a preset F key or by the menu). If you have set an
open traffic channel, only the Monitor key opens SQUELCH is normally available. However, depending on the previous
settings you have made for Selcal and CTCSS/DCS in that channel, you will find different active options. For example, if you
have activated CTCSS in the channel, the Monitor key opens CTCSS signalling checkbox will be available as well.
If the monitor command is issued a second time (e.g. F key assigned to mon function pressed twice), it restores the previous monitor
condition.