HM135/HM435 Programmer software guide
Preliminary version Page 21
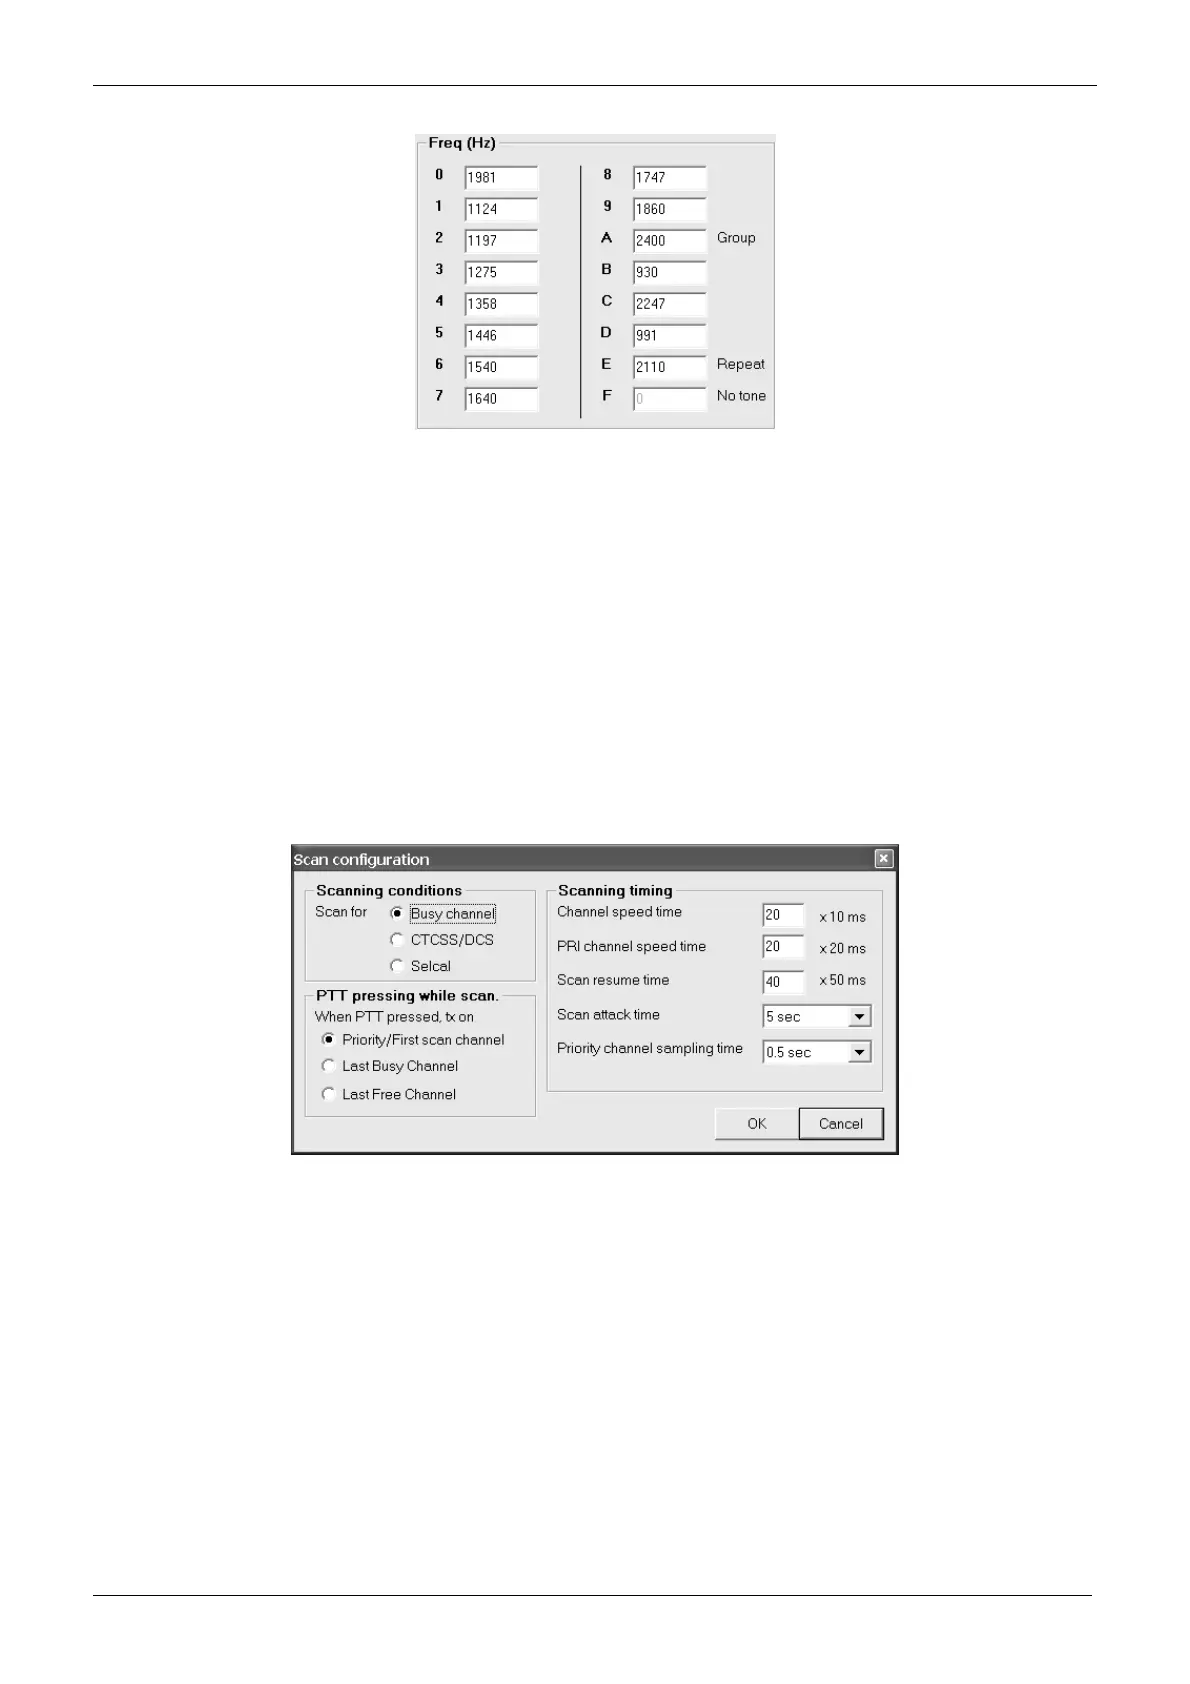
5) Go directly to the proper Freq (Hz) boxes (from 0 to F) and type the new tone frequencies or modify the preset ones.
6) The Two-tone paging checkbox enables the said paging standard which is used in the U.S.A. This option is not normally supported in
the standard HM135/435 versions and needs to be implemented upon specific request. For further information please contact your
dealer. If you are sure that your radio supports it and you need to enable this option tick the Two-tone paging checkbox.
The settings described till now are available only in the PERSONAL standard.
7) Now you can set the Maximum Rx gap length. It’s the maximum time in which the received selective call is assumed as over. Go to Rx
gap len box and type the maximum accepted Rx gap length.
Rx gap len parameter is expressed in x 10 ms, so if you type 20 you will obtain 200 ms.
8) If necessary, you can adjust now the tone length both for the first one and for other ones. Go to the TXed Tone length area and type the
tone lengths you need respectively in the 1st and others boxes
TXed Tone length parameters are expressed in x 10 ms, so if you type 20 you will obtain 200 ms.
9) Click on the OK button to close the database window and return to Global Data window.
6.2 Scanning Configuration (Scan configuration button)
This button allows to define which condition the scan should stop in, as well as the scan speed, the priority scan speed and
scan wait time.
1) From the Global Data window - Set-Up area - click the Scan configuration button: the Scan configuration window will open.
2) In the Scanning conditions area, you can define the condition in which the scan should stop:
If you need the scanning should stop when a busy channel is detected (carrier presence) click the Busy channel radio button.
If you need the scanning should stop when the proper CTCSS/DCS is detected, select the CTCSS/DCS radio button.
If you need the scanning should stop when the proper Selcal is detected, select the Selcal radio button.
3) In the PTT Pressing while scan. area, you can define the channel in which the radio should transmit if PTT is pressed during scan:
Select the Priority/First scan channel radio button if you need the transmission on the priority channel or the first scanned
channel (the one which has been set before starting the scan). The first or the second condition is selected depending if you
have ticked the checkbox Priority described at step 10) in chap. 3.7)
Select the Last Busy Channel radio button to allow the transmission on the last busy channel.
Select the Last Free Channel radio button to allow the transmission on the last free channel.
4) In the Scanning timing area, you can define your preferred scan timings. Go to each box and type/select your preferred values:
• Channel speed time – It’s the time which the radio stays on each channel checking the condition defined at step 2)
• PRI channel speed time – It’s the time which the radio stays on the Priority channel, checking the condition defined at step 2)
• Scan resume time – defines the time to wait before automatically restart the scan when the radio is stopped on a channel and
the condition defined at step 2) ceases