APOC0274 Ed.3a
Page 9 of 35
+44 (0)1235 861 483 | aleretoxicology.co.uk
Alere™ DDS
®
2 Mobile Analyser User Guide | 2. Getting Started
Alere DDS2 Mobile Analyser Symbols
Symbol Meaning
Service symbol (white): This symbol will appear on the status line when the annual service date
for the analyser is due in less than one month. To view the service due date, refer to section 1.11
Servicing. Contact Product Support to arrange a service for the Alere DDS2 Mobile Test System.
Service symbol (orange): When service is overdue, the service symbol will turn orange.
Contact Product Support to arrange a service for the Alere DDS2 Mobile Test System. Accuracy
of test results may be reduced if a service is overdue.
2.3 Control keys
The Alere DDS2 Mobile Analyser has three control keys: the left selection key, the right selection key and
the five way navigation button. Please see section 2.1 Alere DDS2 Mobile Analyser at a glance, which
shows the location of these buttons.
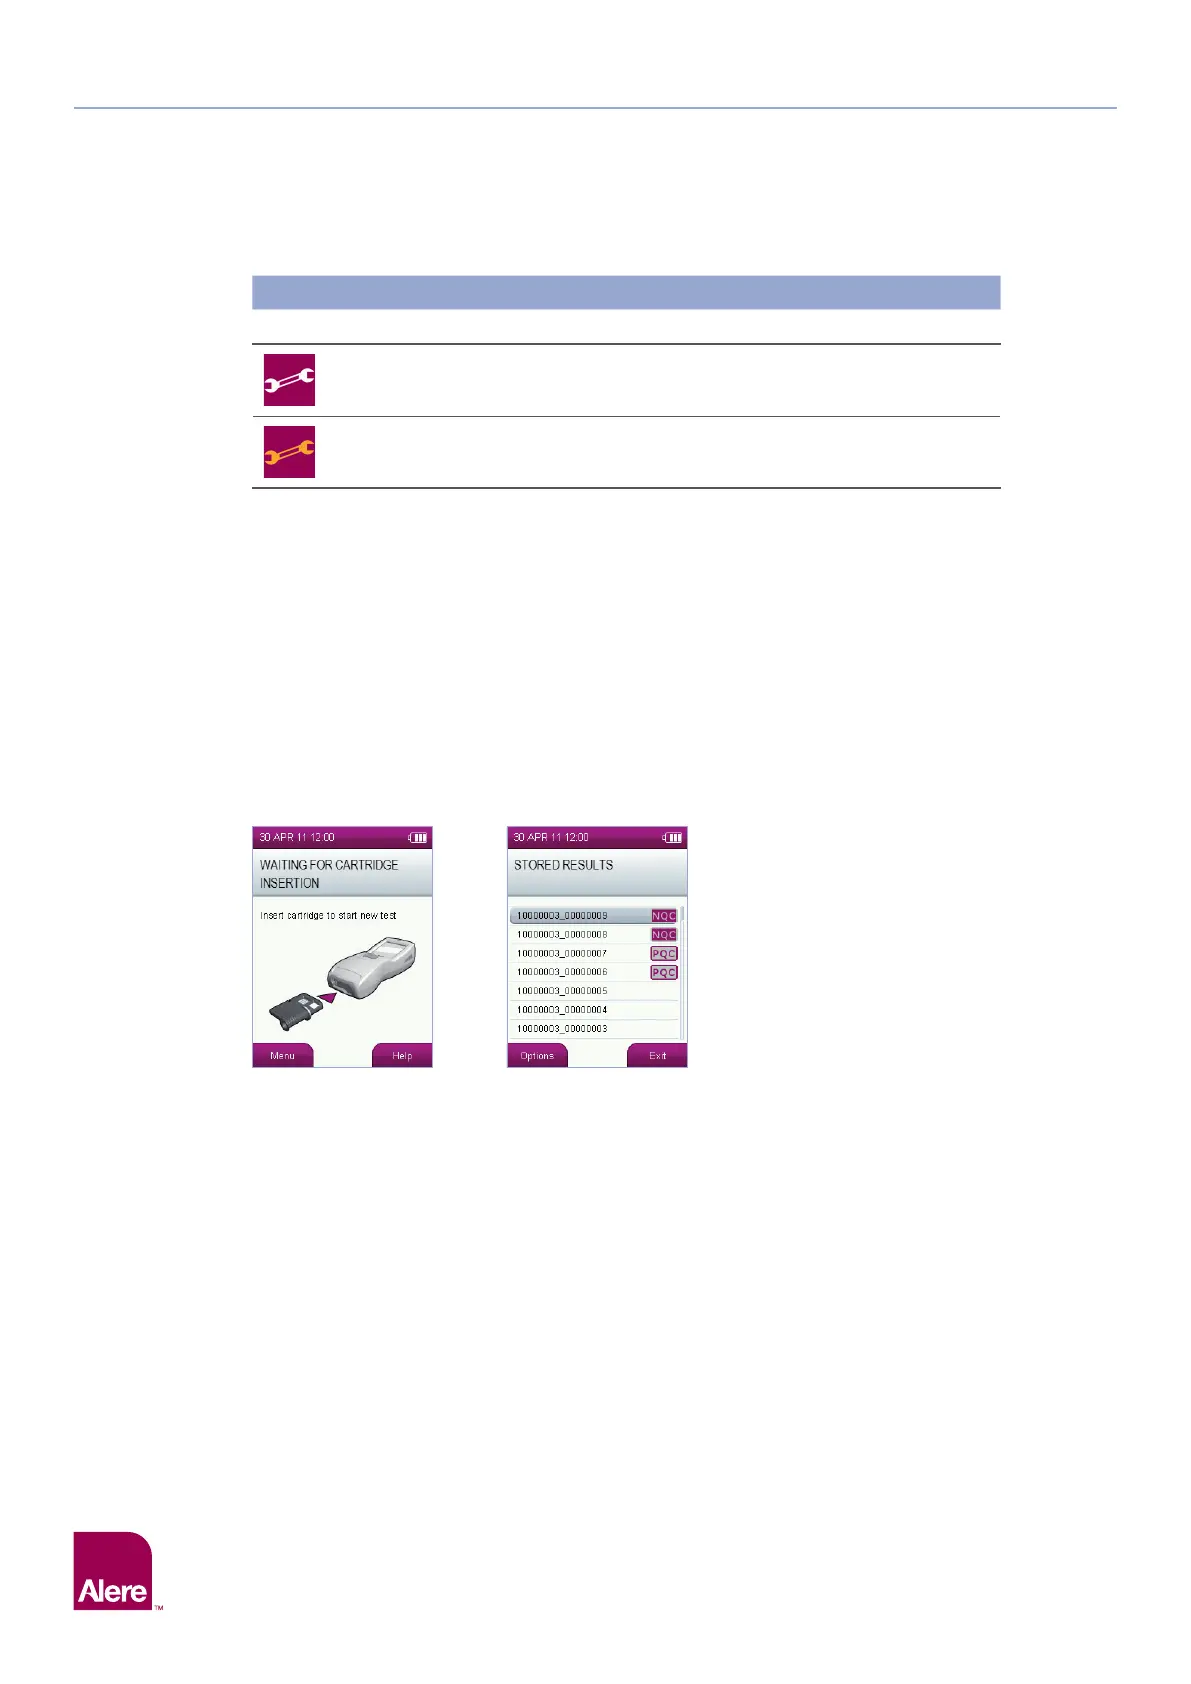
The left and right selection keys can be used to select the corresponding on-screen buttons which will
appear at the bottom left and right hand corners of the screen when input is required from the user. For
example, if the screen below appears, pressing the left selection key would take the user to the menu while
pressing the right selection key would take the user to the help function associated with this step.
The five way navigation key can be used to scroll up, down, left and right by pressing the top, bottom, left or
right edge of the button respectively. For example, if the screen below appears, the five way navigation key
can be used to move the highlighter bar up and down through the list of test results. Pressing the centre of
the five way navigation key selects the option that is highlighted on the screen and can be used instead of
the left and right selection keys for ‘OK’ and ‘Enter’.
2.4 Setting up
The Alere DDS2 Mobile Analyser does not require any installation steps. The analyser can be connected to
mains power, to the printer and to a PC using the cables provided in the system Carry Case. Use only the
connections and printer provided. Alternative connections and printers should not be used as these may be
unsafe or incompatible with the analyser.
If using the Alere Software Application Suite, this will need to be installed onto a PC. Please refer to the
Software Application Suite user guide which can be found on the Alere Software Application Suite CD-ROM.
2.5 Mains power
The Alere DDS2 Mobile Analyser can be powered from mains A/C power or by its internal batteries.
To connect the analyser to the mains:
Step 1: Insert the A/C power cable into the power supply unit.
Step 2: Connect the power supply unit to the power supply connector, located at the top of the analyser.
Step 3: Connect to the corresponding A/C power socket.