APOC0274 Ed.3a
Page 18 of 35
+44 (0)1235 861 483 | aleretoxicology.co.uk
Alere™ DDS
®
2 Mobile Analyser User Guide | 6. Running a Drug Test
6.6 Completing the questionnaire
The Alere DDS2 Mobile Analyser allows additional donor information to be captured alongside the test result.
If the questionnaire set has been enabled on the analyser, the questionnaire will be entered following the
results screen. The questionnaire can be enabled or disabled by changing the analyser settings. Refer to
section 10.6 Questionnaire for instructions on how to enable and disable the questionnaire.
The questions included in the questionnaire can be configured using the Alere Software Application Suite.
If the Software Application Suite is not being used, the analyser will use the standard questionnaire set.
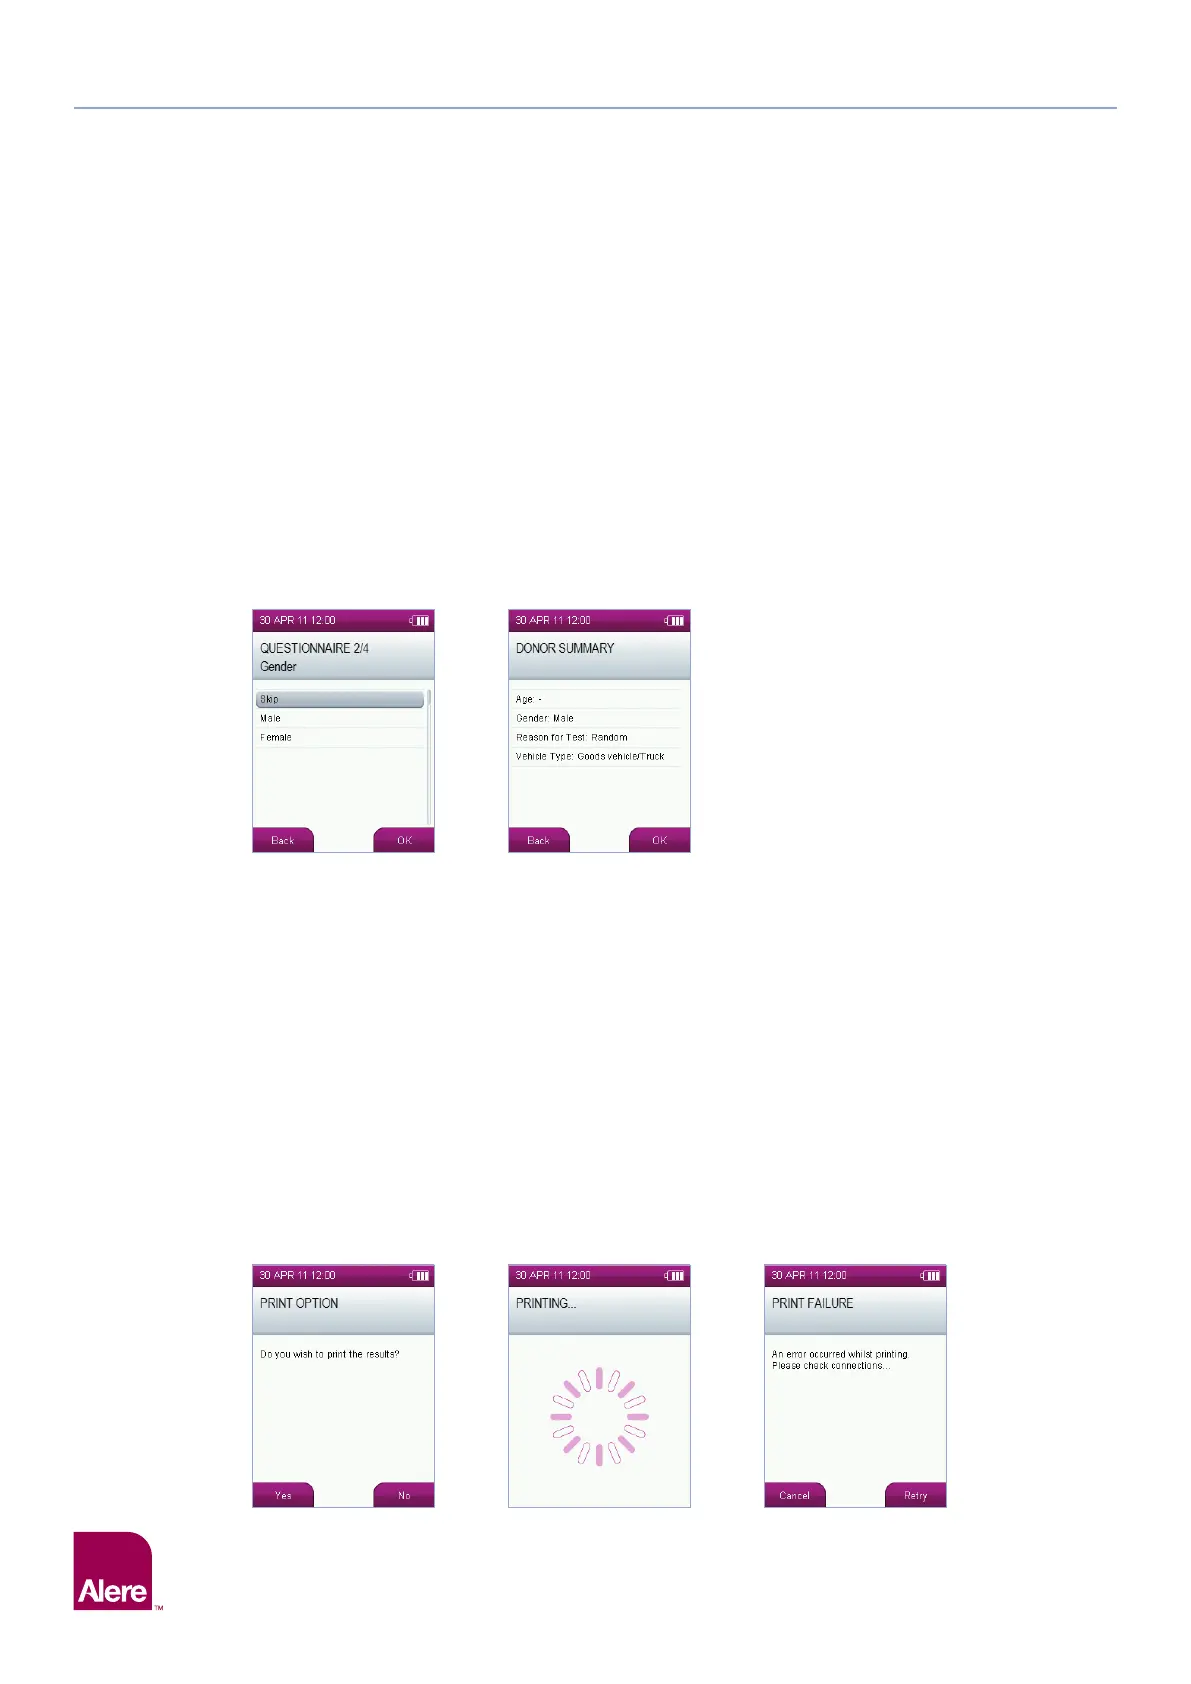
Step 1: Use the five way navigation key to scroll either up or down, or left to right to select the
correct information.
Step 2: Any of the individual questions can be skipped by either selecting Skip, or scrolling through the options until
Skip or – is reached.
Step 3: To make a selection, press OK.
Step 4: At the end of the questionnaire, a summary of the information entered will be displayed.
Step 5: If the information is correct, select OK using the right select key or if something needs to be changed, select
Back with the left select key to return to the questions.
Step 6: Selecting OK will accept the questionnaire and move on to the next screen.
6.7 Printing results
If the results and questionnaire (if used) have been accepted, the Alere DDS2 Mobile Analyser will give the
option to print results.
Step 1: If not already connected, attach the printer to the analyser (refer to section 3.1 Connecting the printer) and
ensure the printer is switched on.
Step 2: To print results, select Yes using the left select key.
Step 3: Failure to connect or switch on the printer will lead to the print failure screen. Check connections, switch on
the printer and select Retry to return to the previous screen. Alternatively select Cancel to skip printing.
Step 4: After printing is complete, the print option screen will be displayed again to give you the choice to print
additional copies of results.
Step 5: If printing is not required, select No on the print options screen.
Step 2 Step 2 Step 3
Step 3 Step 4